Who should read this article: Administrators
Create and modify custom user access groups (roles) to grant or restrict access to Voiso features.
Important
The Security access groups feature is available for contact centers on the Pro plan or higher.
Introduction
By default, Voiso provides the following system roles, which can be assigned to a user to grant access to sets of features that are relevant to their job. The roles are:
Role | Description |
|---|---|
Admin | Access to all features enabled for the contact center |
Agent | Access to WebRTCSoftphone, outbound calling, click-to-call, contact data, call events, and teams |
Analyst | Access to CDR and Topics only |
Hardware phone | Access to login using a Hardware Phone only – no access to WebRTCSoftphone/Agent Panel) |
Supervisor | Access the same features as the Agent role plus Real-time Dashboards, Call Monitoring and management, Queues, wrap-up codes, Unavailable codes, and Topics |
Voiso customers with the Professional Plus plan may create and assign custom access groups to fine-tune the permissions for an access group. For other plans, a limited number of user permissions may be modified when a user is created or edited.
The following tables provide descriptions of the permissions for each feature area:
Administration
Feature | Description |
|---|---|
Access to Web interface | Log into the Voiso site and use permitted features |
Enable WebRTC | Use the WebRTCSoftphone/Agent Panel (otherwise, the user only has access using a Hardware Phone) |
Omnichannel Workspace Enabled | Use the Omnichannel Workspace to handle Omnichannel and Voice interactions |
View Call History | Access to personal call history in Agent Panel |
Allow mobile WebRTC | Use a mobile phone to make calls |
Enable hardware phone | Use a hardware phone to make calls |
Allow change password | Allow users to change their own passwords in the User Profile panel. |
Edit System settings | Access and use the System settings page |
View Integrations | Access to view all integrations on the Integrations page. |
Edit Integrations | Access to add, modify, and configure integrations on the Integrations page. |
Edit Billing | Access and use the Billing page |
View Billing unit | Access the Billing units tab on the Billing page |
Edit Billing unit | Access and use the Billing units tab on the Billing page, including creating, editing, and deleting Billing Units. |
Allow Feature Access Code | Take control of calls, including initiating monitoring by entering a DTMF code combination |
Access to broadcast messages | Access to the Broadcast messages page to send messages to teams and view your own messages |
View all broadcast messages | Access to view all broadcast messages |
Edit Wrap-up codes | Access to the Wrap-up codes page to manage wrap-up codes and wrap-up code groups |
Edit Unavailable codes | Access to the Unavailable codes page |
Edit media files | Access to the Media page |
Edit allowed IPs | Access to the Allowed hosts/subnets page |
View allowed IPs | Access to the Allowed hosts/subnets page to view allowed hosts/subnets |
Delete Call Recordings | Access the Delete recordings page |
Enable 2FA | Two-factor authentication (2FA) is enabled for this user |
View Topics | Access to view the Topics page |
Edit Topics | Access to the Topics page |
View Keyword Groups | View the Keyword groups page |
Edit Keyword Groups | Access the Keyword groups page to add and delete keywords and keyword groups |
Edit child Security Access Groups | Access to the Security Access Groups page to view and copy all roles, and to add, copy, edit, and delete custom access groups |
View API keys | View the list of API keys and key details, including assigned scopes, last used, and audit history. |
Create API keys | Create new API keys for integrations and assign the required scopes. |
Edit API keys | Update existing API keys, including renaming keys and changing their assigned scopes. |
Delete API keys | Delete API keys to revoke access immediately. |
CDR
Feature | Description |
|---|---|
View all CDRs | Access the call detail records (CDRs) of all users |
View team CDRs | Supervisor access the CDRs of assigned team members |
View call events | Access the Call Events table in a call detail record to view all stages of a call |
View agent’s public IP | Access the public address IP Address of the agent's WebRTC endpoint. |
View Call transcriptions | When Speech analytics is enabled, view transcripts of calls |
Download CDR CSV | Allow selected CDRs to be downloaded as a CSV file |
Allow recordings download | Allow the call recording to be downloaded from a call detail record |
Inbound
Feature | Description |
|---|---|
Create queues | Add and view new queues |
Edit all queues | Edit the properties of all queues |
Edit own queues | Edit the properties of one's own queues only |
Delete queues | Delete queues |
Edit scripts | Edit scripts |
View scripts | View scripts |
Edit Flows | |
View Flows | View inbound interaction flows |
Edit skills | Access and edit the Skills section in the Add queue page |
Edit blocked numbers | Access the Blocked numbers page and add or delete numbers or prefixes to the blocklist |
Edit Allowed inbound voice trunk IPs | Manage the list of trusted IP addresses and subnets that are allowed to send inbound SIP calls to your contact center. |
Messaging
Feature | Description |
|---|---|
View Sender IDs | Access the Sender IDs tab in the Sender ID groups page |
View Sender ID groups | Access to Sender ID groups page |
View Message Templates | Access the Message templates page |
View Canned Messages | Access the Canned messages tab on the Message templates page |
Edit Sender ID groups | Add, edit, and delete sender ID groups |
View Digital Channels | Access the Digital channels page |
Edit Digital channels | Add, edit, and delete connections to digital channels such as Telegram, WhatsApp, and Webchat |
View WhatsApp templates | Access the WhatsApp tab on the Message templates page |
Edit WhatsApp templates | Add, edit, and delete WhatsApp templates |
Edit Canned Messages | Add, edit, and delete Canned Messages |
Display SMS functionality in WebRTC | Send SMS to contacts during and after a call from the Agent Panel |
My Numbers
Feature | Description |
|---|---|
Buy numbers | Buy phone numbers from the Buy numbers tab in the Inbound numbers view |
Access to Inbound numbers | Access the Inbound numbers page |
Number masking
Feature | Description |
|---|---|
Display client numbers instead of Acc ID | Allow the user to view a contact's phone number instead of the contact's account ID or the Hidden number placeholder in the Redial Counter and Agent List widgets in the Real-time dashboard, the CDR, and Agent Panel. |
Display client number for click-to-call | For click-to-call dialed numbers, allow the user to see a contact's phone number instead of the contact's account ID or the Hidden number placeholder in the Agent Panel. This setting does not affect interactions with the click-to-call type in the CDR. |
Display client numbers on Dashboard | Allow the user to view a contact's phone number (if permitted by the Display client numbers instead of Acc ID permission), account ID (in the case of CRM calls), or the Hidden number placeholder in the Agent List and Redial Counter widgets in the Real-time dashboard. |
Outbound
Feature | Description |
|---|---|
Edit all campaigns | Access the Dialer campaigns page to add, clone, edit, and delete all campaigns |
Edit own campaigns | Access the Dialer campaigns page to add, clone, edit, and delete one's own campaigns |
Edit CID groups | Add, edit, and delete Caller ID groups |
View CID groups | Access the CID groups page |
Access to Caller ID Risk Check | Access the Caller ID Risk Check page |
Access to Number validator | Access to the Number validator page to check outbound calling numbers |
Access to Do Not Call Registry | Access to the Do Not Call Registry page to upload and manage do-not-call lists. |
Edit Suppressed numbers | Access to the Call Suppression page (formerly Hardcaps) |
Edit Suppressed numbers exceptions | Access to the Call Suppression exceptions feature, with the ability to add, edit, and delete exceptions (formerly Hardcaps) |
Allow manual outbound calls | Allow manual outbound dialing to external phone numbers |
Enable Transcriptions with Analytics | Allow user to view call transcripts with speech analytics in various UIs, including the CDR. |
Allow external transfers | Allow user to transfer calls to phone numbers outside the contact center |
Allow Click-to-call | Allow Click-to-call outbound dialing |
Enable Answering Machine Detection | Enable answering machine detection ({{glossary.AMD}}) for all outbound calls |
Display HLR Lookup in WebRTC | Allow users to initiate a Home Location Register (HLR) Lookup request, real-time phone number validation, from the call history in the Agent Panel |
Enable Call Notes in WebRTC | Allow users to add call notes in the Agent Panel |
Enable Scheduled Callback | Allow user to schedule callbacks from the Agent Panel during an active call or from Call History |
Real-time dashboard
Feature | Description |
|---|---|
View Real-time dashboard | Access the Real-time dashboard view |
Display all data in the ASR by CID by country | In the ASR by CID by country Real-time dashboard widget, display all numbers, not just the numbers assigned to teams supervised by the user |
Allow manager actions | Enable access to manager actions in Agent Zoom as a part of the Agent List widget capabilities, then use the Allow Monitor, Allow Whisper, Allow Barge-in, Allow Intercept, and Allow Terminate to enable only a subset of Agent Zoom capabilities |
Allow Monitor | Allow Silent Monitoring to enable a Supervisor to listen to a call without distracting the agent |
Allow Whisper | Allow whisper coaching to enable a supervisor to help agents during a call without the contact hearing the supervisor |
Allow Barge-in | Allow call barging to enable a supervisor to join a live call and converse with both the contact and the agent |
Allow Intercept | Allow a supervisor to intercept a call or interaction and redirect it to the supervisor's desktop |
Allow Terminate | Allow call termination to enable a supervisor to end an agent’s active call from the supervisor dashboard |
Recordings
Feature | Description |
|---|---|
Allow selective recording | Allow the agent to disable and enable call recordings manually in Agent Panel during a conversation |
Reports
Feature | Description |
|---|---|
Access to Historical reports | Access to the Historical reports view |
View ASR per CID report | Allow user to generate and view ASR per Caller ID historical report |
View Sensitive Data Access report | Allow the user to generate and view the Sensitive Data Access Report historical report |
View Billing report | Allow the user to generate and view the Billing report historical report |
View all scheduled reports | Allow the user to view reports scheduled by other users |
Users & Teams
Feature | Description |
|---|---|
Access to Users | Access to the Users page |
View user settings | Allow a user to view the list of users and the user profile settings |
Edit users | Allow a user to edit user profile settings |
Allow to set Security Access Group | Allow a user to change the Security Access Group for users and set the Security Access Group for new user |
Allow editing of support chat users | Allow a user to grant the premium support chat feature to up to three users |
Delete users | Allow a user to delete user profiles |
Create users | Allow a user to create new user profiles |
Bulk users upload | Allow a user to create users by importing a CSV file |
View teams | Access to the Teams view |
Edit teams | Allow a user to create, edit, and delete teams |
Access to data of all users | Access to user data in all system components |
Access to data of team users | Access to team data in all system components |
Creating a custom access group
If the default Security Access Groups do not meet your organization's needs, you can create custom root access groups. There are two approaches to creating new access groups: creating a new access group "from scratch" or clone and then modifying an existing access group. The first approach means that you have to consider every single setting. In contrast, the second approach means you only have to disable one or more settings to differentiate your custom access group from the existing one.
Creating a custom access group from scratch
To create a new custom access group beginning with all permissions enabled, follow these steps:
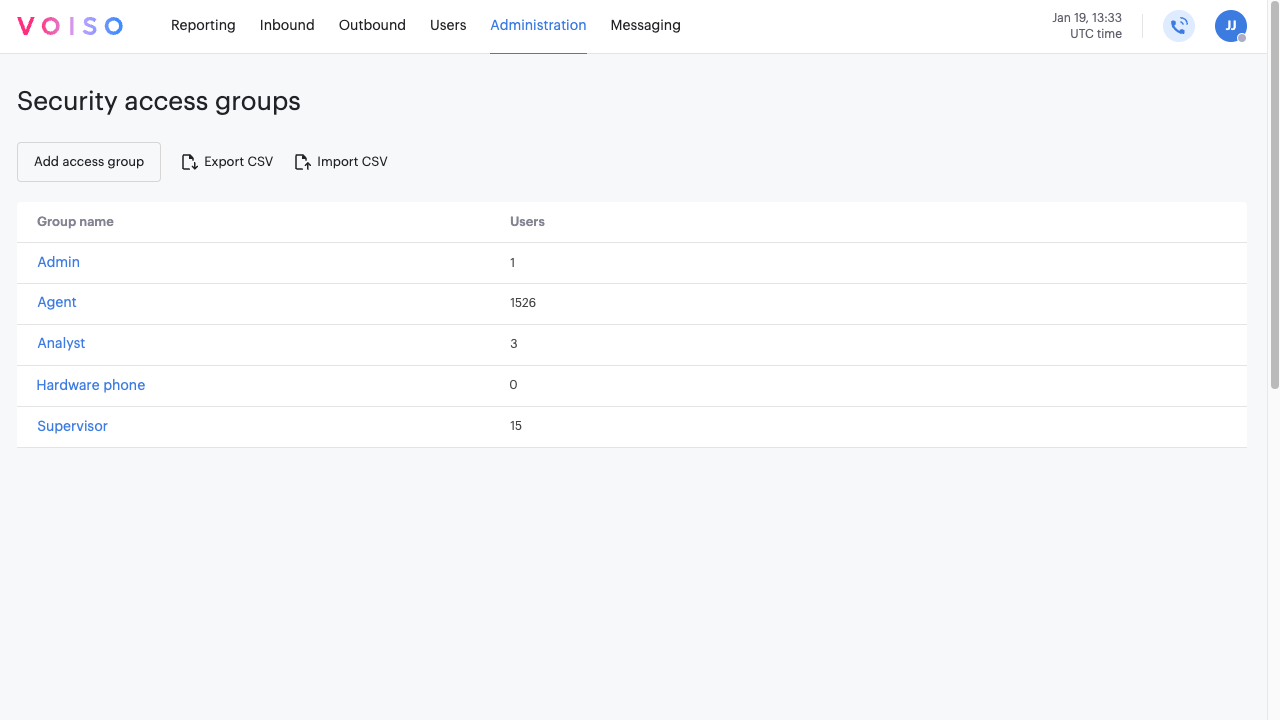
From the Voiso navigation bar, select Administration > Security access groups.
In the Security Access Groups page, click Add new access group.
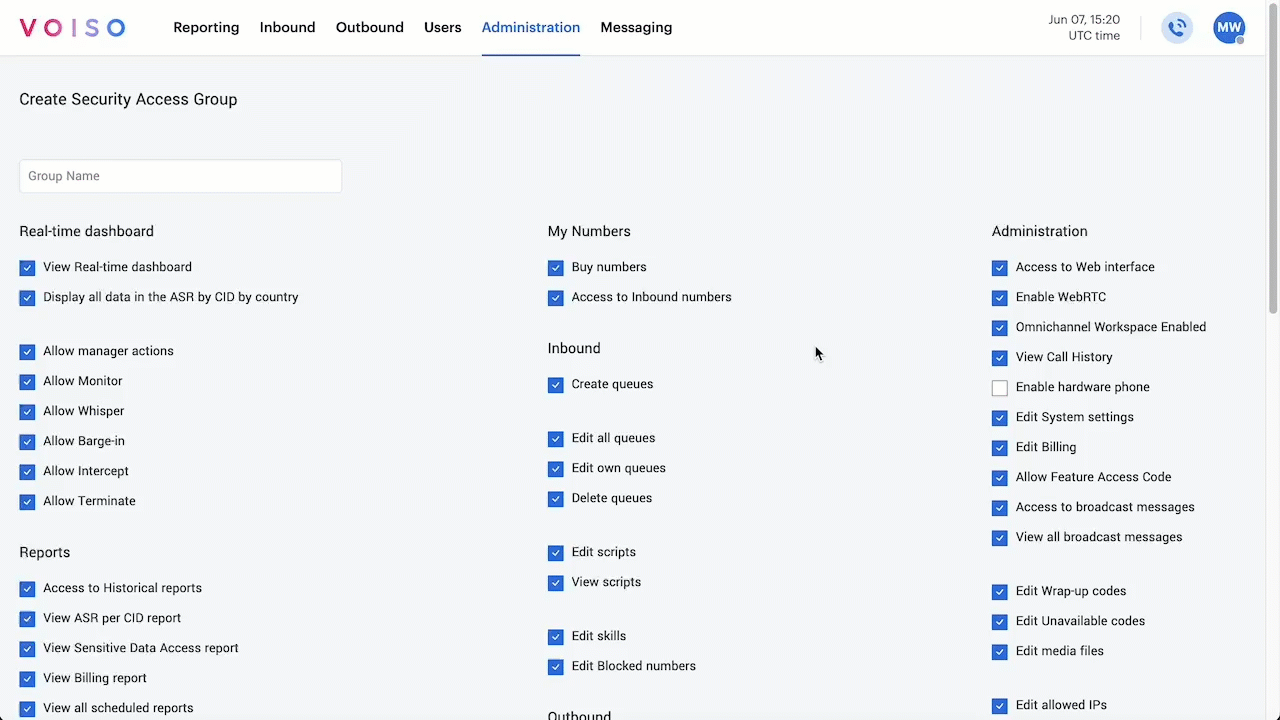
All permissions are initially granted except for Enable hardware phone in the Create Security Access Group page.
Add a name in the Group name field.
Review each permission and de-select the ones you do not want to grant to the access group.
Click Save.
Assign the new access group to one or more users.
Creating a custom access group from a clone
When you clone an access group, you cannot add new permissions, and you can only disable permissions to make the new access group more restrictive than the cloned access group. To create a new custom access group based on an existing access group, follow these steps:
From the Voiso navigation bar, select Administration > Security Access Groups.
In the Security Access Groups page, hover your mouse pointer over the group to be cloned, then click Clone.
Add a name in the Group name field.
In the Clone Security Access Group: <access group> page, de-select the permissions you want to disable for the new access group.
Click Save.
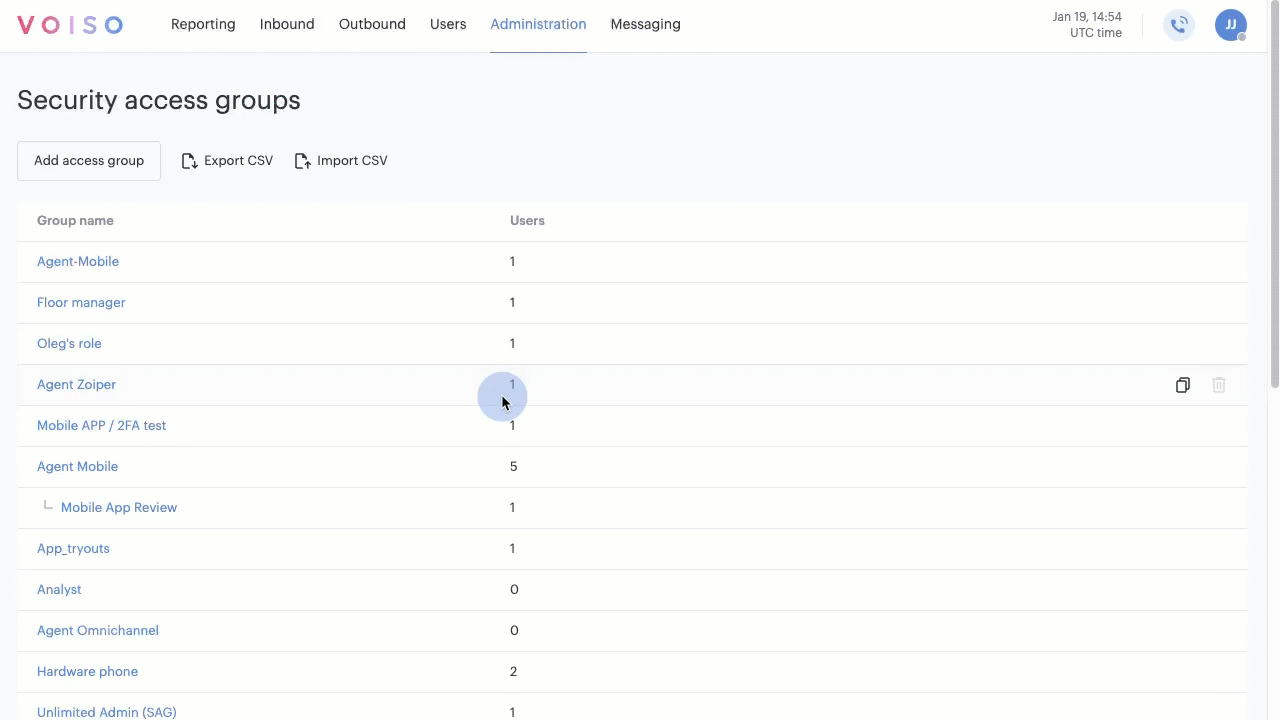
The new access group appears on the Security Access Groups page as a sub-access group of the access group you cloned.
Exporting custom groups as a CSV
To enable you to copy your custom Security Access Groups from one contact center to another, follow these steps to export your custom Security Access Groups:
From the Voiso navigation bar, select Administration > Security Access Groups.
In the Security Access Groups page, click Export CSV.
A CSV file named
security-access-groups-export.csvis downloaded to your computer. It contains a list of the configuration setting names on the first row and your custom Security Access Groups on subsequent rows in the following format, where y = enabled and n = disabled:
child_group_name,parent_group_name,n,n,n,n,n,n,n,n,n,n,n,n,n,n,n,n,n,n,n,n,n,n,n,n,n,n,n,n,n,n,n,n,n,n,n,n,n,n,n,n,n,n,y,y,n,y,n,n,n,n,y,n,n,n,n,n,n,n,n,n,n,y,n,n,y,n,n,n,n,n,n,n,n,n,n,n,n,n,n
Importing custom groups from a CSV
To enable you to copy your custom Security Access Groups from one contact center to another, follow these steps to import your custom Security Access Groups:
From the Voiso navigation bar, select Administration > Security Access Groups.
In the Security Access Groups page, click Import CSV.
Navigate to the location where you stored the Security Access Groups CSV you previously exported, then click Upload.
Click Process.
The message Done! displays when your imported Security Access Groups are ready to use.
Assigning an access group
When the Security Access Groups feature is enabled, all users must have a Security Access Group assigned (this is the same as the Role for Professional and Start-up plans). By default, new users are created with the Agent security access group. To assign an access group to a user, follow these steps:
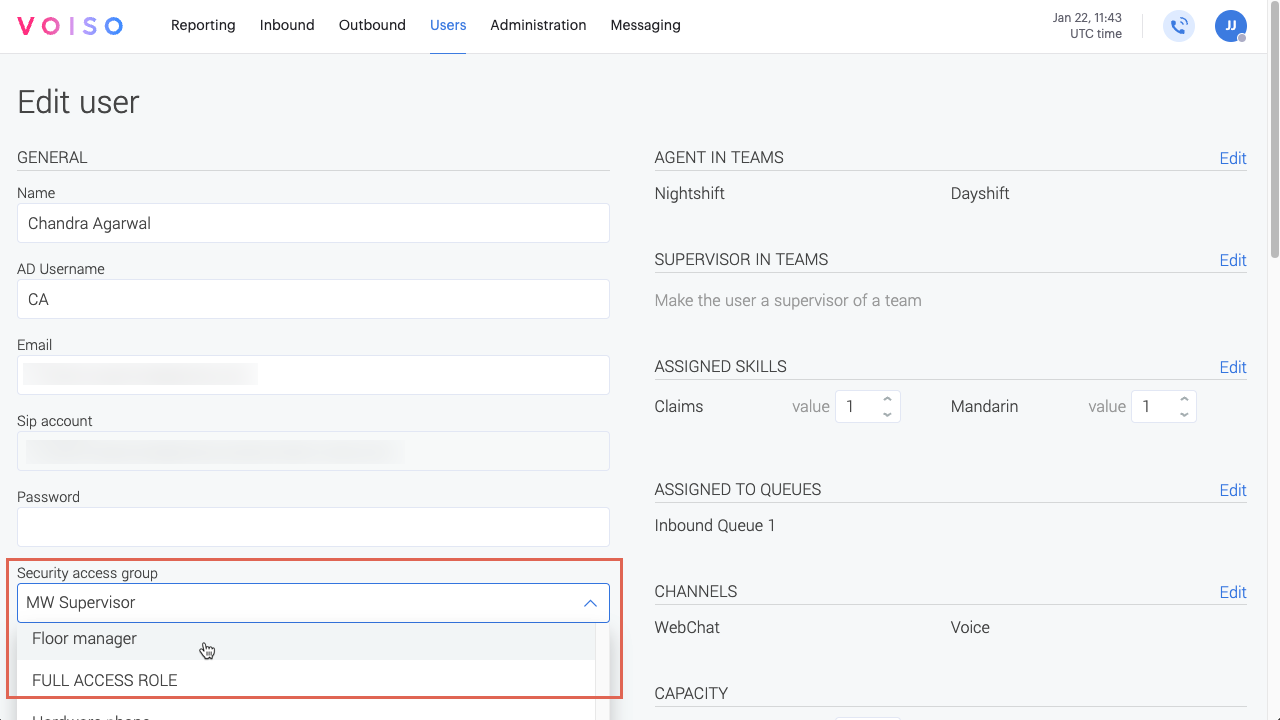
From the Voiso navigation bar, select Users > Users.
In the New User or Edit User page, select a Security Access Group from the Security access group menu.
Click Save.
Deleting a Security Access Group
You can delete custom Security Access Groups. To delete a custom access group, follow these steps:
From the Voiso navigation bar, select Administration > Security Access Groups.
In the Security access groups page, hover your mouse pointer over the group to be deleted, then click Delete.