Who should read this article: Agents
How to use Agent Panel to receive an inbound phone call.
Introduction
The Agent Panel is a small browser-based WebRTC Softphone application that enables you to make and receive phone calls on your computer. It uses the device, usually a headset, that you have set up as your computer's microphone and speakers.
Review the Getting started article for information about how to log into Agent Panel and enable your microphone and speakers.
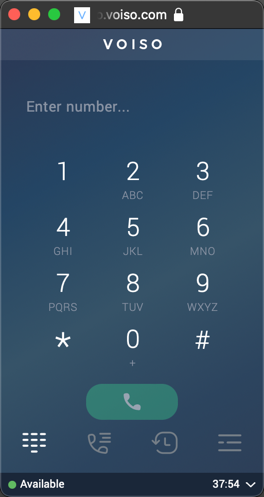
The Agent Panel provides call controls on the Call screen, such as a dial pad, call/end, hold, transfer, consultation, conference, mute/unmute, and call recording start/pause/stop, that enable you to handle inbound and outgoing phone calls.
Receiving a call
To be able to receive phone calls on your Voiso softphone, you must be logged in to Voiso, and your status must be set to Available.
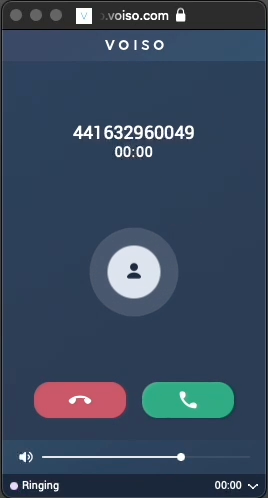
When an inbound voice call is routed to you, your status changes to Ringing, and the Caller ID or number of the contact is displayed in the Agent Panel. To accept the call, click Answer (the green phone button on the right). To reject the call, click End (the red phone button on the left).
If you answer the call, the Call screen is displayed. The Call screen includes all the functions you need to handle the call. You hear the caller in your headset and can speak to them through your microphone.
When you have finished the call, click End to hang up the call. If the contact hangs up their phone, the call automatically ends.
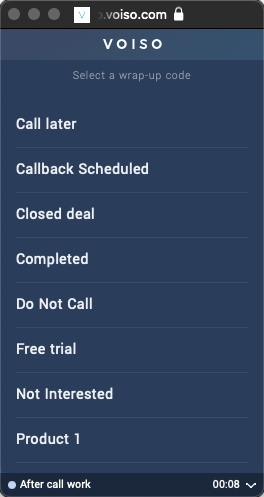
After call work
After your call ends, the Agent Panel displays the Wrap-up code screen. Your status is changed to After call work. Your organization defines the call wrap-up codes that appear in this view. Select the appropriate code according to your organization's business requirements.
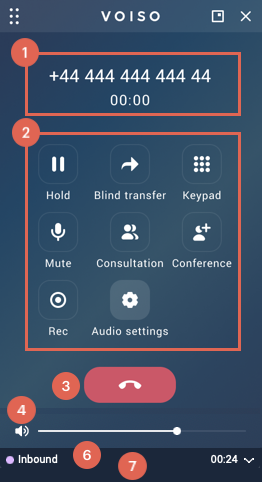
Call screen
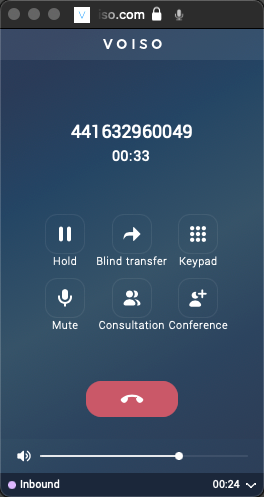
The Call screen is displayed in the Agent Panel when you are handling a call. It includes call controls and status information. The Call screen includes the following features and controls:
The controls that are displayed are set up by your administrator, so you might not see all the call controls described in the following table.
| Feature | Description | |
|---|---|---|
| 1 | Contact information | The name or ID of the contact and their phone number, along with the elapsed time of the call. |
| 2 | Call controls | Buttons enabling you to manage the call. |
| Hold | Place the call on hold so that you and the contact cannot hear one another. For some features such as Consultation, the call is placed on hold automatically. | |
| Blind transfer | Immediately transfer to a number you dial a call without knowing if the call will be answered. | |
| Keypad | Enter numbers using the dial pad to send DTMF. This is commonly used to navigate phone system menus. | |
| Mute | Mute your microphone so that the contact cannot hear you. | |
| Consultation | Speak to another employee about a contact’s case, without the contact hearing the conversation, and transfer the call when necessary. | |
| Conference | Invite another party to join an active call, enabling all parties to hear and speak to one another. | |
| Record | Start, pause, and stop recording a call (this feature is not available in all contact centers). | |
| Audio settings | Select which connected devices to use for microphone and speaker. | |
| SMS | Send an SMS to the contact during the call. | |
| Notes | Add notes about a call during a call or during after call work. Call notes are saved in the call history. | |
| 3 | End | Button to hang up the call |
| 4 | Volume control | Call volume control for your headset. Click it to mute the caller. Hover your mouse pointer to display the volume control slider. |
| 5 | CID | The Caller ID (CID) that is displayed to the contact on their phone |
| 6 | Status | Your current availability status and how long you have been in that status. When you are on an outgoing call, your status is Outbound. |
| 7 | Status menu | You cannot change your status while you are handling a call |
Troubleshooting
Chrome browser notifications
When you receive an interaction, a notice is displayed in the Agent Panel or Agent Workspace. However, if the Agent Panel or Agent Workspace is hidden behind another window, you might not notice that you have a ringing interaction.
To ensure you are notified by your Google Chrome browser whenever you have a ringing call, enable notifications in Chrome and your operating system settings.
Windows 11
Windows 11 lets you manage notifications in the Notification Center. Use the Settings app to change your notification settings:
- Select Start, then select Settings.
- Navigate to System > Notifications.

- To see all options, expand the notifications area.
- Turn notifications to On.
- Enable all notifications.
MacOS
MacOS lets you manage notifications in the System Settings.
- Open Settings.
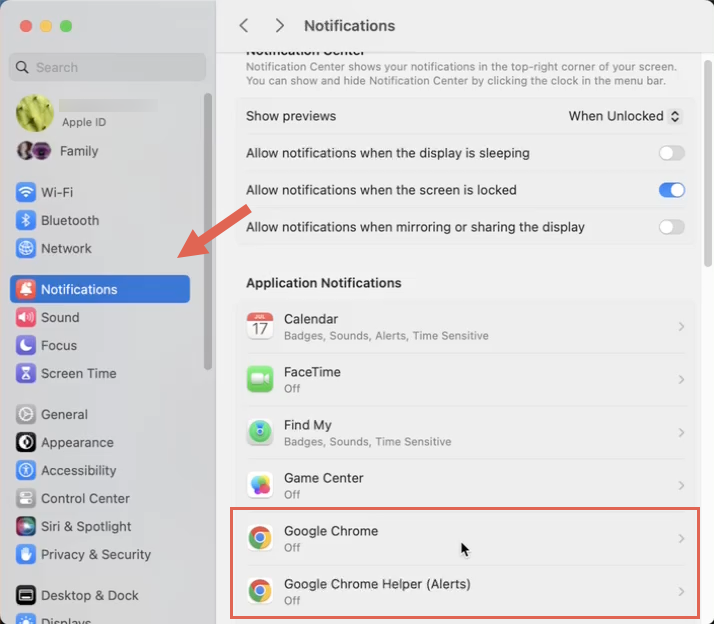
- Select Notifications.
- Enable Allow notifications when the screen is locked.
- In the Applications Notifications section, scroll down to Google Chrome and click the tile.
- Click Alerts.
- Enable Allow notifications, then enable the following settings:
- Show notifications on lock screen
- Show in Notifications Center
- Badge application icon
- Play sound for notification
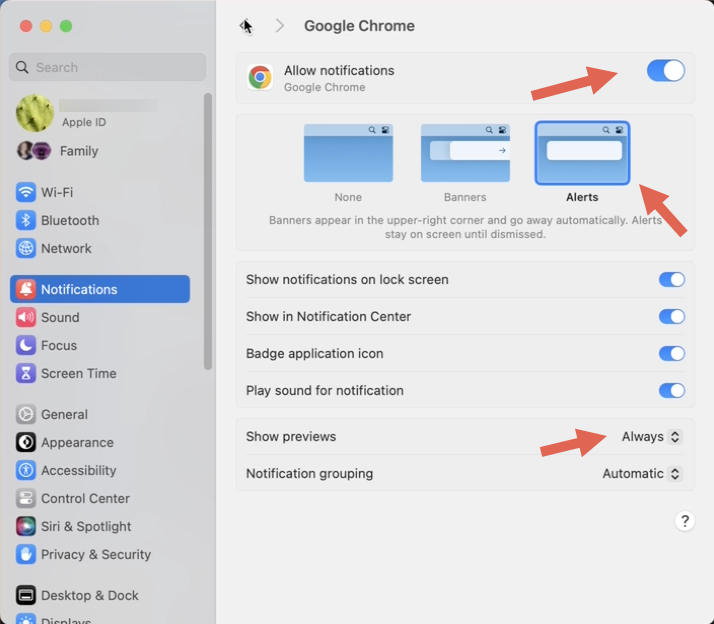
- Change the Show previews setting to Always.
- Return to the Applications Notifications, scroll down to Google Chrome Helper (Alerts), and click the tile.
- Click Alerts.
- Enable Allow notifications, then enable the following settings:
- Show notifications on lock screen
- Show in Notifications Center
- Badge application icon
- Play sound for notification
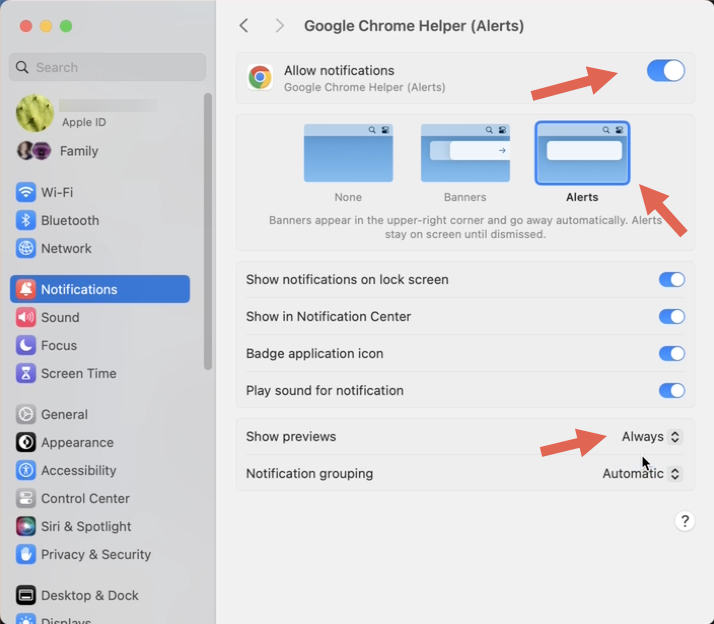
- Change the Show previews setting to Always.
- Close System Settings.
Google Chrome
Google Chrome enables you to specify which websites may send you notifications. To enable your Voiso contact center to send you notifications, follow these steps:
- Open the Customize and control Google Chrome menu (three dots in the toolbar).
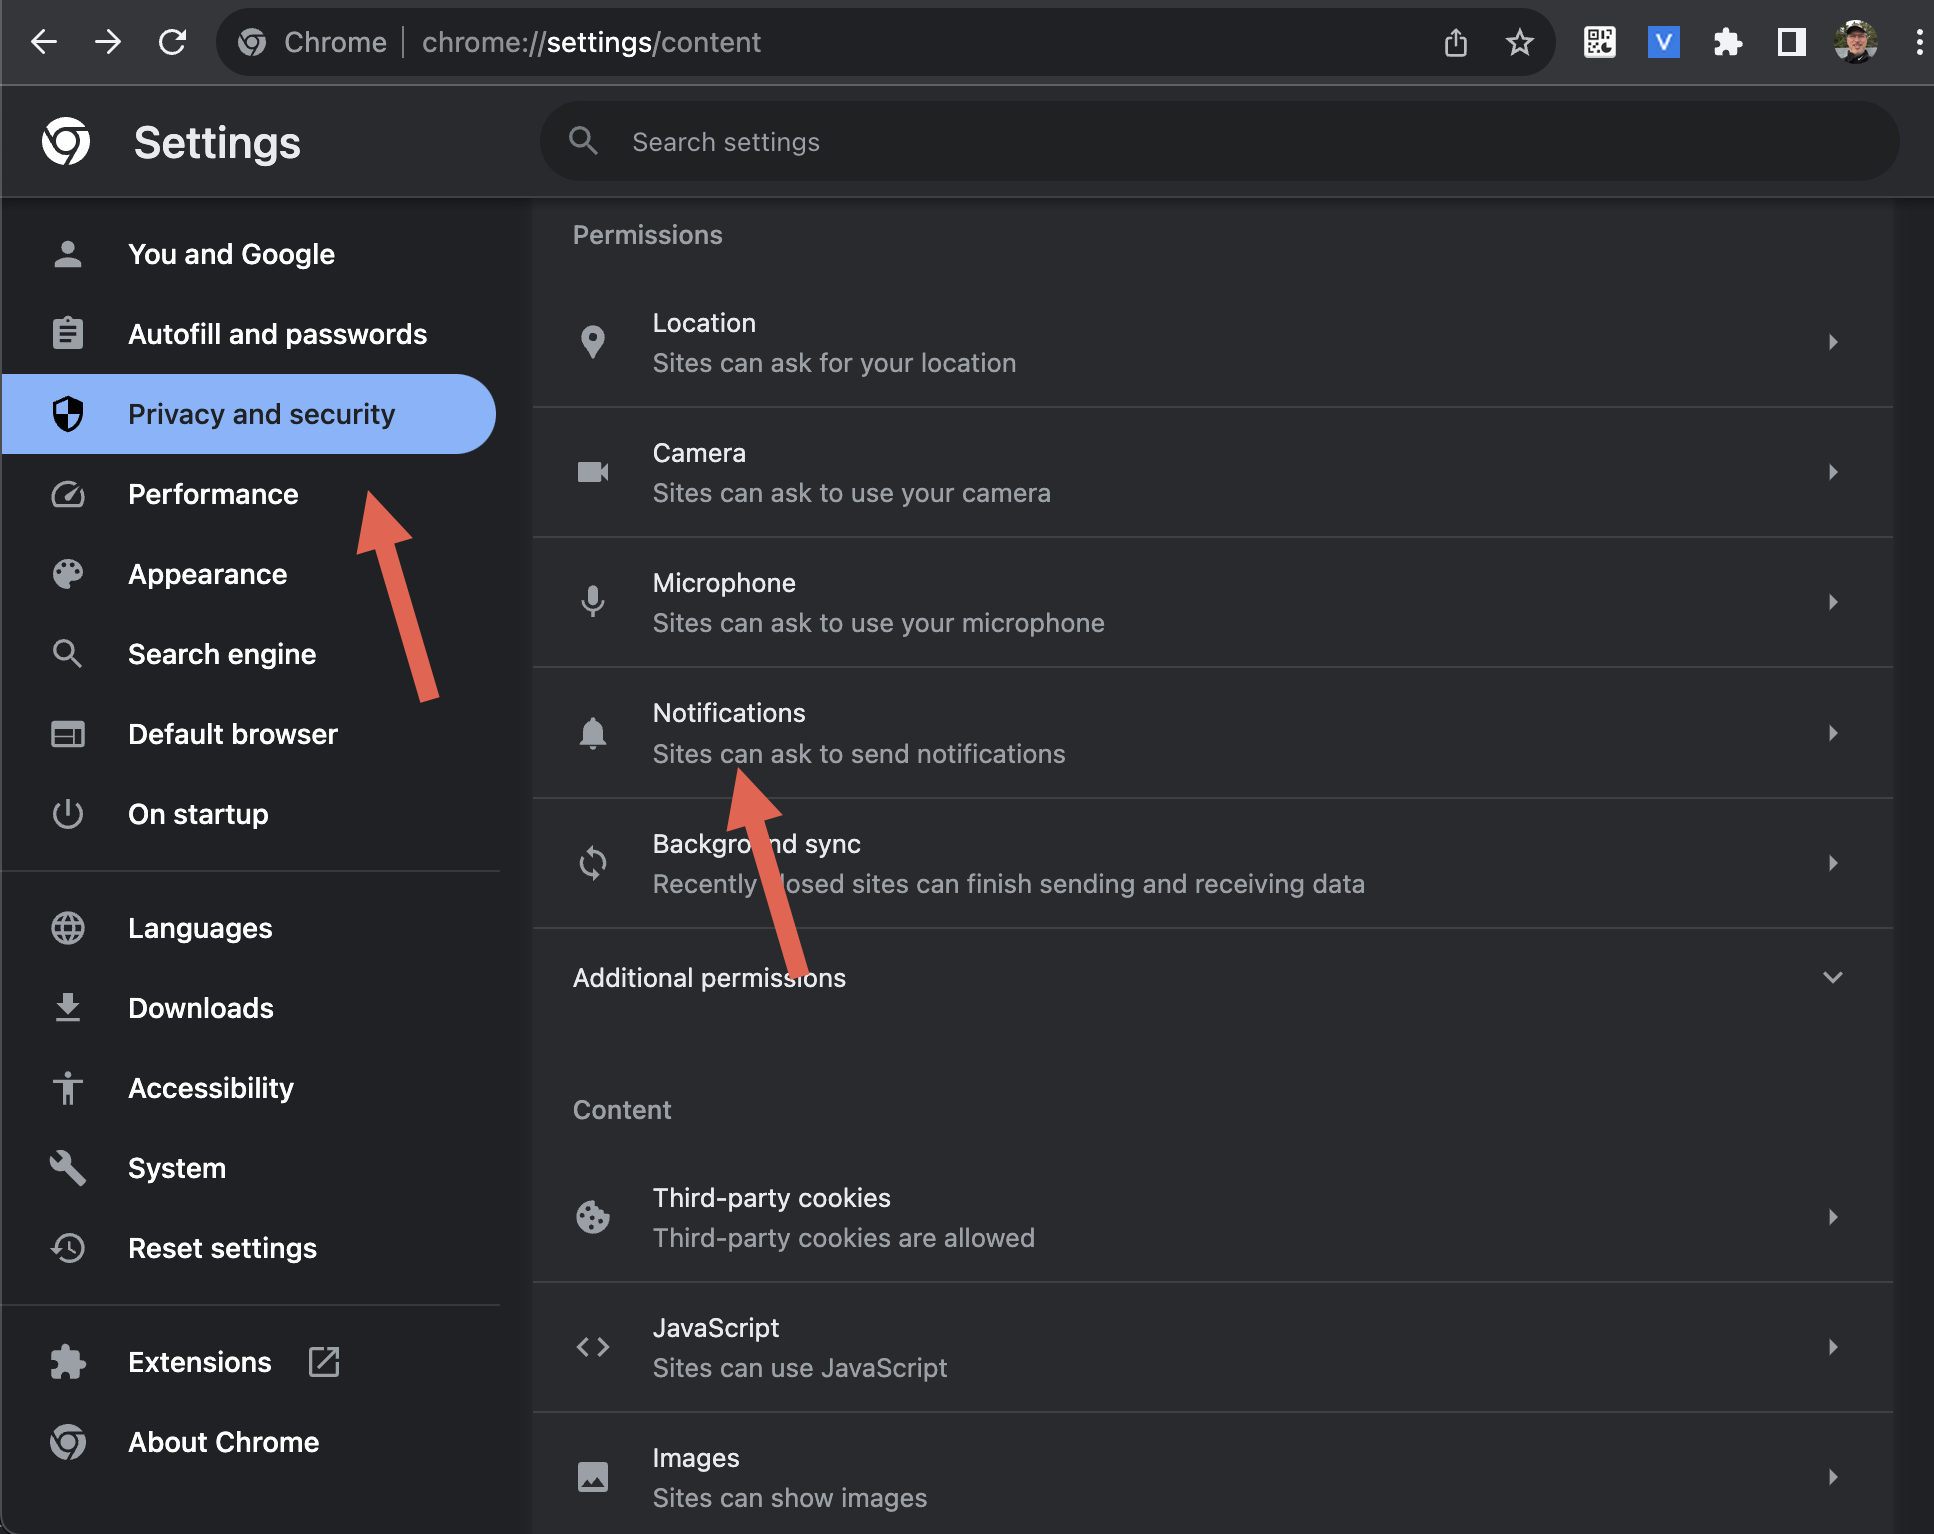
- Select Privacy and security.
- Scroll down and select Notifications.
- Enable Sites can ask to send notifications.
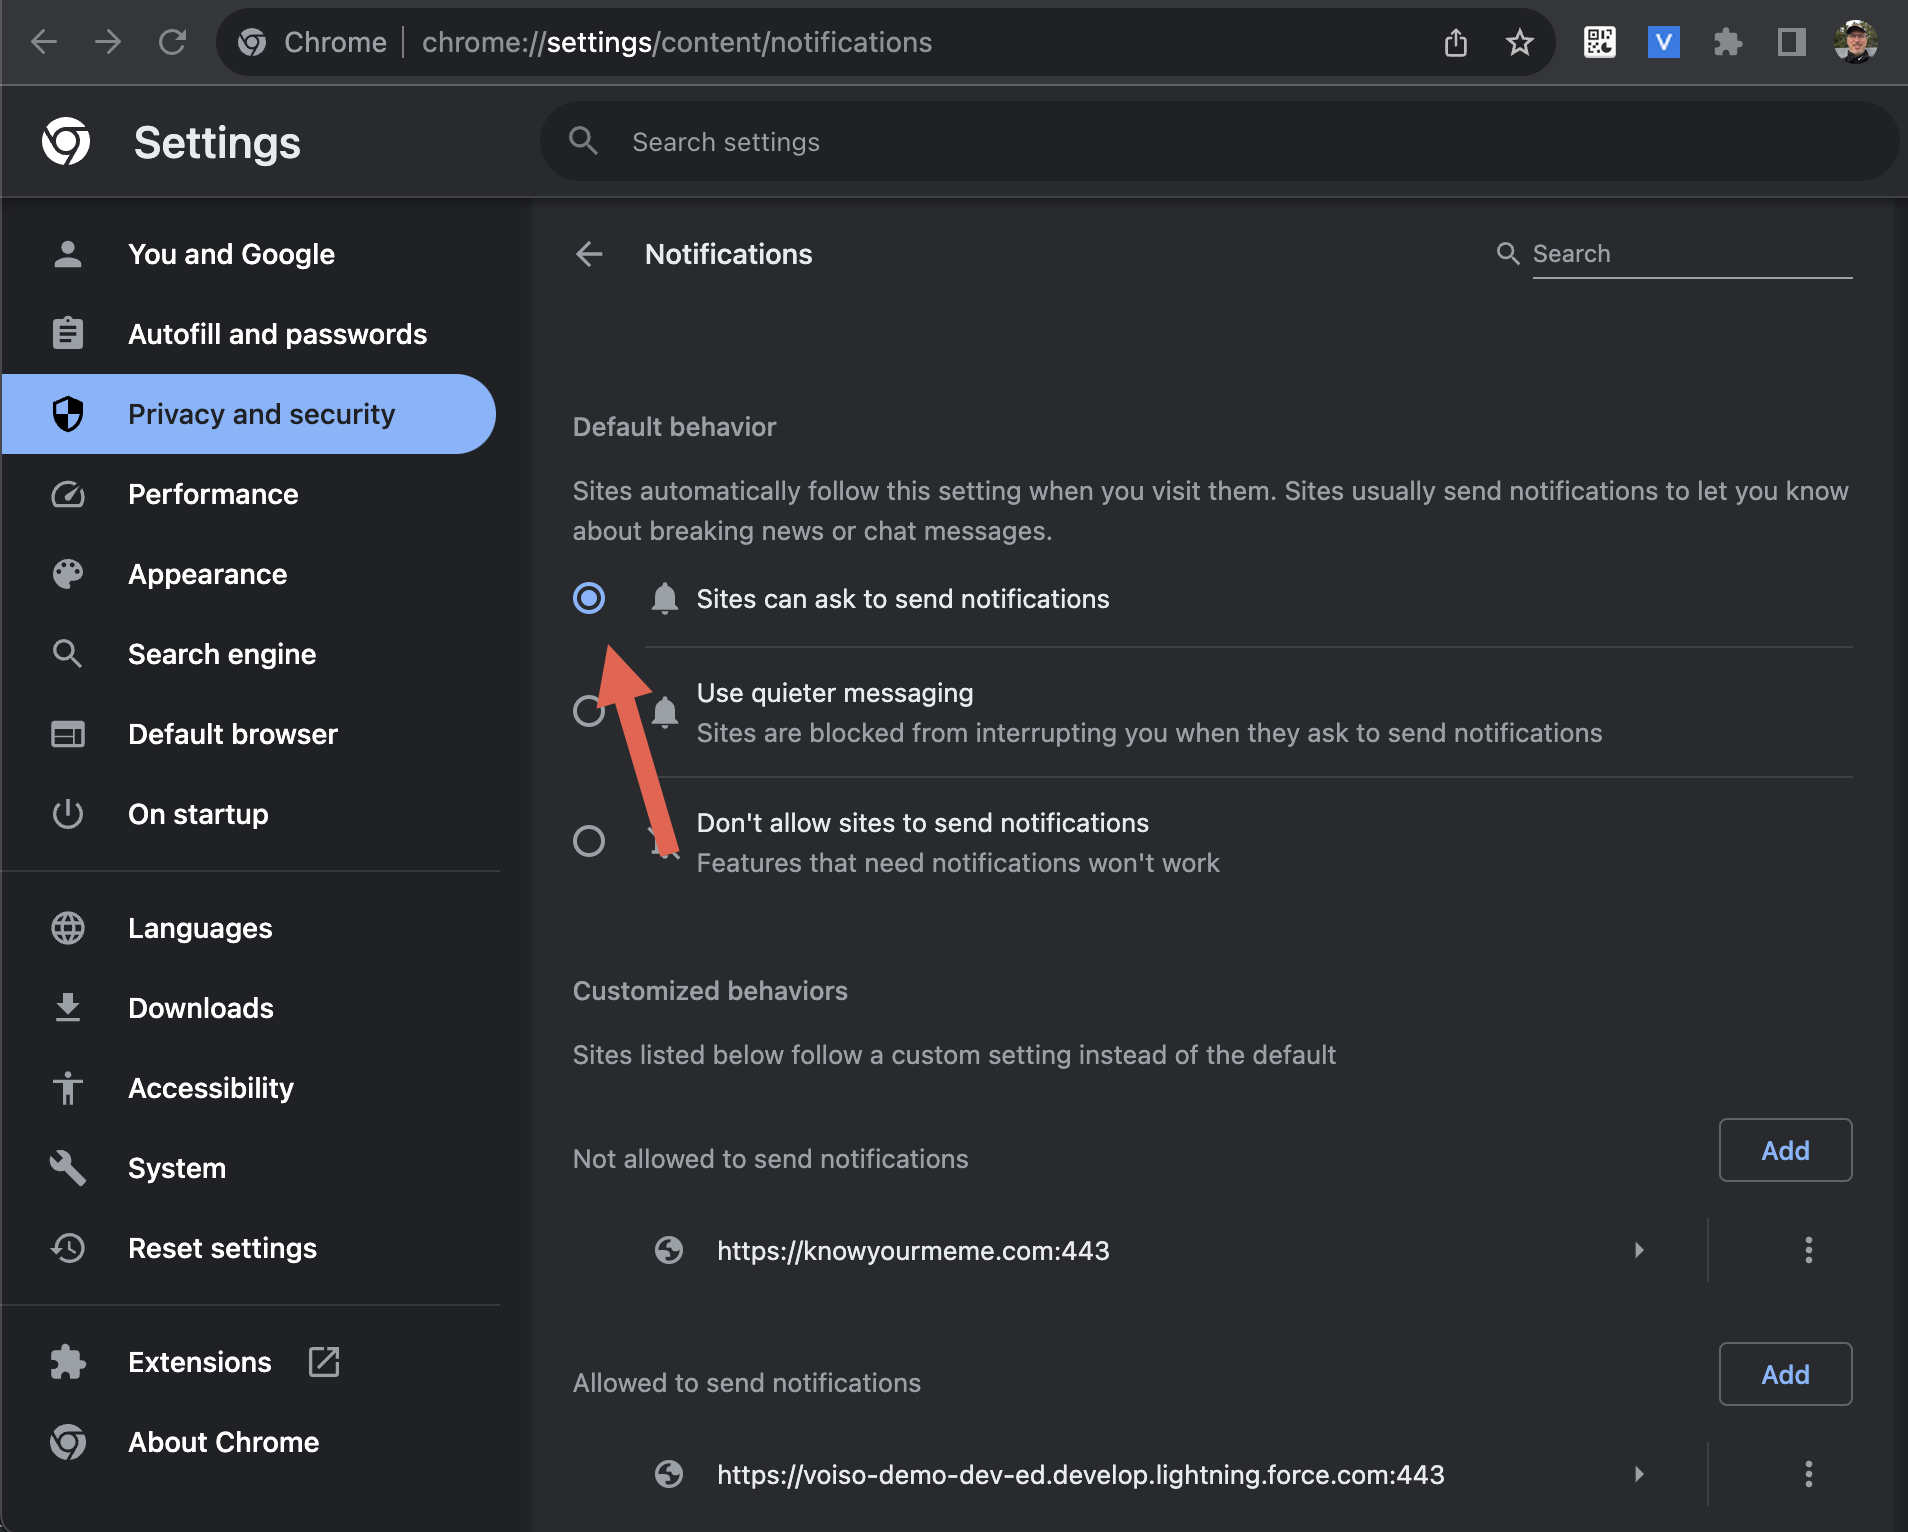
- Scroll down to Allowed to send notifications and click Add.
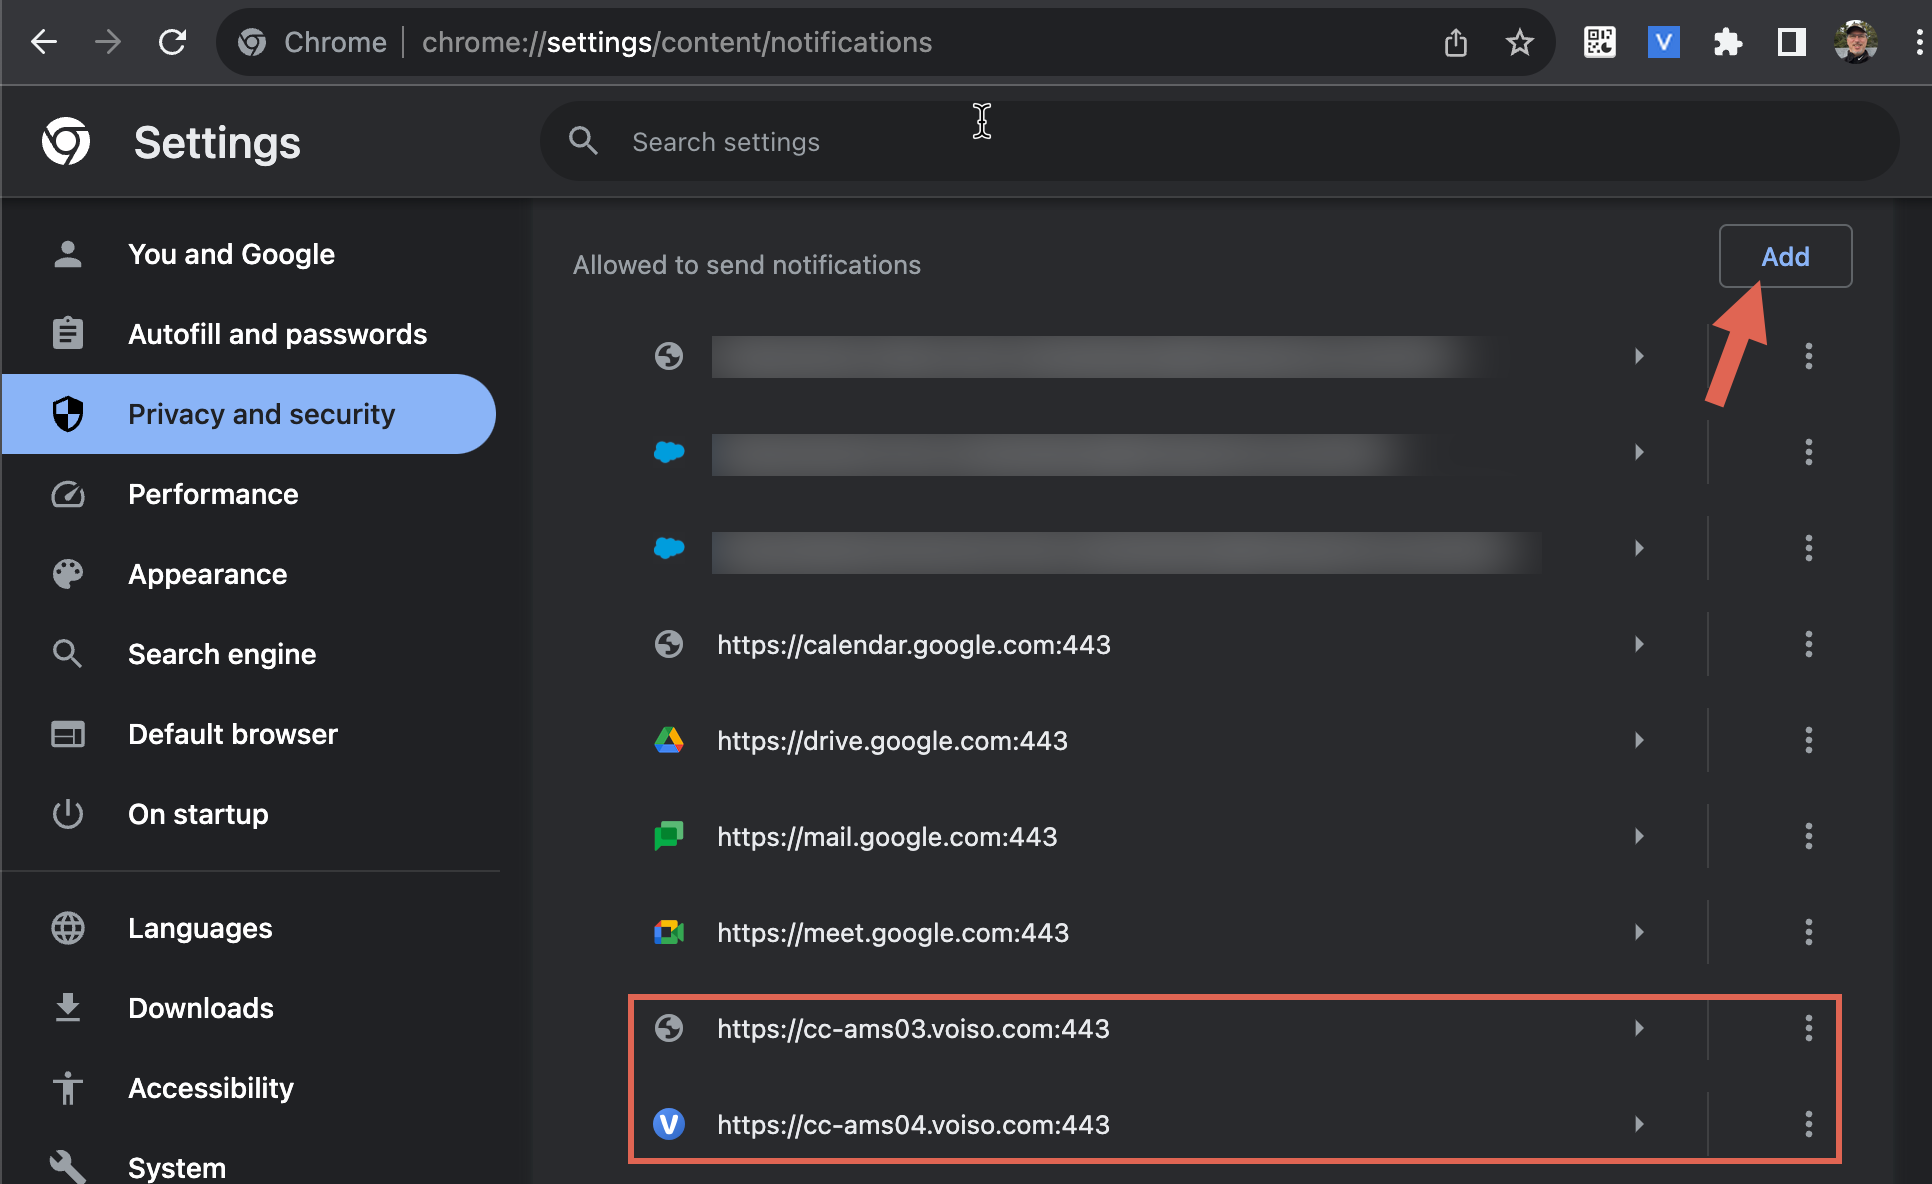
- In the Add a site panel, enter the URL of your contact center. For example,
https://cc-ams02.voiso.com:443

- Click Add.
- Close the Settings tab.