Who should read this article: Administrators
How to integrate Voiso with the Salesforce CRM.
Introduction
Voiso integrates with the Salesforce CRM by using an app that you install from the Salesforce AppExchange marketplace. After installing the app, contact Voiso to enable Salesforce integration for your account, then set up the integration on the Integrations page.
Setting up your Salesforce integration
We provide two articles to guide you through the process of setting up your Salesforce integration. Choose the one that is right for you:
- The Quick setup guide is for readers who are very familiar with Salesforce and do not require detailed steps to perform actions such as creating permission sets in Salesforce, adding elements to the Utility Bar, or creating call center definition files.
- The Detailed setup guide provides all the steps you need to complete the integration, including ample screenshots to guide you through the process.
For administrators
The Voiso Salesforce integration enables administrators to build calling lists using Campaign objects in Salesforce and automatically import them into Voiso Dialer campaigns. This capability enables you to create a campaign that runs continuously – the campaign can automatically pause when there are no available agents or no available contacts, then resume as agents come on-line and new contacts are added to your list of leads.
For agents
The Voiso Salesforce integration enables agents to launch the Voiso Agent Panel from the Salesforce Utility Bar, click any dialable number in Salesforce to make calls, view the call outcome in the call details, participate in Voiso Dialer Campaigns where the calling list is provided by Salesforce, and receive a Screen Pop of a contact record while handling a call.
If your contact center uses two-factor authentication (most contact centers), also known as 2FA or multi-factor authentication, agents must complete the 2FA setup process prior to the first time they sign-in to their Voiso account on Salesforce.
Features
The Voiso Integration app for Salesforce enables the following CRM features:
| Feature | Description |
|---|---|
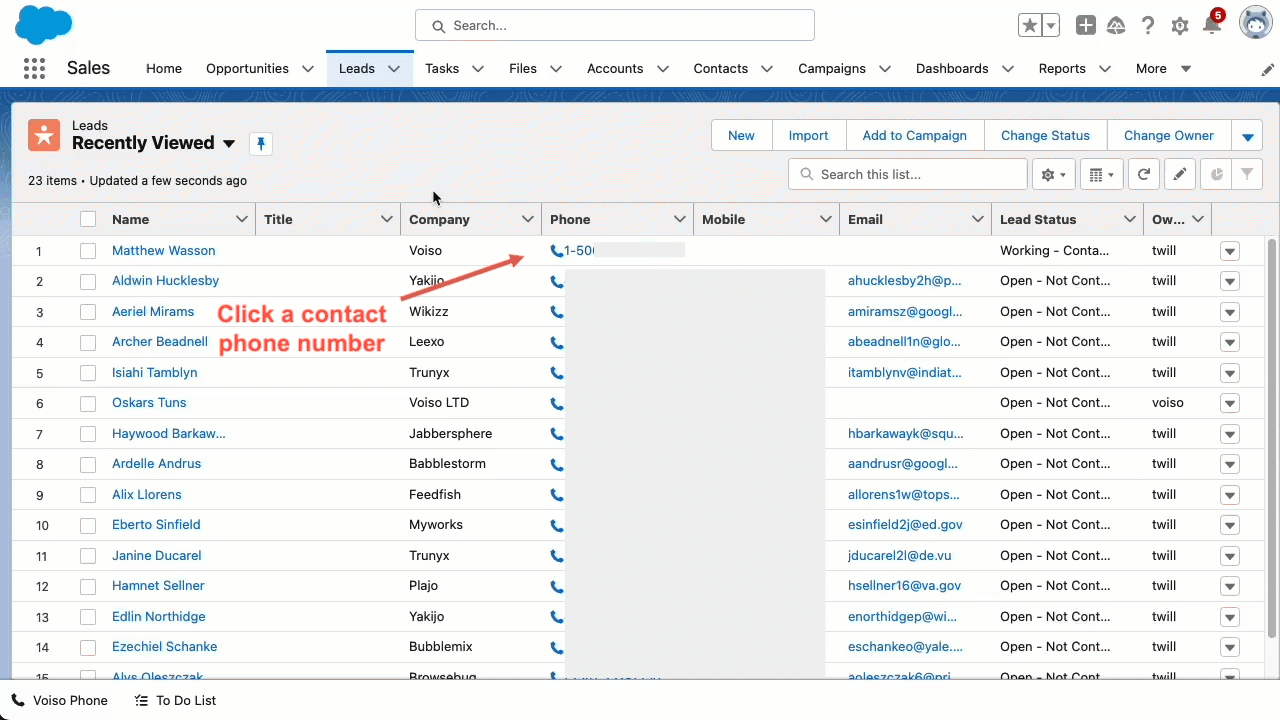
| Click-to-call | Agents initiate calls in Salesforce by clicking any dialable number instead of manually dialing the number |
| Calling List Import | Voiso pulls selected contact phone numbers directly from the Salesforce org database for Dialer campaigns |
| Screen Pop | The contact record automatically pops up in Salesforce org search when an agent handles a call in Voiso |
| Call History | Call details are automatically transmitted to the Salesforce org database after a call |
Refer to Step 4 of either the Quick setup guide or the Detailed setup guide for information about configuring these features.
Click-to-call
Agents can dial contact numbers directly from Salesforce by clicking any dialable number. This feature enables agents to make calls without manually dialing the number or copying and pasting a number into the dial pad, and without leaving Salesforce to call from another application.
Related article: Making calls
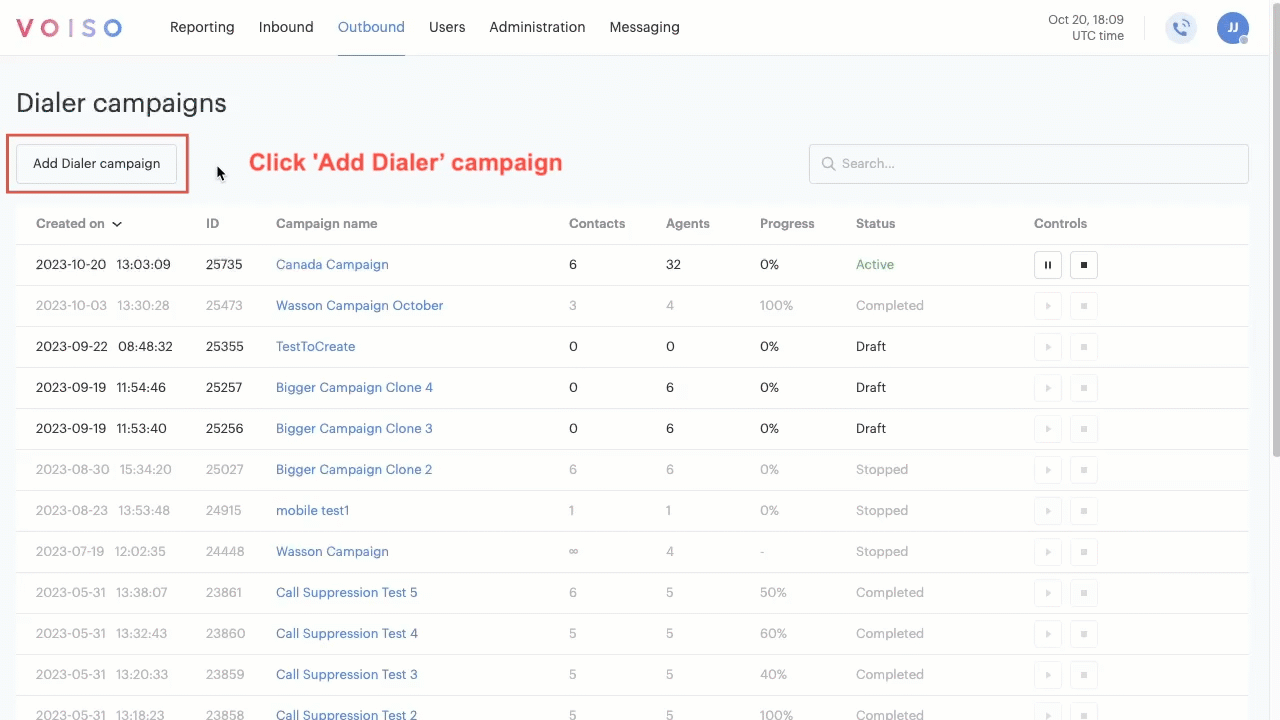
Calling list import
This feature enables you to import calling lists from Salesforce to Voiso. First create a Campaign in Salesforce, add Leads or Contacts, then use the Campaign as a data source in the Voiso Dialer campaign builder.
Related article: Dialer campaigns
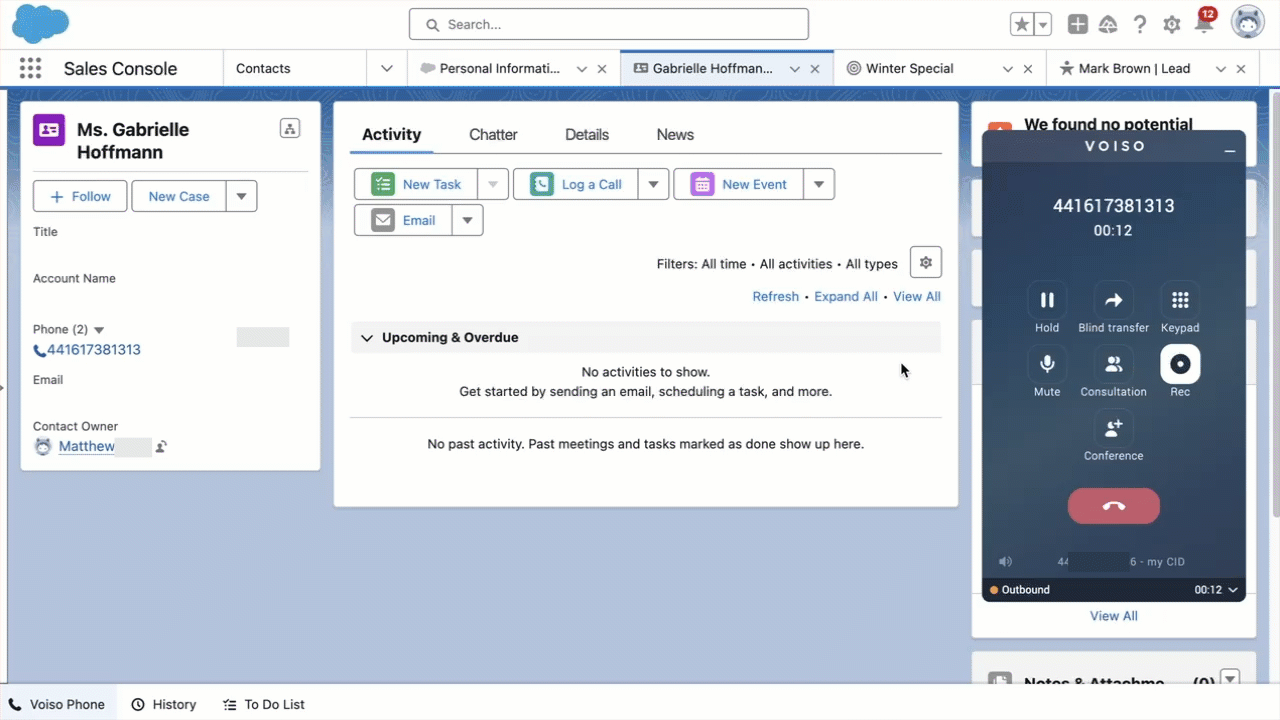
Screen pop
When a call is routed to an agent, Voiso displays the relevant Salesforce objects, such as cases and contact records, in Salesforce.
Related articles:
Call history
Call history adds information from Voiso about the call to the activity task in Salesforce. The following Voiso call details can be included in the call activity task:
| Field | Description | Example |
|---|---|---|
| Entry Name | A description of the call. | Inbound call from 1234567890 |
| Record type | The call type. | Click-to-call Outbound Call |
| Lead's Phone | The ANI or DNIS of the contact. | A 10-digit phone number. |
| Call Center Phone | The phone number of your contact center. | A 10-digit phone number. |
| Disposition | The call outcome assigned by Voiso. | answered |
| End reason | The system reason that the call ended. | Customer disconnect |
| Call Recording | A link to the call recording in the Call Detail Records. | A URL. |
| Call UUID in Voiso | The unique identifier of the call in the Voiso Call Detail Records | A 36-digit identifier. |
| Start Time | The date and time that the call started. | 31/03/2025, 5:28 pm |
| End Time | The date and time that the call ended. | 31/03/2025, 5:35 pm |
| Duration in Seconds | The length of the call in seconds. | A floating point value. |
| Duration | The length of the call. | A time in minutes and seconds, such as 02:39. |
| Owner | The name of the Salesforce user who owns the call. | A Salesforce user name with a link to the user's profile. |
| Last Modified By | The name of the Salesforce user who most recently modified the call record, along with the date and time the call record was last modified. | A Salesforce user name with a link to the user's profile followed by a timestamp, such as "User Name 31/03/2025, 5:35 pm". |
| Queue | If the call was inbound, the name of the queue that routed the call | My queue |
| Flow | If the call was inbound, the name of the Flow that routed the call | My flow |
| Wrap-Up Code | The wrap-up code selected by the agent during after call work. | Sale made |
| Description | A short summary that combines key call details from the above fields. | |
| Related Module | The Salesforce record ID the call is associated with. For example, for inbound calls, this may be the ID of a matched Lead, based on screen pop logic. For outbound calls, it may be the ID of the record from which the click-to-call was initiated. | The 15- or 18-character ID of the Salesforce record. |
Related articles:
Troubleshooting
Here are solutions to common problems you might encounter with the Voiso/Salesforce integration.
Softphone is missing or hidden in the Utility Bar
The Voiso Phone button is not displayed in the Salesforce Utility Bar.
Solution
Add the Voiso Phone component to the Lightning application Utility Bar. Refer to Add the Voiso Phone Component to the Utility Bar in Salesforce.
The Call Center record does not exist
The Voiso Call Center is not available when the user navigates to Salesforce.
Solution
Import the Call Center Definition File into Salesforce. Refer to Set Up a Call Center in Salesforce.
The Call Center record is not assigned to the user
Call records are not assigned to the user.
Solution
Assign the Voiso Call Center to the user. Refer to Set Up a Call Center in Salesforce.
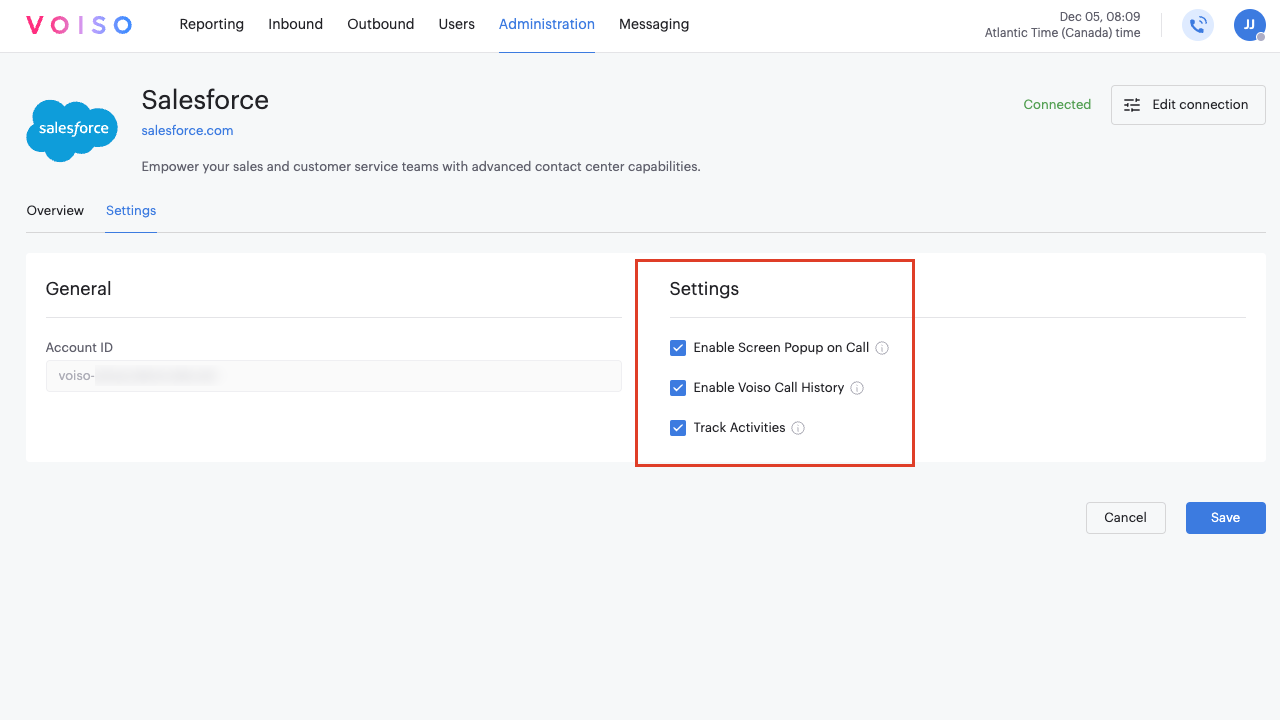
Screen pop does not work
The contact record does not screen pop when the user handles a call.
Solution
- Navigate to Administration > Integrations.
- Select the Salesforce tile.
- Open the Settings tab.
- Enable Screen Popup on Call in the Settings section.
Click-to-call does not work
The call is not dialed in Agent Panel when the user clicks a number in Salesforce.
Solution
Add an extension to the user's account in Voiso.
Click-to-call is logged as an outbound call
A call dialed using click-to-call is logged as an outbound call instead of click-to-call.
Solution
Enable the Allow Click-to-Call option in the user's security access group role. Also, ensure an extension is added to the user's account in Voiso.
Calls are not logged
Calls are not logged in Salesforce.
Solution
-
Ensure the integration user is properly configured in Salesforce. Assign both Voiso Integration User Permission Sets to the integration user. Refer to:
-
Enable Activity Tracking and/or Voiso Call History in the integration settings in Voiso:
- Navigate to Administration > Integrations.
- Select the Salesforce tile.
- Open the Settings tab.
- Enable Activity Tracking and/or Voiso Call History in the Settings section.
The record owner is assigned incorrectly
Call records are not being assigned to the correct user.
Solution
Ensure the user has signed in to the Voiso softphone in Salesforce using their Voiso credentials.
Salesforce campaigns do not display in the Calling List menu
When creating a campaign that imports contacts from Salesforce, the Salesforce campaign name does not appear in the Calling List menu of the Voiso Dialer campaign.
Solution
The user creating Dialer campaigns must sign in to both Voiso and Salesforce using the same email address.