Who should read this article: Agents
The Agent Panel is a powerful yet simple-to-use tool that enables you to easily make and receive calls, join outbound campaigns, and monitor your performance.
Introduction
The Agent Panel is a web application for Agents to perform their work in a contact center. The Agent Panel lets you:
- handle inbound and outbound phone calls through your computer using a WebRTC Softphone
- manage your availability status
- join and leave outbound calling campaigns
- review your call history
- select a Caller ID
- view your metrics and KPIs
- view notifications and messages about missed calls, network connection status, and outbound calling campaigns
- send an SMS to your contact
Sign-in
For information about signing in to your Voiso account, refer to the articles in the Signing in topic area.
Using Agent Panel for the first time
- If pop-ups and redirects are blocked, select Allow and click Done.
- To open the Agent Panel, click the Agent Panel icon in the navigation bar.
- When the Agent Panel is displayed for the first time, you are asked to allow Voiso to use your microphone. Click Allow.
- If your browser does not have permission to use your microphone, a dialog box might be displayed asking permission. Allow your browser to use your microphone as well. You might have to enable your microphone in your browser settings.
- To change your microphone settings or choose a different microphone, click the microphone icon.
- Modify the settings, then click Done. To modify your browser's microphone settings, click Manage.
- Your softphone is now ready to use.
- To start receiving inbound calls or outbound campaign calls, set your status to Available.
- To make an outbound call, use the dial pad.
Agent Panel home screen
The Voiso Agent Panel home screen is a dial pad that you can use to make outgoing phone calls to contacts (external people your organization interacts with, such as clients, customers, patients, and sales leads) or internal targets, such as another agent, a calling queue, or back office personnel.
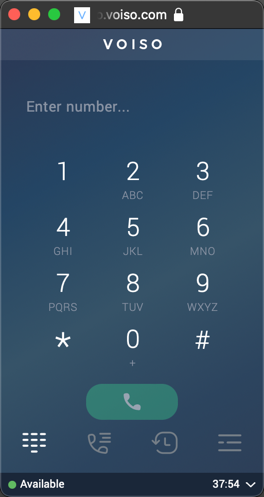
Refer to Outbound calls for information about how to use the dial pad to make a call.
Switch screens
There are four icons at the bottom of the Agent Panel that enable you to switch between screens.
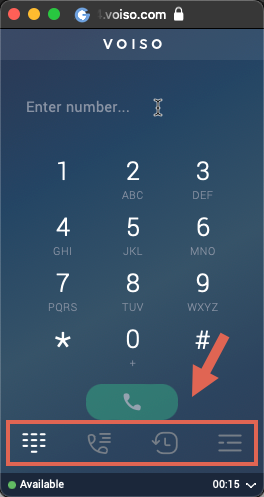
From left to right, the icons are:
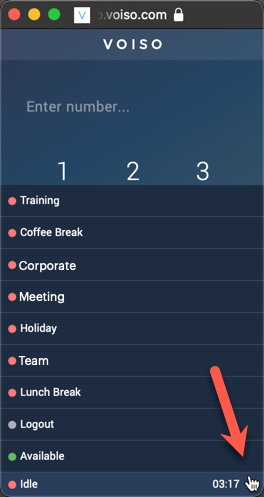
Status menu
Your current availability status, and how long you have been in that status, are displayed in the status bar at the bottom of the Agent Panel.

| Status | Description |
|---|---|
| Available | Ready to accept an inbound call or an outbound campaign call |
| Dialer outbound | You are handling an outbound dialer campaign call. |
| Dialer waiting | You are in an outbound dialer campaign and you are available and waiting to be connected to the next call |
| Dialing in | You have joined an outbound dialer campaign and the dialer is dialing you. |
| Idle | This status is set automatically if you have not used the Agent Panel for a while but you are still logged in |
| Inbound | You are currently engaged in an inbound phone call |
| Logout | This status is set automatically if you have not used the Agent Panel for a while or if Agent Panel has become disconnected from your network, but you are still logged in |
| Outbound | You are currently engaged in an outbound phone call or an outbound campaign call |
| Ringing | You have an active inbound call that you have not answered. |
| Unavailable reason | Not ready to accept an inbound call or an outbound campaign call. Unavailable statuses are displayed as reasons for being unavailable, such as meetings, training, or lunch break |
Use the Status menu to manually set your availability or unavailability (with a reason) to take calls or to log out from Voiso. To display the Status menu, click the Status bar at the bottom of the Agent Panel.
Dialer campaigns screen
The Dialer Campaigns screen contains a list of all the active outbound calling campaigns that you are assigned to.
Click the Dialer campaigns icon to switch to the Dialer campaigns screen. To join a campaign, select it.
For more information about the Dialer campaigns screen, refer to Outbound campaigns.
Call history screen
The Call history screen contains a list of all the phone calls you have handled. You can access your call history in three different views, All calls, Inbound, and Outbound. Scroll the screen to see more calls.
To call a number again, click it.
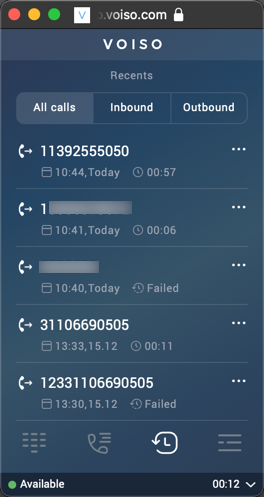
To view the details of a call, click the kebab menu button. The Call details screen displays the contact's number, the date and time of the call, the call duration, the call result, and the Wrap-up code you assigned to the call.
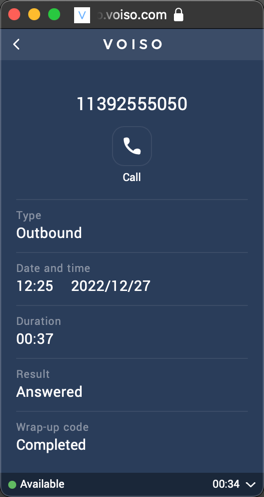
To call a contact from the Call details screen, click Call.
Menu screen
The contents of the Menu screen depend on how your account has been set up by your administrator. By default, it contains the CID groups and Agent metrics menus.
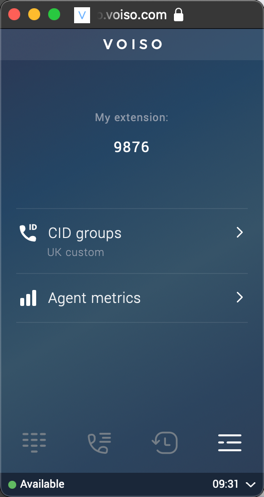
CID groups
The CID groups menu displays the current Caller ID (CID) group that is displayed to contacts on their phone when you make an outbound call. For Outbound campaigns, your CID groups setting is overridden by the campaign settings.
To change your CID group, click CID groups, then find and select a new CID group from the Select a Caller ID group menu. You can use the search feature or scroll the menu to find a CID group.

Agent metrics
The Agent metrics menu displays a list of metrics and KPIs that tell you about your work performance. For details, refer to the Agent metrics article.
Using Call notes
Users with the Call notes feature enabled have the Notes button availble in the call controls.
To use the Call notes feature, follow these steps:
- During a phone call, click the Notes button in the call controls page.
- Enter your notes in the Notes page.
- Click Back to return to the call controls page.
- After the call ends, during the After Call Work stage, the Notes page displays again. Add or edit your notes.
- Click Next to save your notes.
- Select a wrap-up code.
Audio settings
The Audio settings screen in Agent Panel enables you to select the microphone and speaker devices used for voice calls.
To open the screen, click the Menu icon, then select Audio settings.
Use the Microphone and Speaker menus to choose the audio devices currently connected to your computer.
Your selections are applied immediately and remain active for your session. You can return to this screen at any time to change devices or troubleshoot audio issues.
Picture-in-Picture view
Your contact center may enable the Picture-in-Picture (PiP) feature for Agent Panel. PiP allows you to open Agent Panel in a floating window that stays visible above all other applications—even when you switch windows or tabs.
This capability enhances multitasking by keeping call-related information and controls accessible at all times.
When PiP mode is active, Agent Panel provides key advantages:
- Monitor ongoing calls while working in CRM or support tools.
- Access call controls instantly—no need to switch back to Agent Panel or the Agent Workspace.
- View caller information at a glance while using other applications.
- Use a movable softphone panel, ideal for Omnichannel Workspace users.
- Minimize the full Voiso application while keeping Agent Panel accessible at all times.
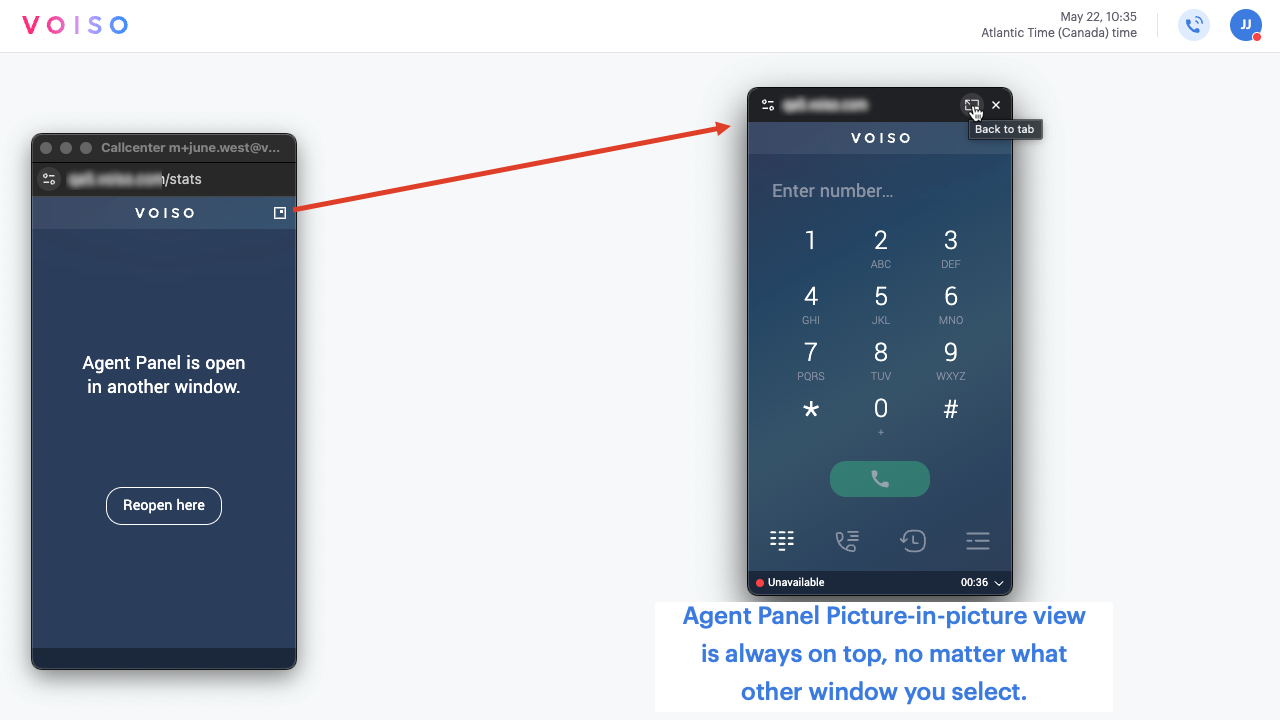
Using Picture-in-Picture mode
The Picture-in-picture (PiP) feature allows you to keep Agent Panel visible in a floating window while you work in other applications.
If PiP is available in your browser, you’ll see the Open picture-in-picture button near the top right of Agent Panel. Click it to open Agent Panel in a floating, always-on-top window.
To close PiP and return to the regular Agent Panel view, do one of the following:
- In the PiP window, click Back to tab.
- In the original Agent Panel tab, click Reopen here.
The Picture-in-picture feature is supported only in the Google Chrome browser.