Who should read this article: Administrators
Learn how to set up agents, buy numbers, and create Caller ID groups to start making manually dialed and click-to-call calls efficiently.
14-day trial users should start with these articles. They walk you through initial setup, calling configuration, and key steps to get the most out of your trial experience.
Refer to How to run a Dialer campaign for information about automated calling campaigns.
Introduction
Voiso offers an intuitive interface that makes it easy to set up key components for outbound calling, including:
To enable outgoing calls from your contact center, you’ll need the following:
- Users (agents)
- At least one phone number for your contact center
- At least one Caller ID to identify the origin of your calls on telecom networks. Your Caller ID can be the same as the number for your contact center, or you can buy additional numbers to use as Caller IDs.
With these elements in place, your agents and automated Dialer campaigns can seamlessly connect with your clients (contacts).
Related articles:
Users
This article assumes you have already set up Users during your initial contact center setup. Refer to How to set up your contact center for details. By default new users can receive inbound calls and can be added to outbound Dialer campaigns. However, for users to make manual outgoing calls, you have to grant permissions in the user profile.
Granting Outgoing Call Permissions to a User
By default, new users do not have permission to make manual outbound calls. You must grant this permission in the user's profile or import a bulk user CSV with the Allow Manual Outbound Calls field set to y.
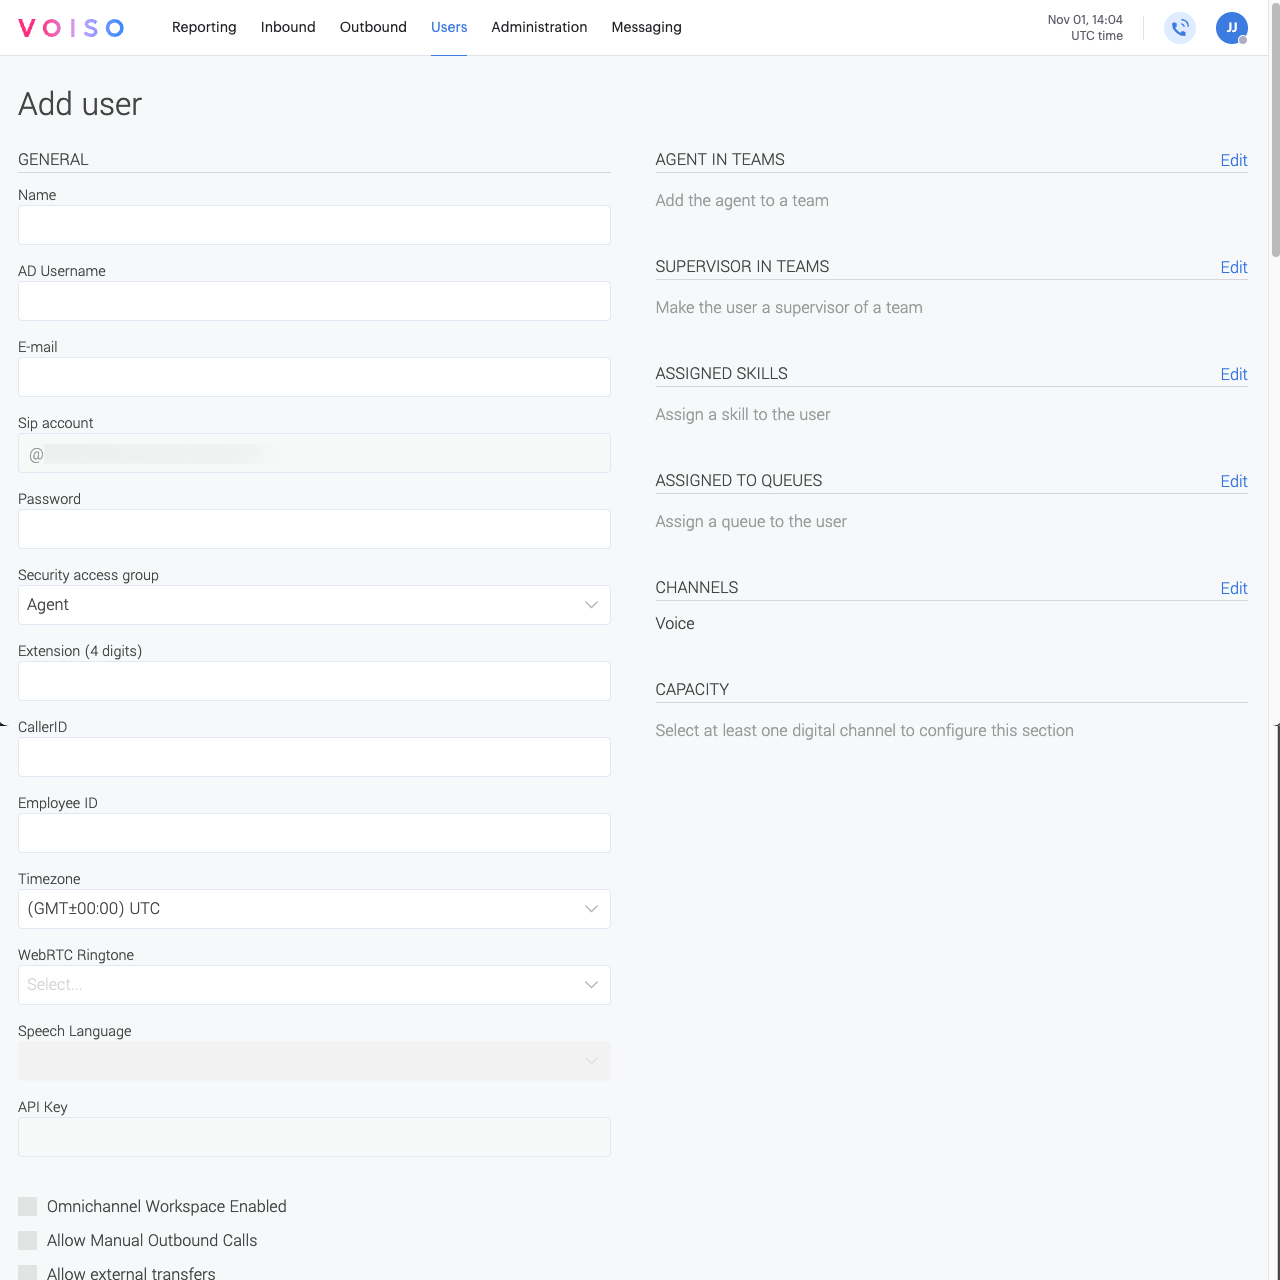
To enable manual outbound calling for a new user, follow these steps:
- Navigate to Users > Users in the Voiso main menu.
- Click Add user to create a new user profile.
- Enter the user's Name.
- Specify the AD Username—this is the name displayed in Agent Panel.
- Enter the Email address the user will use to sign in.
- Select the Role for the user:
- Choose Agent for users who will handle interactions.
- Set the user's Extension—this number is used for call transfers and routing.
- Enter the Caller ID that will be displayed when making outbound calls.
- If left blank, the default Caller ID is used.
- Select the user's Time zone.
- In the Permissions section, enable Allow manual outbound calls.
- This is required only if the user will manually dial outbound calls.
- If the user will only handle inbound calls or participate in outbound Dialer campaigns, this setting is not required.
- (Optional) To allow click-to-call from your CRM, enable Allow click-to-call.
- Assign the user to a Team.
- If the user will handle inbound calls, assign them to a Queue.
- Click Save to create the user profile.
For information on bulk importing user profiles, refer to the Users article in the Voiso documentation.
Phone Numbers
You can assign phone numbers to:
- Individual users
- Caller ID groups
- Dialer Campaigns via Caller ID groups
Set up phone numbers for your contact center by either purchasing numbers from Voiso or adding your own. Purchase and manage all your numbers easily from the Numbers page.
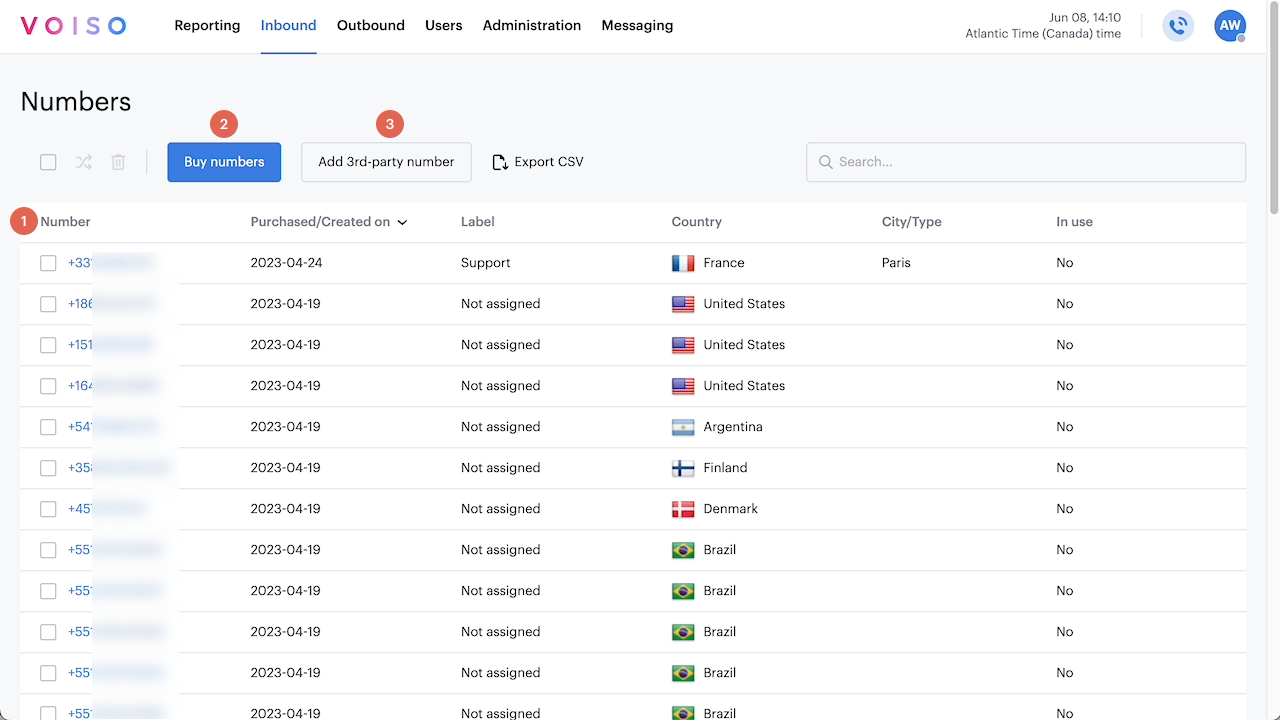
In the Voiso navigation bar, select Inbound > Numbers. If you already have numbers, you can view them in the Numbers table (1).
Buying New Numbers
- Click Buy Numbers (2).
- Search for available numbers by country and geographic region.
- Select the numbers you want, then click Buy Numbers to add them to your list.
Adding Your Own Numbers
- Click Add numbers (3).
- Enter the number, country, and number type.
For more information about adding your own numbers and adding numbers in bulk, refer to Add numbers.
Buying numbers in detail
This tutorial video steps you through the process of buying numbers.
Setting Up an Individual Caller ID
Your contact center Caller ID can be the same as the number for your contact center, or you can buy additional numbers to use as Caller IDs. Having additional numbers means that you can assign different Caller IDs for different purposes, divisions, campaigns, or locations.
To assign a Caller ID to a specific user, follow these steps:
- On the Voiso navigation bar, go to Users > Users.
- Select the user to open the Edit User page. You can also assign a Caller ID while initially adding a user.
- In the Caller ID field, enter one of your phone numbers.
If the user is assigned to a team and the team has an associated Caller ID group, the Caller ID group numbers take priority over the Caller ID assigned individually.
Setting up Caller ID groups
Caller ID groups allow you to manage multiple Caller IDs (CIDs) for manually dialed and click-to-call calls from your CRM or other service. When team members associated with a Caller ID group make calls, Voiso automatically selects a CID based on the region being called or whether the contact has been called before.
Watch this tutorial video about creating a Caller ID group.
To create a Caller ID group, navigate to Outbound > Caller ID groups in the Voiso navigation bar to open the Caller ID Groups page.
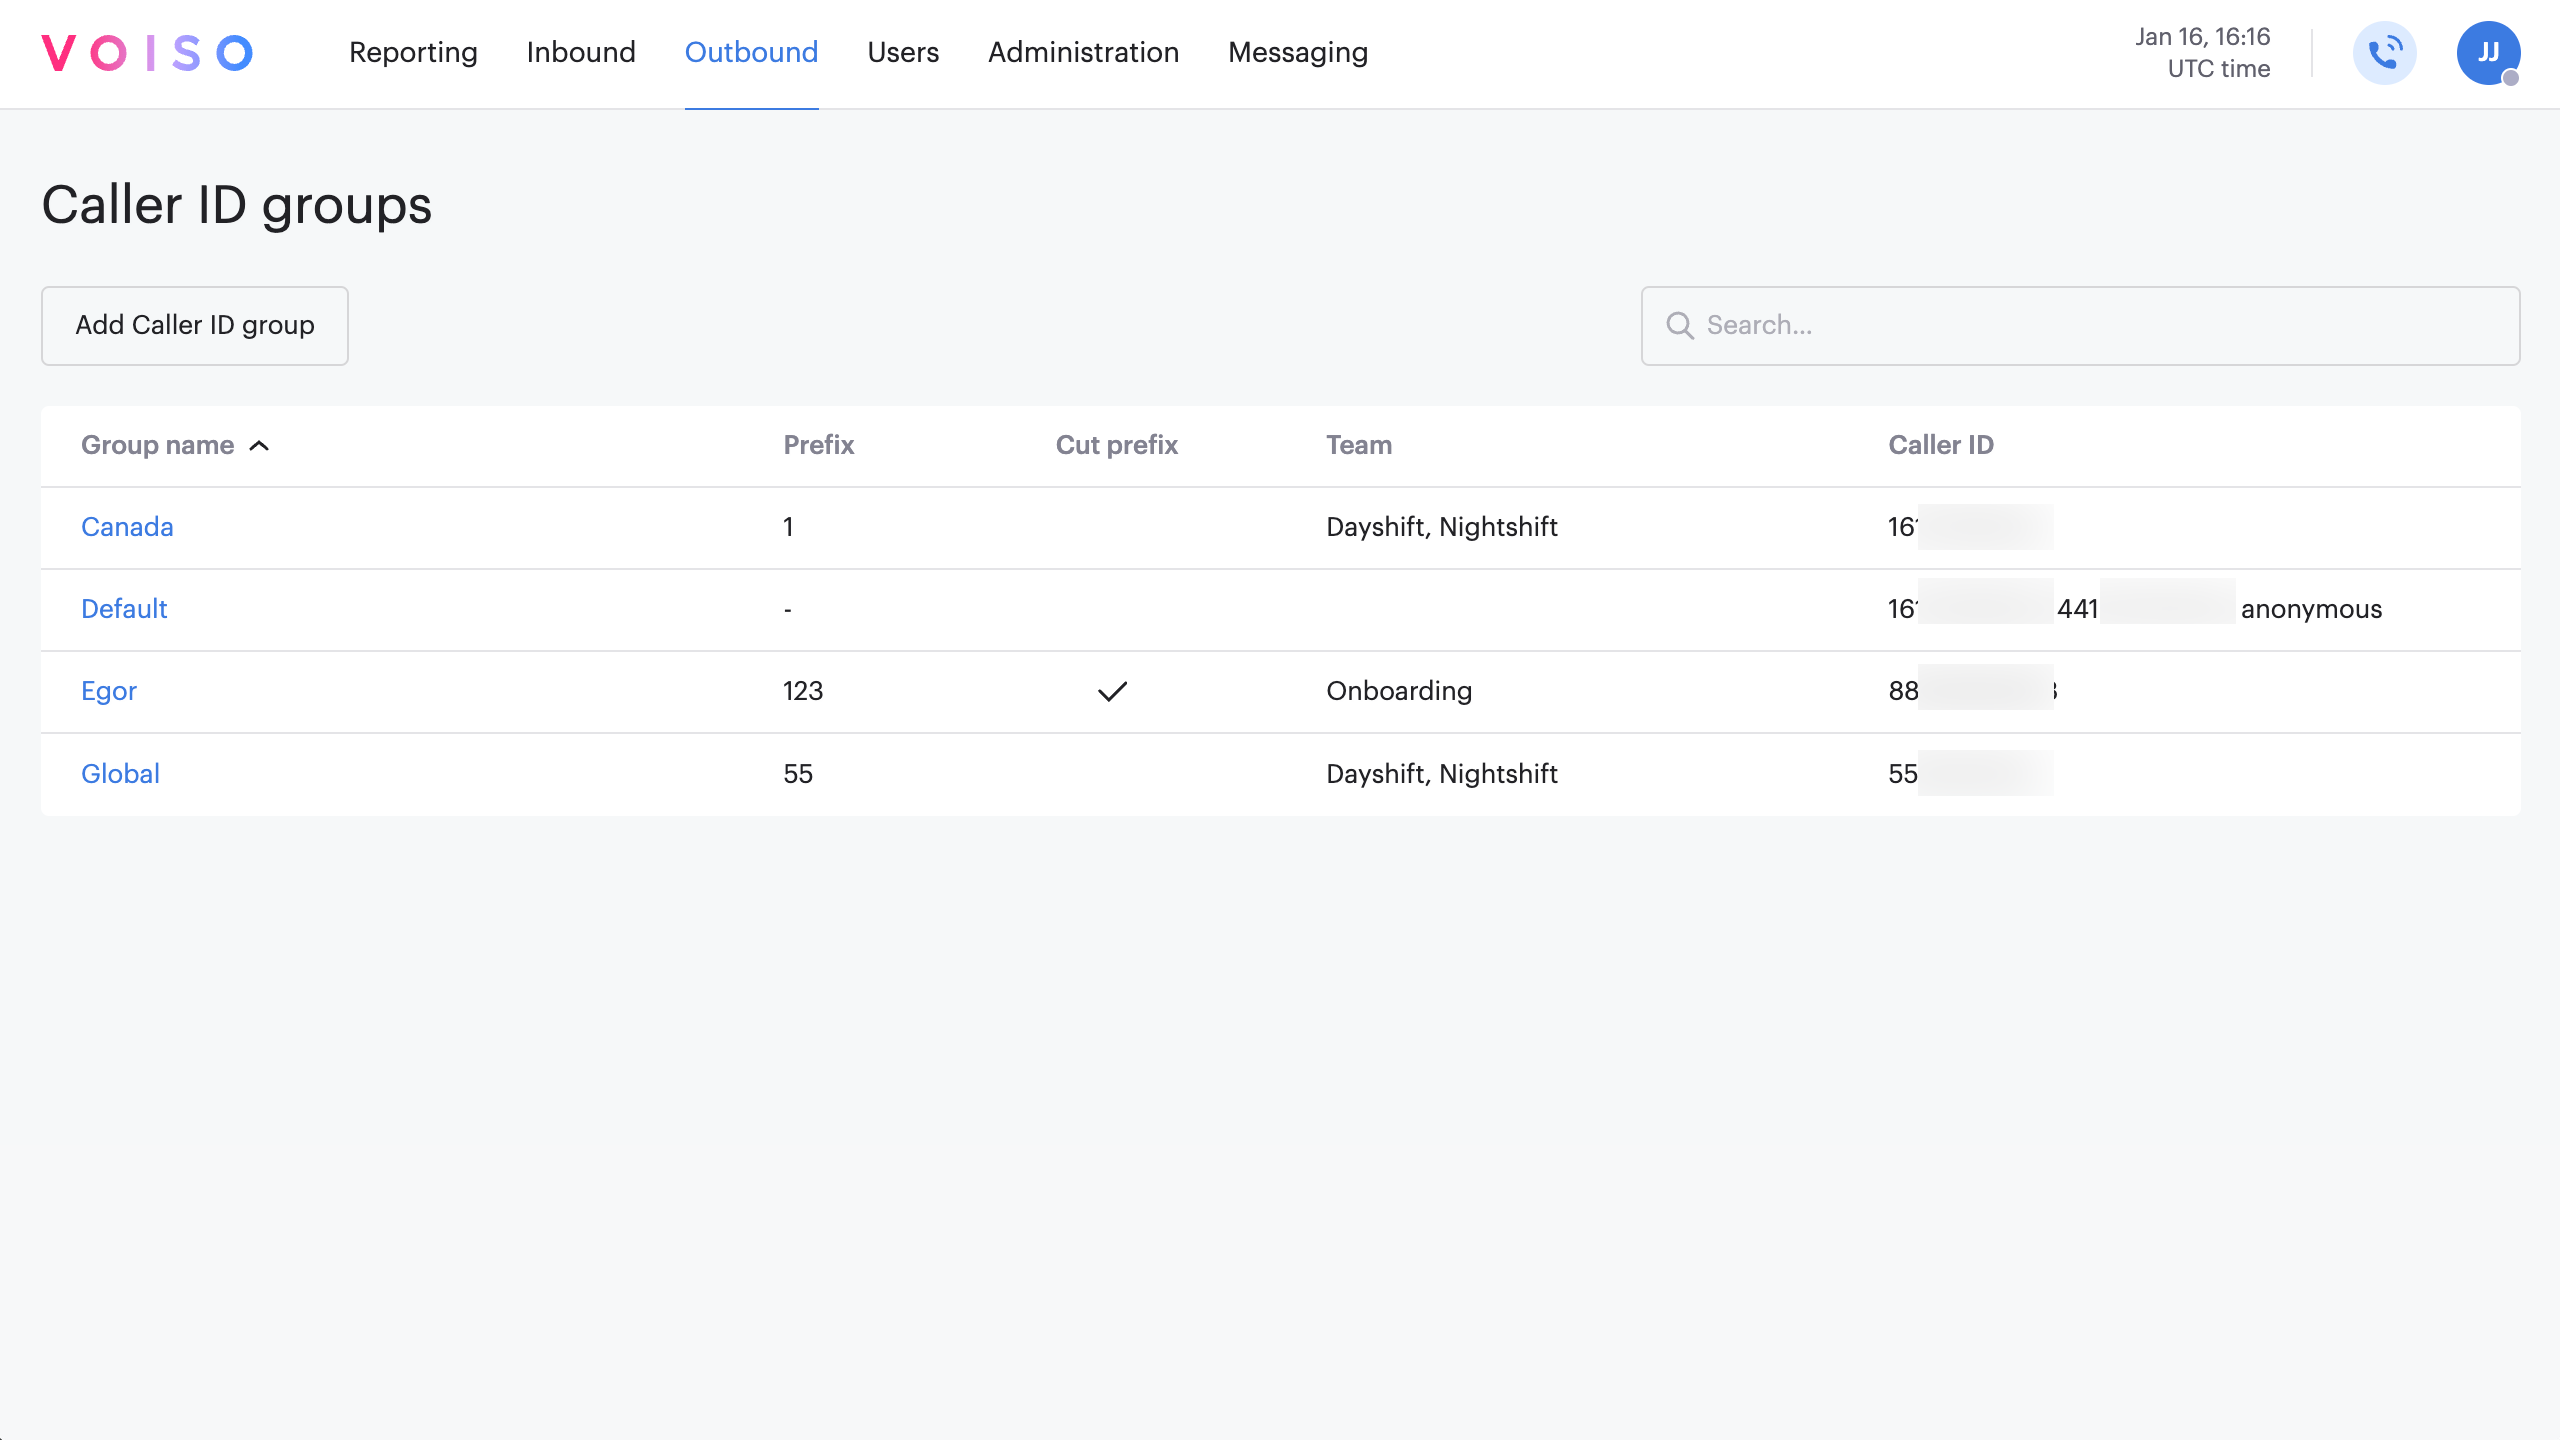
Default CID group
When you first open the Caller ID Groups page, the only available CID group is the Default group.
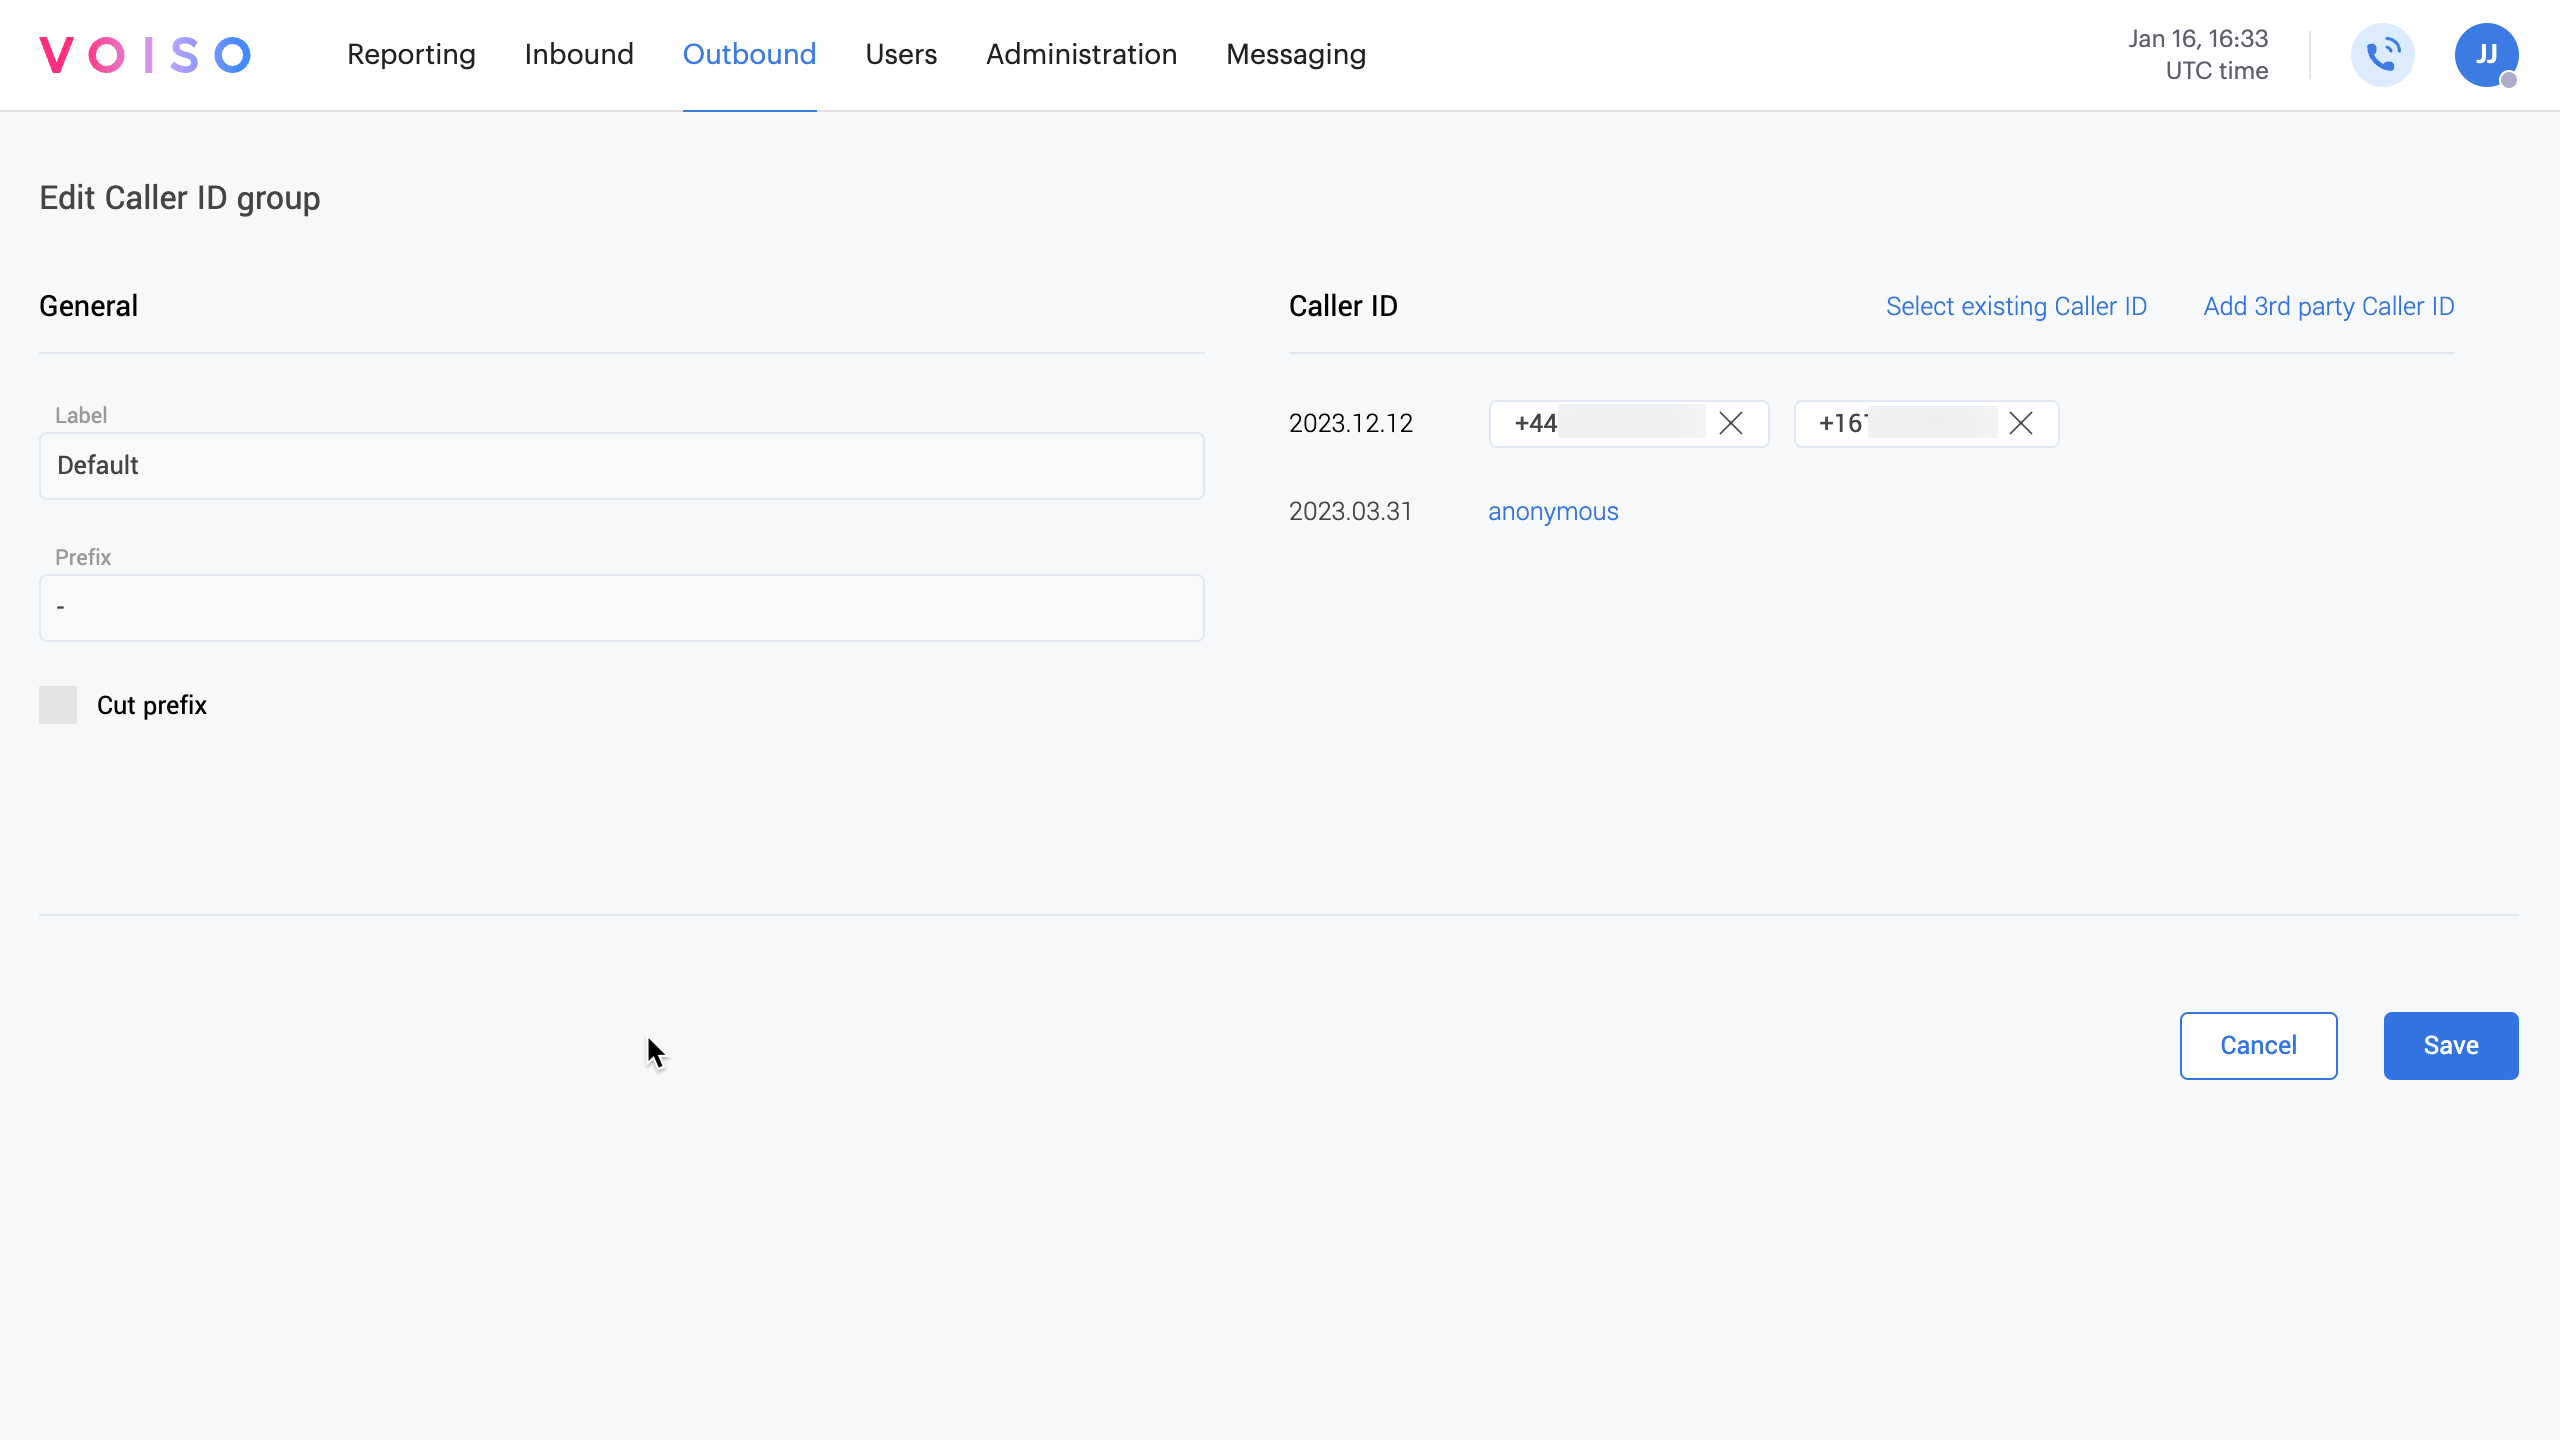
You can edit the Caller ID name, description, and assign an existing CID or a third-party CID. By default, the Caller ID name is set to anonymous.
Voiso recommends renaming the default Caller ID from anonymous to something that represents your organization or business processes. Many local networks reject calls from anonymous CIDs.
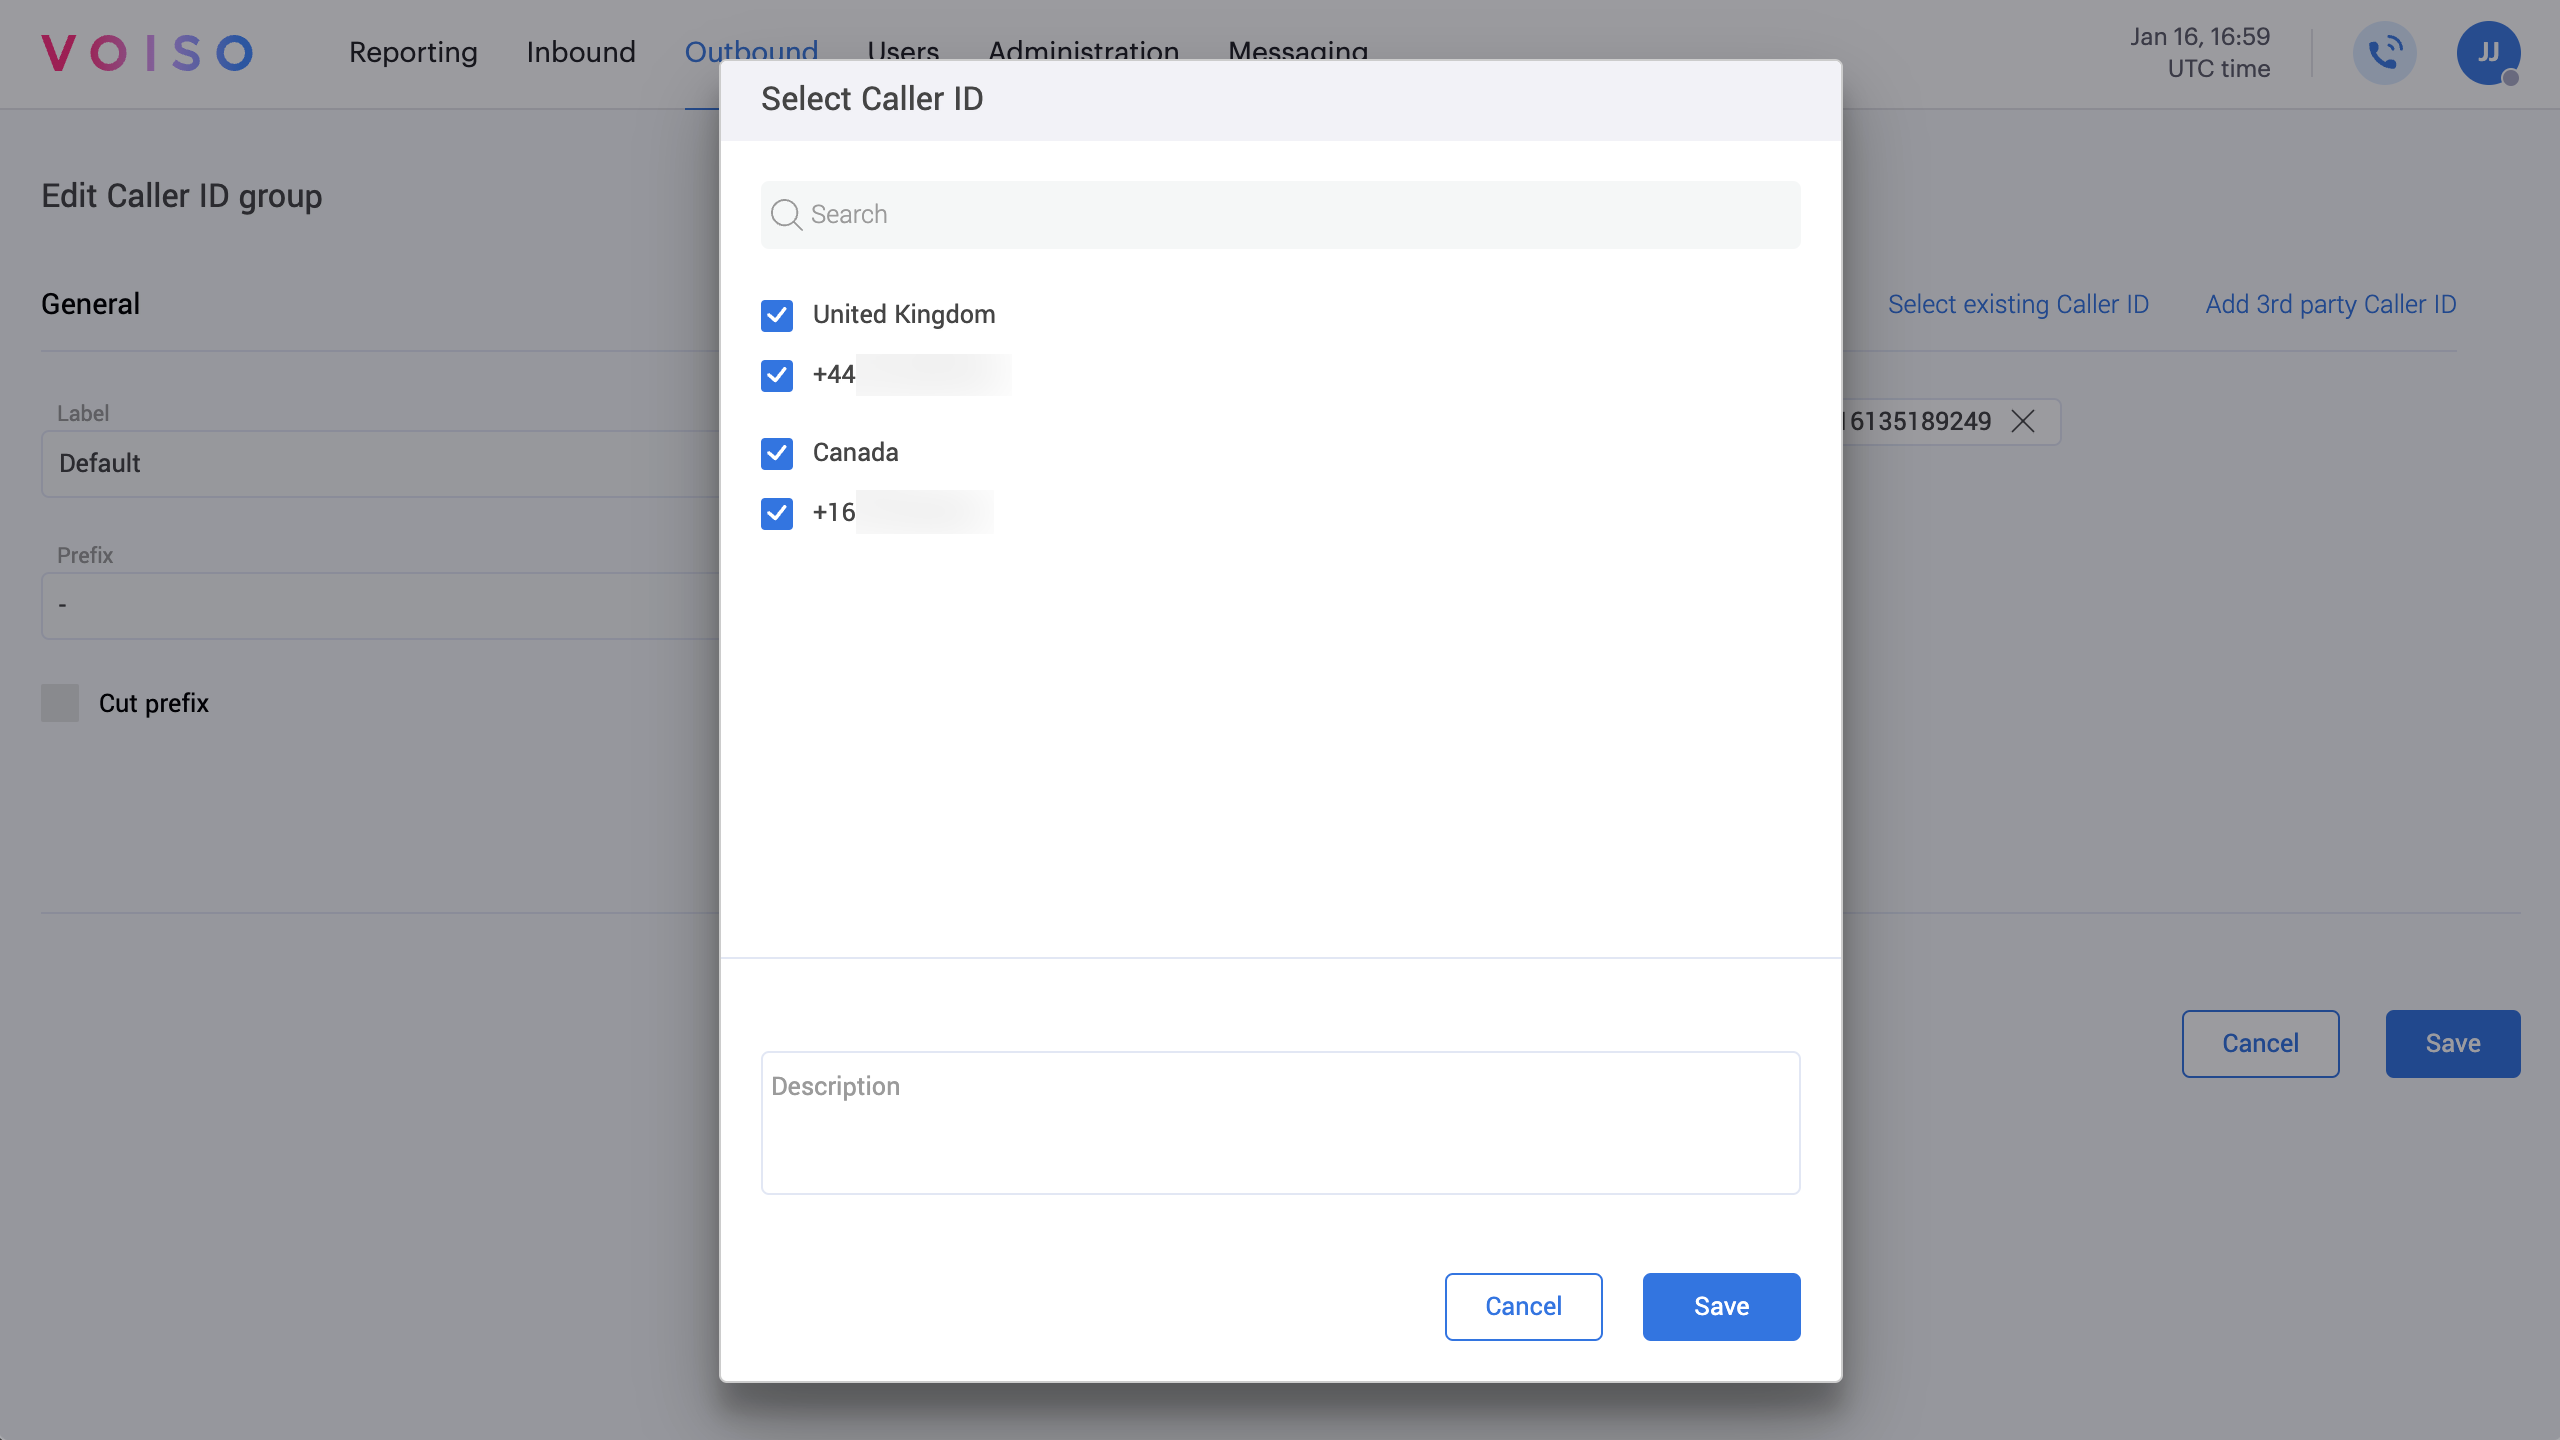
To edit the Default group:
- Click the Default group in the Caller ID Groups page.
- Click Select existing Caller ID to open the Select Caller ID panel.
- Choose numbers from your owned list by selecting individual numbers, destinations, or countries. To select all numbers for a country, select the country name.
- Click Save to add the selected numbers to your Default Caller IDs.
Custom CID groups
Custom CID groups let you specify numbers for calls to specific countries, regions, or other business purposes. For example, you can create a group for all contacts in Germany, another for Australia, and so on.
For details on all the ways that caller ID groups can be created and applied, see these articles:
To create a new custom CID group, Follow these steps:
- Navigate to Outbound > Caller ID groups and click Add new Caller ID group.
- On the Add Caller ID Group page, enter a name for the CID group in the Label field.

- In the Prefix field, specify a dialing prefix for your system, business process, or country code.
- To add CID numbers:
- Click Select existing Caller ID to choose from your existing numbers.
- Alternatively, click Add 3rd party Caller ID to include numbers from an external source.
- To assign the CID group to a team:
- In the Teams section, click Edit.
- Select one or more teams from the Edit Teams panel, then click Save.
- Click Save to finalize and create the Caller ID group.
Your agents are now ready to start making outgoing calls!