Who should read this article: Administrators
Using Flows and Flow Builder, you can design, configure, and manage complex interaction flows tailored to your business processes.
You must create an interaction flow using Flow Builder before a flow you have added can accept and route interactions. This article describes the basics of adding a flow. Refer to the articles in the Flow Builder folder to learn how to use the Flow Builder visualization tool.
Introduction
Use Flows to create advanced interaction flows with day, time, and channel-based rules, then use the Flow Builder visualization tool to configure interaction routing to queues, agents, voicemail, and other options.
Business hours in a flow use the contact center’s time zone as specified in System Settings. This may differ from the time zone set for individual users in their profile. When configuring business hours, be sure to account for any difference between the contact center time zone and your agents’ time zones.
You can use the Conditions node in Flow Builder to test the start-time, dnis, or ani of a call and route it to different queues, agents, or other targets (such as voicemail) based on the time zone of the contact or agent.
Flows
To create, view, and manage interaction flows, navigate to Inbound > Flows from the Voiso navigation bar. The Flows page displays a searchable table listing all created flows along with their associated channels.
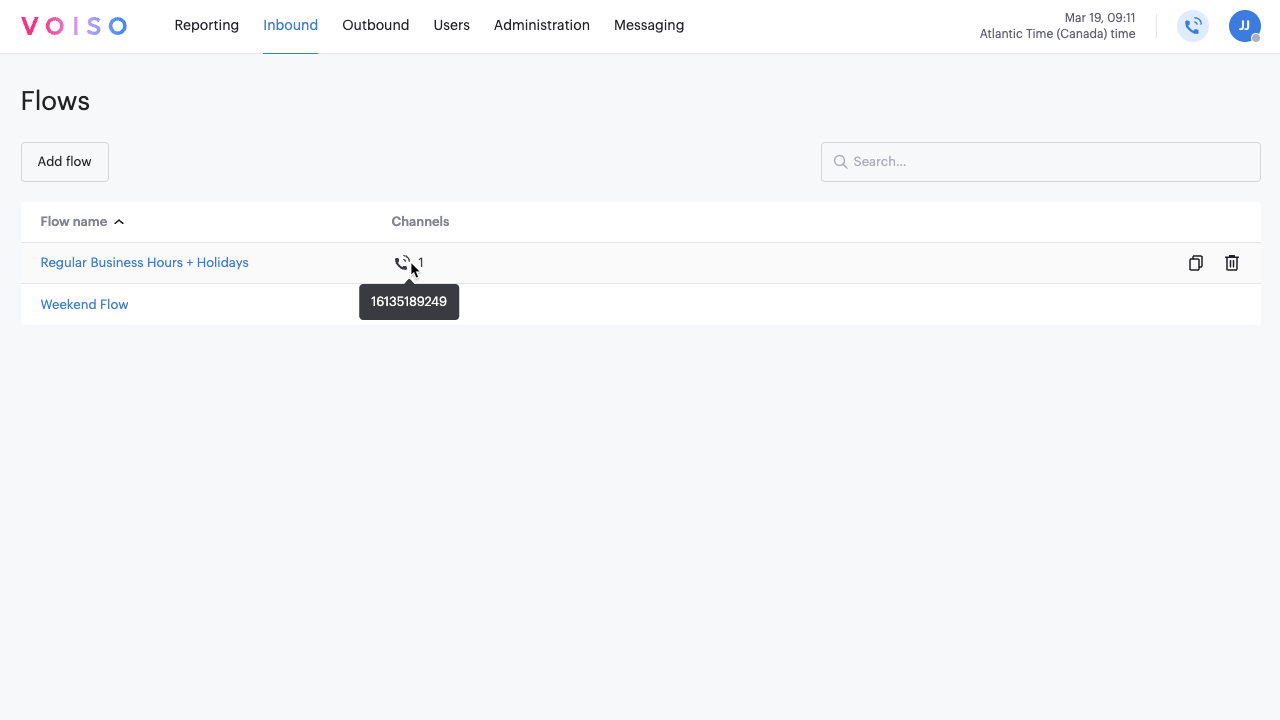
The Flows table contains the following columns:
| Column | Description |
|---|---|
| Flow name | A list of existing flows, sorted alphabetically by name |
| Type | Channel type: Voice or Digital |
| Configuration | Indicator of whether a complete end-to-end interaction flow has been created and saved in Flow Builder. Statuses are Configured or Not configured. Note: inbound interactions cannot be routed to agents and other resources until an interaction flow is completed using Flow Builder. |
| Numbers and digital channels | The phone numbers for a Voice channel or the name of a Digital channel. |
Click an assigned number or digital channel to link to the corresponding number panel or Edit channel page in your contact center.
Flow Management Options
- Search: Type a flow’s name in the Search field to find it quickly.
- Add a Flow: Refer to Adding a new flow for instructions.
- Edit a Flow: Click the flow name to open the Edit flow page.
- Duplicate a Flow: Hover over the flow and click the Clone (copy icon) button.
- Launch Flow Builder: Hover over the flow and click Launch Flow Builder (launch icon).
- Delete a Flow: Hover over the flow and click Delete (trash icon).
Adding a new flow
To create a new flow, click Add flow to open the Add flow panel.
- In the Flow name field, enter a unique name for the flow.
- From the Type menu, select Voice or Digital.
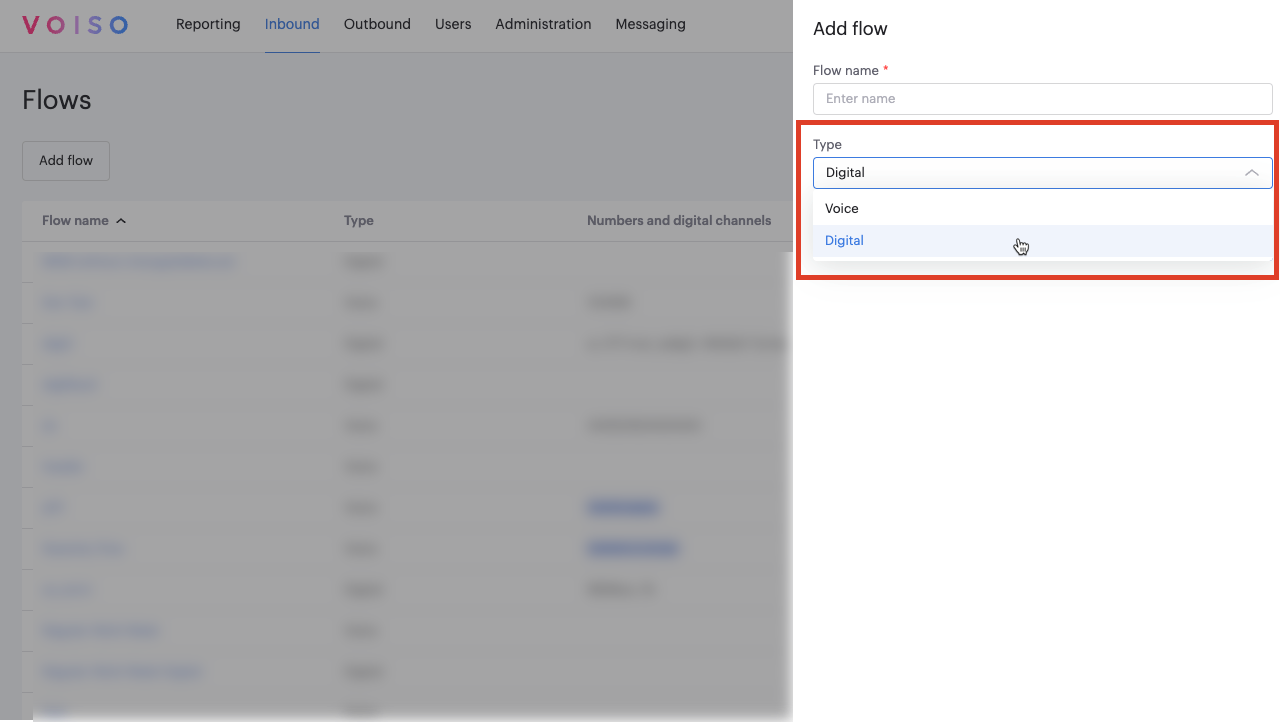
- For digital flows, select the digital channel from the Channel type menu.
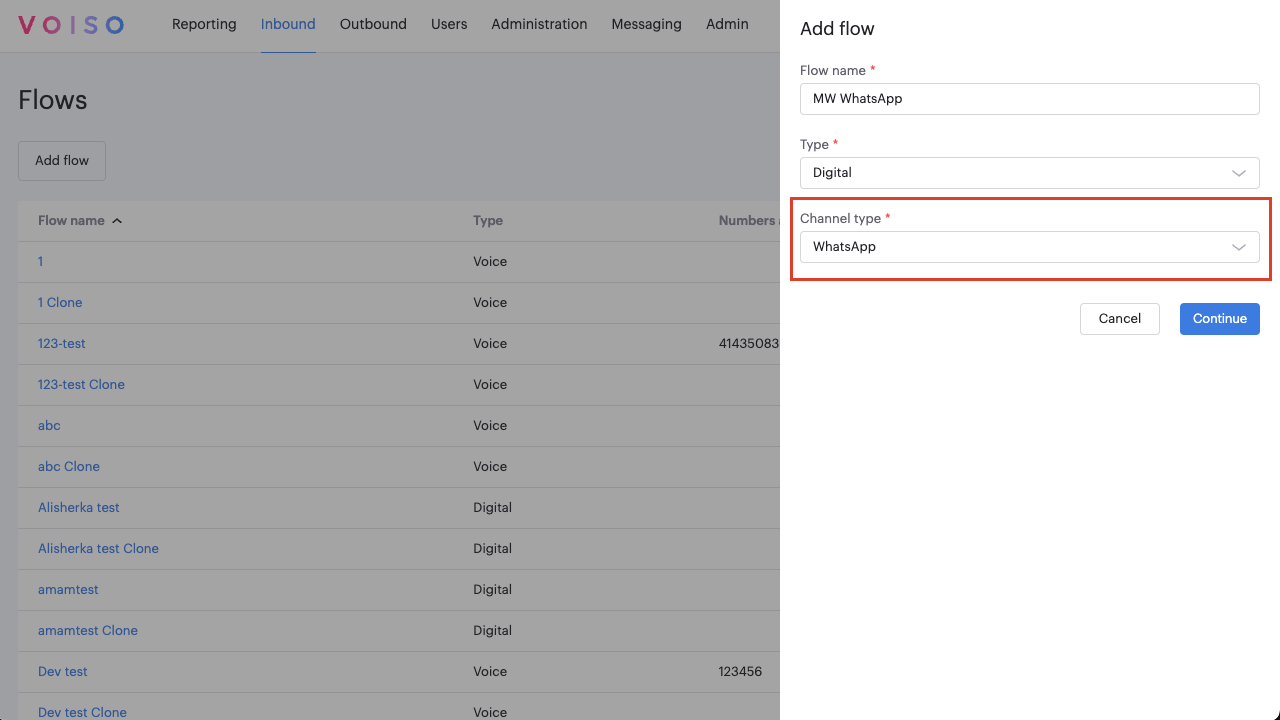
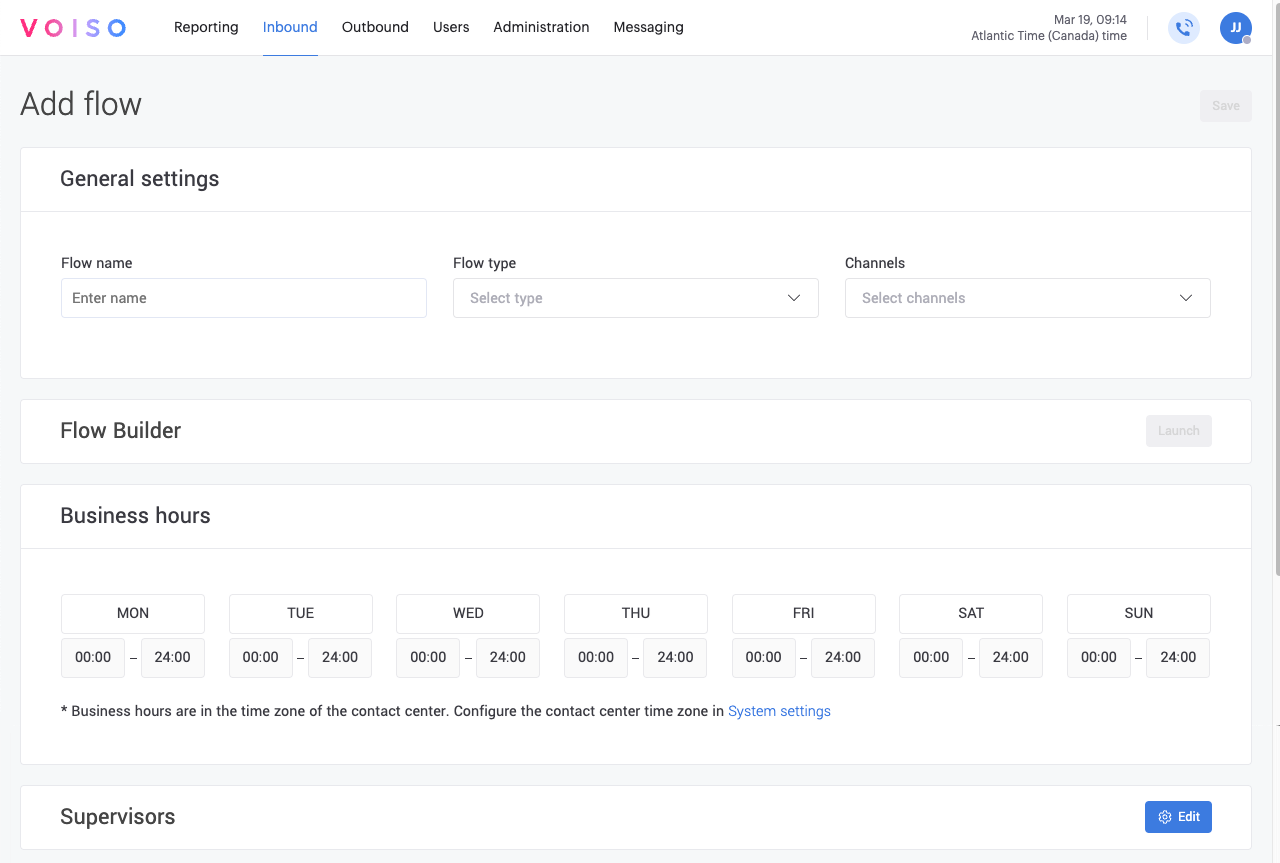
- Click Continue to open the Edit flow page, which includes the following sections:
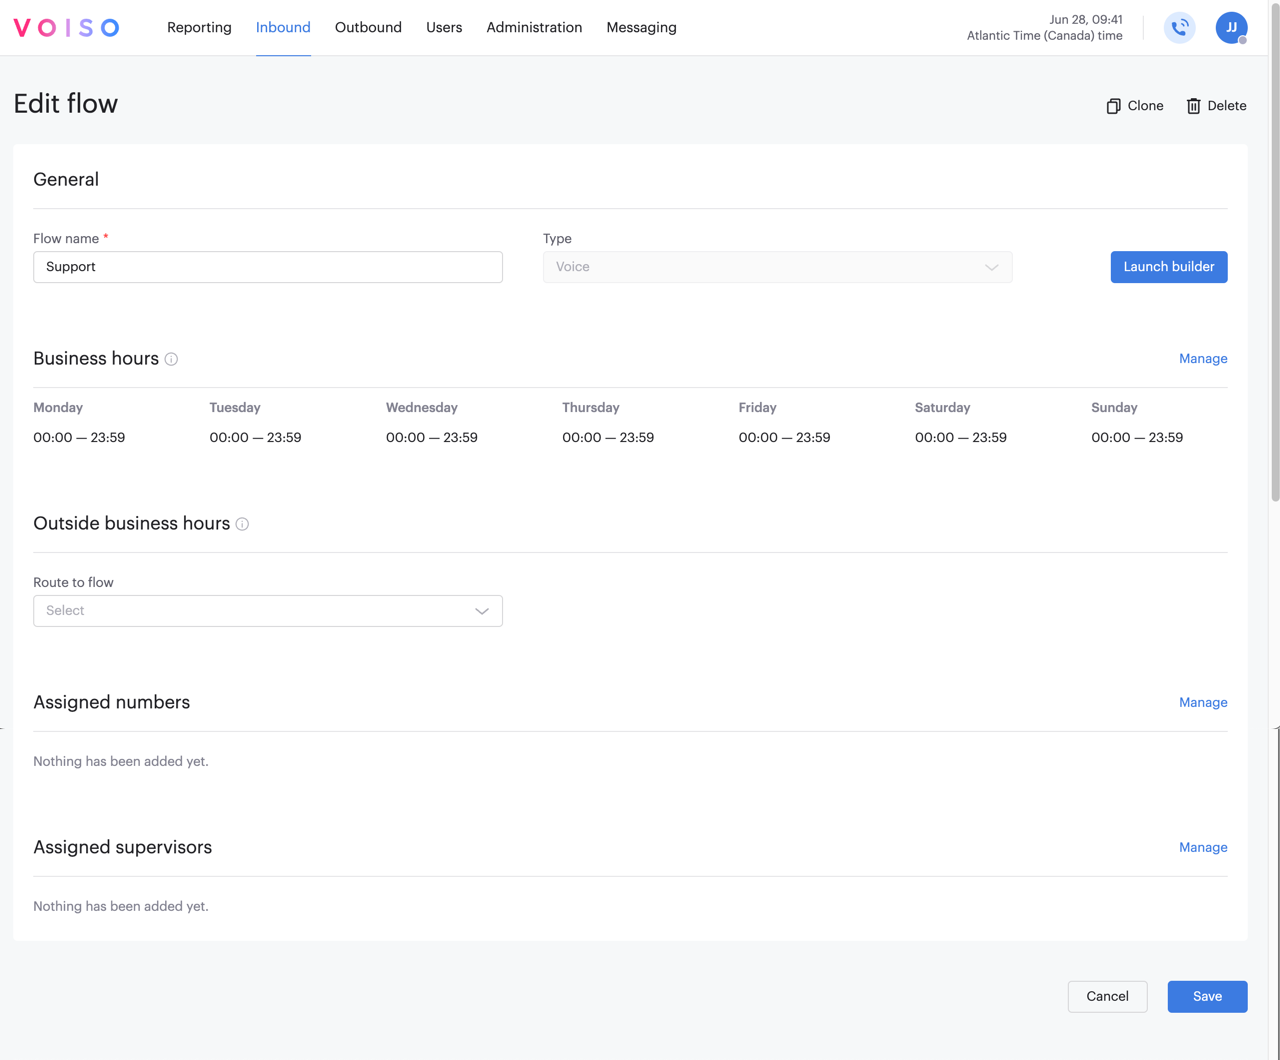
- Flow Builder
- General
- Business hours
- Outside business hours
- Assigned numbers (Voice flows only)
- Assigned digital channels (Digital flows only)
- Assigned supervisors
- Configure the sections as needed, then click Save to create the flow.
Flow builder
After configuring the General section, the Launch Flow builder button becomes active. Click Launch Flow builder to open the Flow Builder, a visual editor for creating interaction routing strategies.
General
The General section includes the following parameters:
| Parameter | Description |
|---|---|
| Flow name | Enter a unique flow name, including any relevant scheduling details. For example: Regular Business Hours. |
| Type | Select the interaction type: Voice or Digital. |
Business Hours
Define operating hours for the flow based on your contact center’s configured time zone in System Settings.
- Click Manage in the Business hours section.
- Select the days and adjust the time fields to specify business hours.
- Click Add hours to define multiple time blocks for the same day if needed (e.g., for lunch breaks or shift changes).
Ensure that Outside business hours flows cover gaps in the schedule (e.g., by routing calls to voicemail).
Outside business hours
Assign an existing flow for times outside of specified Business hours. The assigned flow will inherit the primary flow's channel.
You do not need to specify a channel for the Outside business hours flow.
Assigned numbers
The Assigned numbers section lists phone numbers associated with the flow. Incoming calls to these numbers trigger the flow’s routing logic.
- Click Manage to open the Number assignment panel.
- Select or deselect numbers, then click Assign.
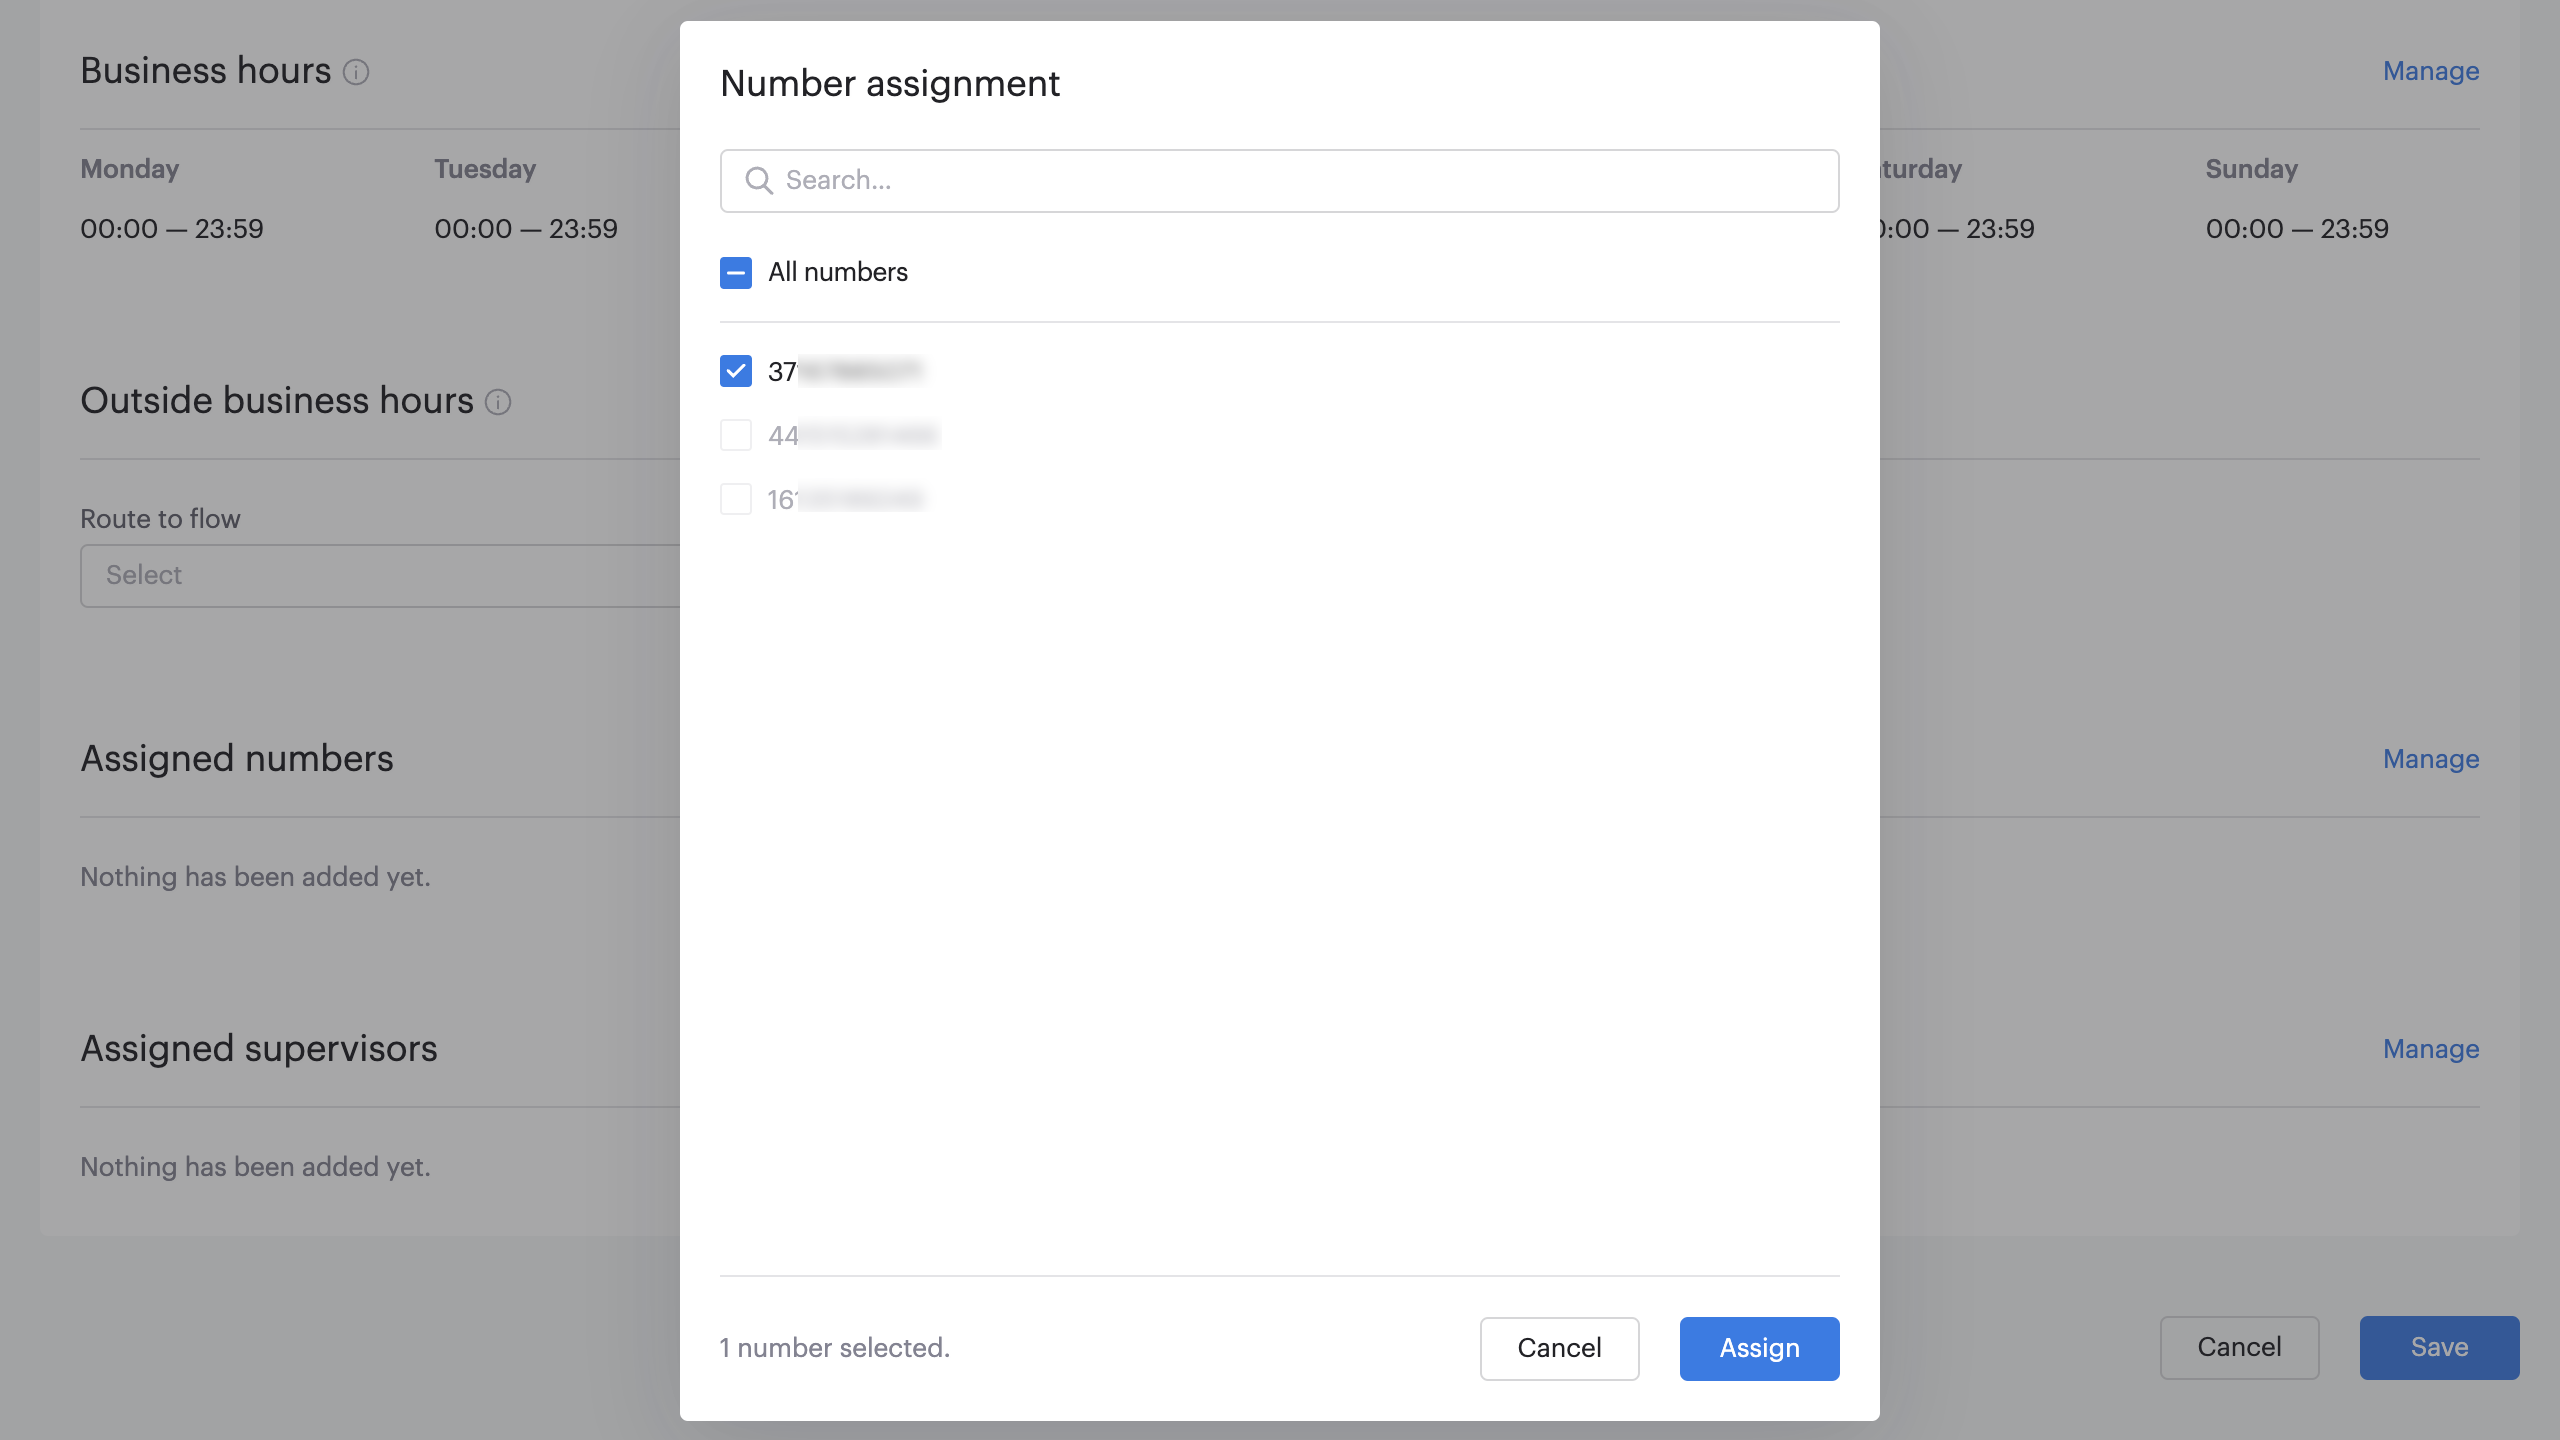
Unassigning a number from another flow
Numbers already assigned to another flow are unavailable for selection. When you hover over one of these numbers, a link to the flow it belongs to is displayed.
To unassign a channel from its current flow:
- Click the link to open the Edit flow page for the existing flow.
- In the Assigned numbers section, click Manage.
- In the Numbers assignment panel, deselect the number, then click Assign.
- On the Edit flow page, click Save.
You can now return to your new flow, refresh the browser, select the unassigned number, and click Assign. The assigned numbers will appear in the Add flow or Edit flow page.
Watch this video to see how to reassign a number to a different flow:
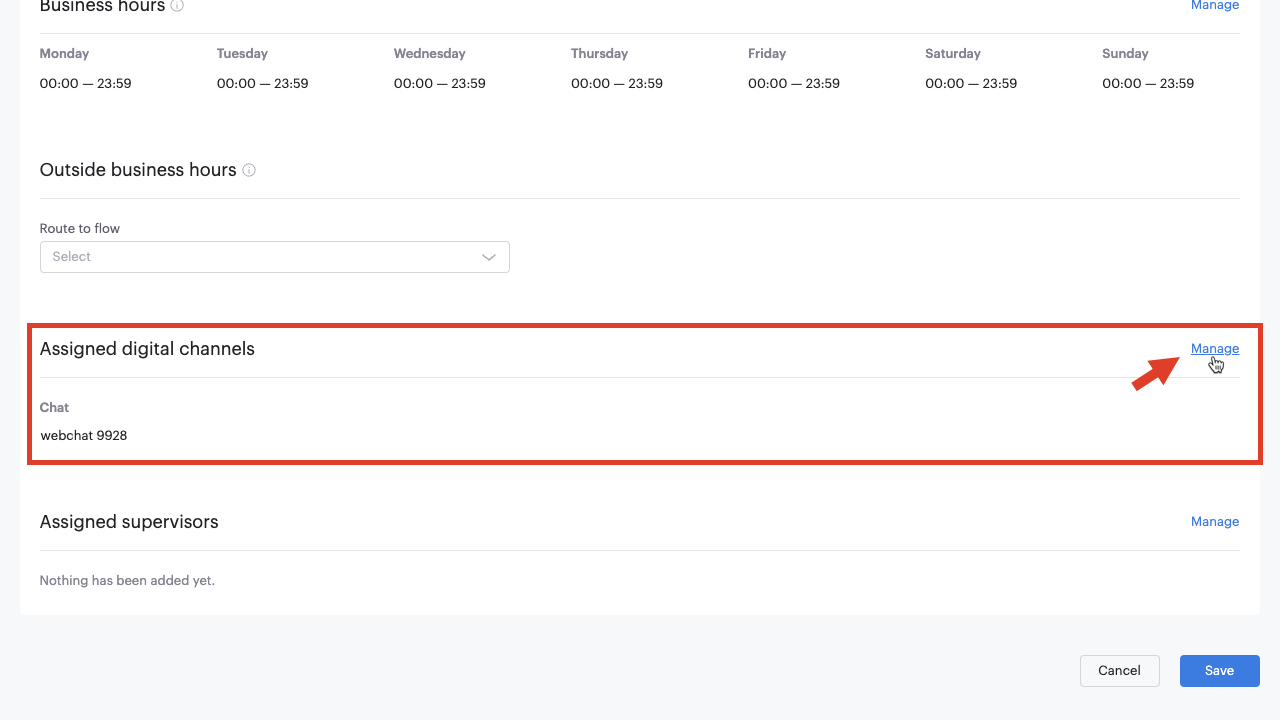
Assigned digital channels
For digital interaction flows, the Assigned digital channels section displays all digital channels in your contact center that match the type selected for the flow. A message of the specified type on any assigned channel will trigger the flow.
- Click Manage to open the Digital channels assignment panel.
- Select or deselect channels as needed, then click Assign.
Unassigning a digital channel from another flow
Channels already assigned to another flow are unavailable for selection. When you hover over one of these channels, a link to the flow it belongs to is displayed.
To unassign a channel from its current flow:
- Click the link to open the Edit flow page for the existing flow.
- In the Assigned digital channels section, click Manage.
- In the Digital channels assignment panel, deselect the channel, then click Assign.
- On the Edit flow page, click Save.
You can now return to your new flow, refresh the browser, select the unassigned channel, and click Assign. The assigned channels will appear in the Add flow or Edit flow page.
Watch this video to see how to reassign a channel to a different flow:
Assigned supervisors
Assign supervisors to monitor the flow using the CDR (Call Detail Records) page.
- Click Manage to open the Supervisor assignment panel.
- Select one or more supervisors, then click Assign.
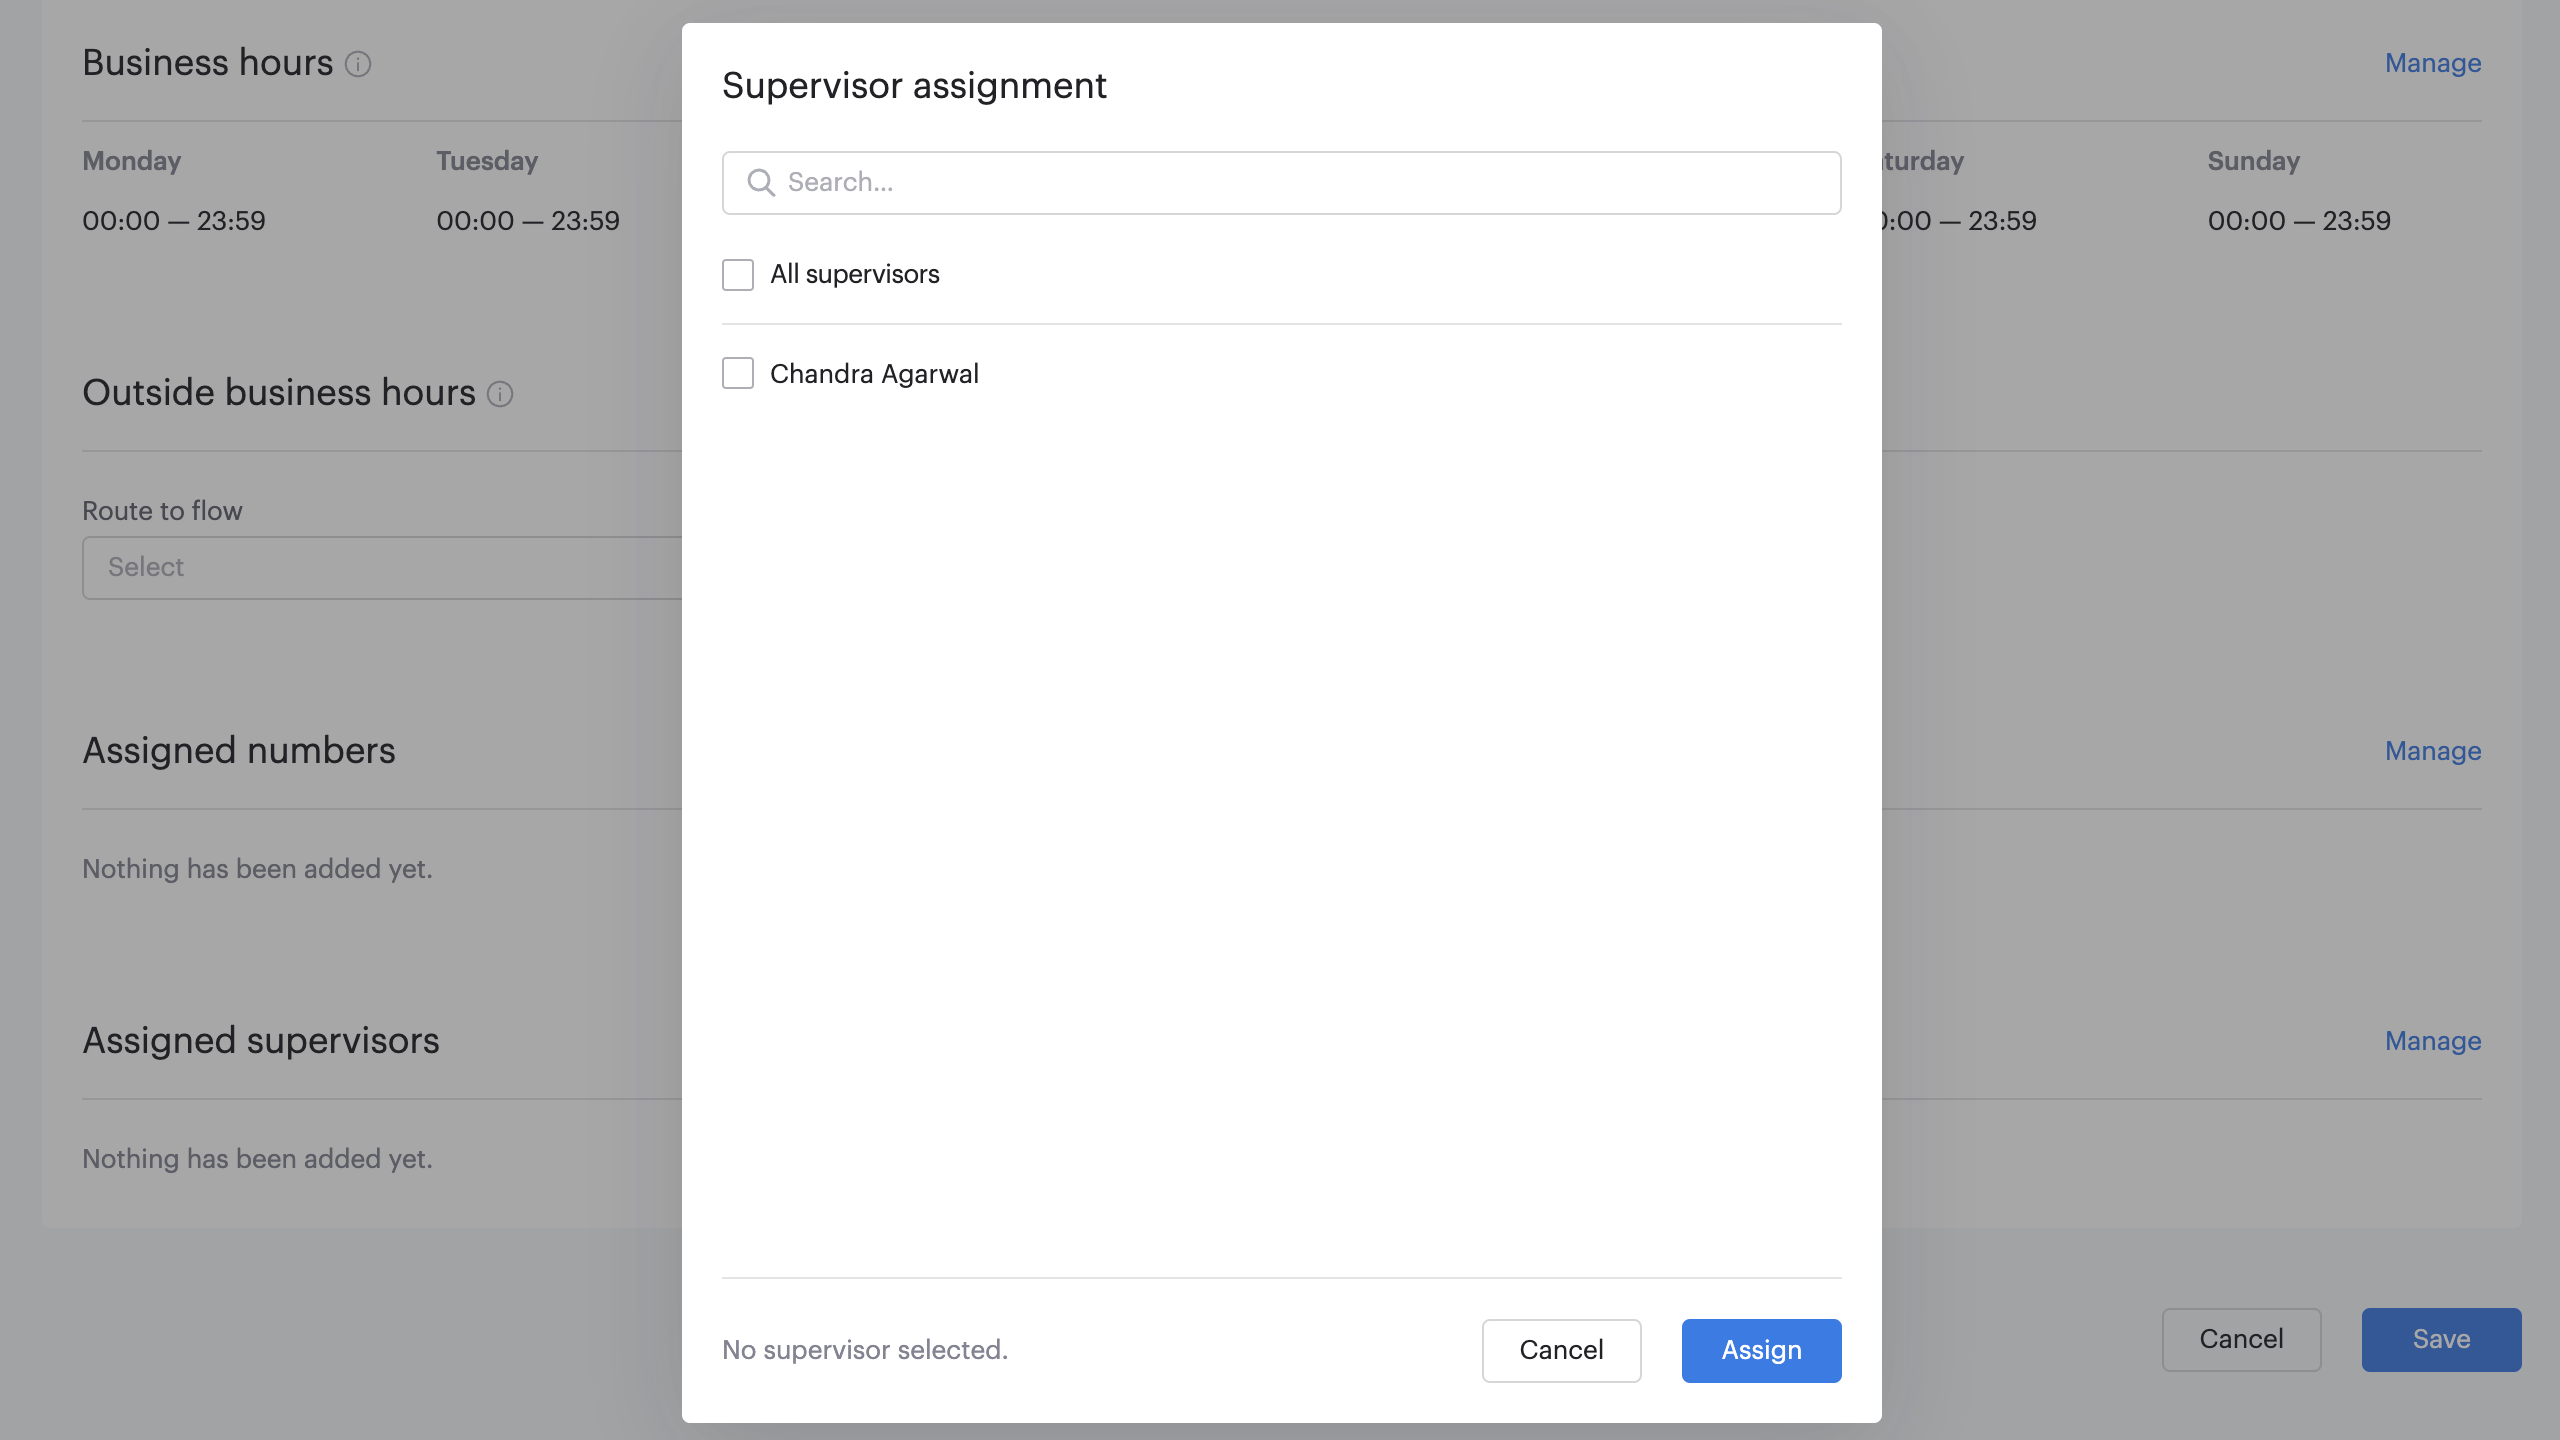
Only users assigned to the default Supervisor security access group role are displayed in this panel.