Who should read this article: Administrators
The basic steps needed for a chatbot.
This is part 2 of the Build your own chatbot use case.
Introduction
Many people do not like interacting with chatbots because they feel a chatbot will not be able to handle their inquiry, or they feel that a chatbot will not give them personalized service.
But, with a bit of planning, you can create a great chatbot experience for your contacts. Refer to Build your own chatbot to read some suggestions for how to get ready to create your first chatbot.
Some of the benefits of chatbots over human agents are:
- Consistent customer experience
- Rapid, automated data retrieval
- Continuous availability
- Cost efficiency when handling simple, common, or repetitive tasks
- Instant response time and the elimination of wait times
- High interaction volume handling
- Accuracy
If you take your time and carefully plan your chatbot, it can be one of your most productive "agents".
Planning
As a contact center administrator, you already create guidelines, scripts, and procedures for your agents. Begin with your current business processes and break them down into individual steps and decision points.
Map these individual steps to one of the nodes of the Flow Builder Digital flow canvas:
| Icon | Node | Description |
|---|---|---|
| Start | The first node of every flow. When an interaction reaches the flow according to the business rules, such as day and time, the flow starts here. A flow may have only one Start node. | |
| Message | Send an automated chat, WhatsApp, or Telegram message to the contact. This node leverages variables to personalize messages. | |
| HTTP Request | Seamlessly integrate interaction flows with web services, such as CRMs, help desks, e-commerce software, websites, and other data sources. | |
| Conditions | Routes interactions based on defined rules or criteria, enabling logic-driven decisions that determine how a contact’s request is handled. | |
| Route | Direct the interaction to a Queue or Agent. | |
| End | The last node of the flow if an interaction was not routed to any other node. Archives the interaction. A flow may contain multiple End nodes. |
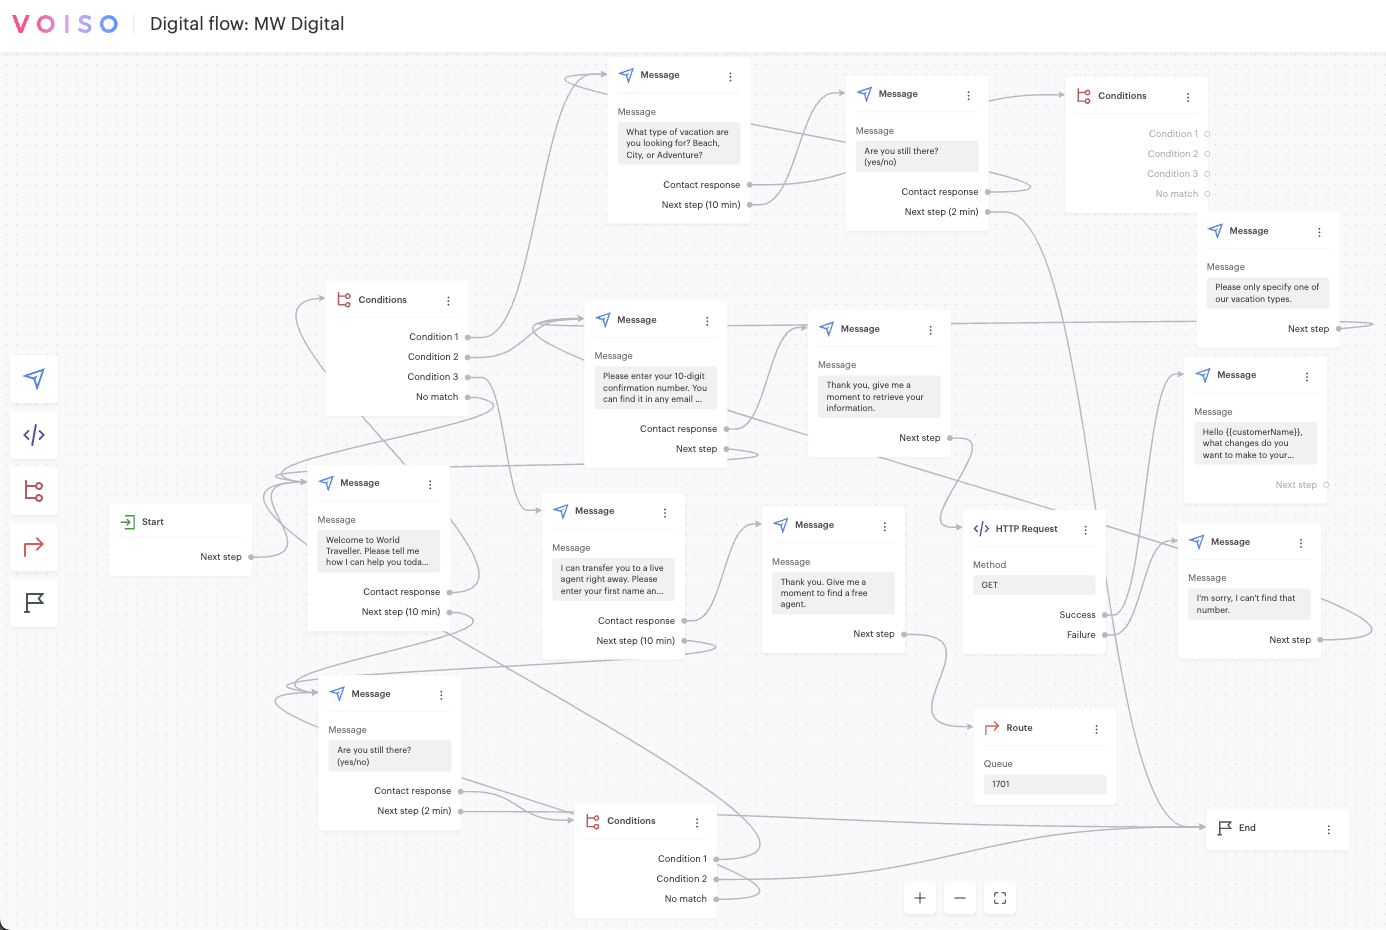
High-level example
Every Digital flow begins with the Start node. This node represents the entry point for the channels specified in the flow, such as webchat or WhatsApp.
1. Greeting and Introduction
The next node after the Start node will likely be the Message node where, the chatbot introduces itself and greets the contact. This greeting should be similar in tone to the greeting used by voice call agents. A Fintech chatbot might be serious and formal, while a travel agency chatbot might be friendly and chatty.
2. Purpose of the interaction
After greeting the contact, another Message node might present a series of options and ask the contact to choose. For example:
- Check account details
- Make a payment
- Report an issue
- Speak with a representative
3. Identity verification
Depending on the nature of your organization or the option specified by the contact, it might be important to verify the contact's identity before proceeding. Use the Message node to request contact information, store the response in a variable, and then use the HTTP request node to send an API request to your web service.
The request can be used to verify a password, email address, or account number or to send a One-time Password (OTP) from your web service via email, SMS, WhatsApp, or other service.
If your web service does not support sending OTPs, you can use the Voiso APIs to send an SMS or WhatsApp message.
4. Refine the query
Based on the information the chatbot gathered in Step 2, gather additional information to understand the contact's needs.
The Message node can be used to present new options to the contact which can be parsed and tested with the Conditions and HTTP request nodes.
5. Respond with solutions or information
Use the Message node to reply to the contact with a solution or information retrieved from your web service by the HTTP request node.
6. Escalation option
At each significant step in your chatbot flow, be sure to offer the option to escalate the interaction to a live agent. Use the Message node to present the option to escalate, the Conditions node to analyze the request, and the Route node to redirect the interaction to an agent, queue, or external phone number.
7. Wait time information
In certain situations, there might be delays, such as waiting for a live agent to be available or if a self-service request requires more than a few seconds to process. Use the Message node to provide important information during the conversation.