Who should read this article: Agents
Learn how to schedule, manage, and handle scheduled callbacks to provide timely follow-ups for your contacts.
If you are looking for information about setting up the Scheduled Callback feature, refer to Scheduling callbacks.
Introduction
The Voiso Scheduled Callback feature empowers you to provide better customer service by allowing contacts to request a callback at a time convenient for them. It helps manage your workload, improves efficiency during peak hours, and ensures you can deliver focused support by rescheduling calls for off-peak periods.
You can also suggest a scheduling callback for your contact. This allows you to gather necessary information and review a contact’s history before reconnecting, ensuring you are well-prepared to resolve their issues.
You may also choose to schedule a callback to follow up on your current call after completing promised actions or resolutions.
Scheduling a callback on a call
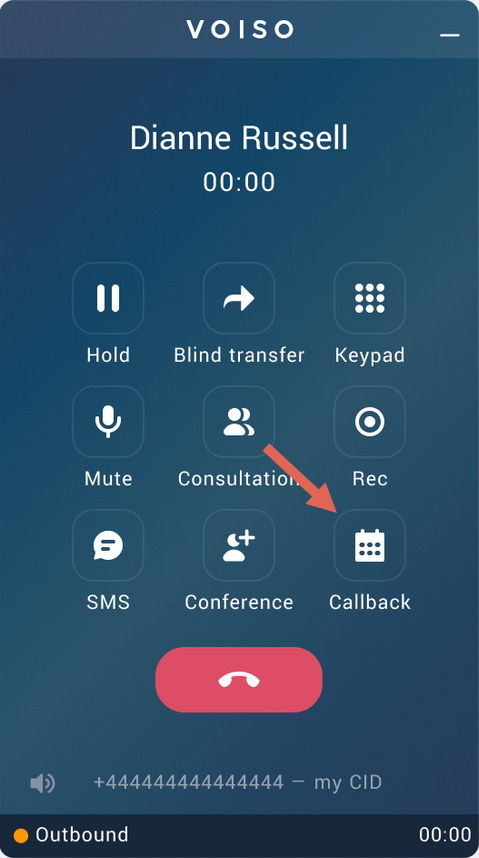
Follow these steps to schedule a callback while on a real-time call with a contact:
- On the Call screen, click the Callback button. (Note: You may need to click the More button to access the Callback option).
- On the Schedule a callback screen, enter the following information:
- To: The contact’s phone number. The current number is filled in by default but can be changed. (1)
- Date and time: Choose a time at least 30 minutes in advance and within 30 days. (2)
- Time zone: Confirm the time zone detected for the contact’s phone number or select a different one. (3)
- From: Select a Caller ID from the list provided. Inform the contact of the Caller ID they should expect. (4)
- Callback note: Add a note to remind yourself of key details for the callback. (5)
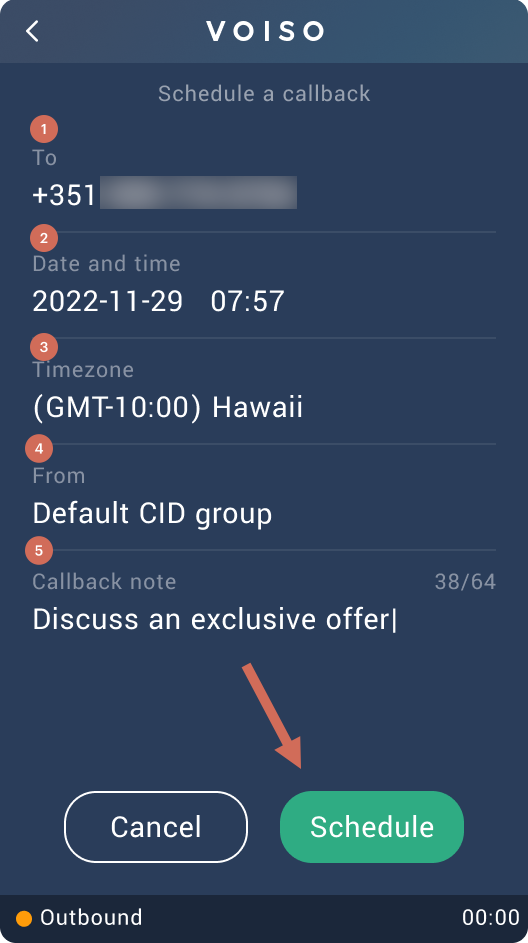
- Click Schedule to schedule the call.
Scheduling a callback from your history
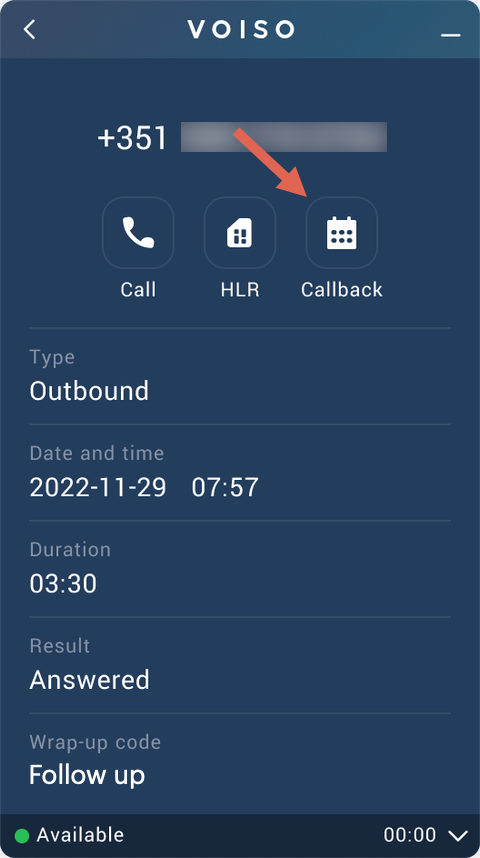
To schedule a callback from your call history, follow these steps:
- On the Agent Panel, click the Call history button to display the Call History screen.
- In the Recents list, find the call from a contact you want to create a callback for.
- Click the Callback button, then follow the steps above.
Scheduling callbacks in detail
The following table describes the Schedule Callback fields in detail:
| Field | Details |
|---|---|
| To | Automatically populated with the contact's phone number. You can change this number if needed. Ensure the full number, including the country code, is entered. |
| Date and time | Defaults to 30 minutes from the current time. You can set a time between 08:00 and 22:00 within the next 30 days. |
| Time zone | Automatically detected based on the phone number. If incorrect, you can search and select the correct time zone. |
| From | Defaults to the Caller ID of the original call. You may need to choose a different Caller ID based on your contact center’s policies. |
| Notes | Add up to 64 characters to include key details for reference during the callback. These notes are visible in your Agent Panel when handling the callback. |
Handling a callback call
To be ready for the scheduled callback, ensure that your status is set to Available.
If your status was not set to Available at the scheduled time of the callback or the contact does not answer the call, Voiso waits a certain amount of time, then dials the call again.
At the date and time of the scheduled callback the call rings on your Agent Panel and your status changes to Ringing.
Voiso waits for you to click Answer then calls the contact.
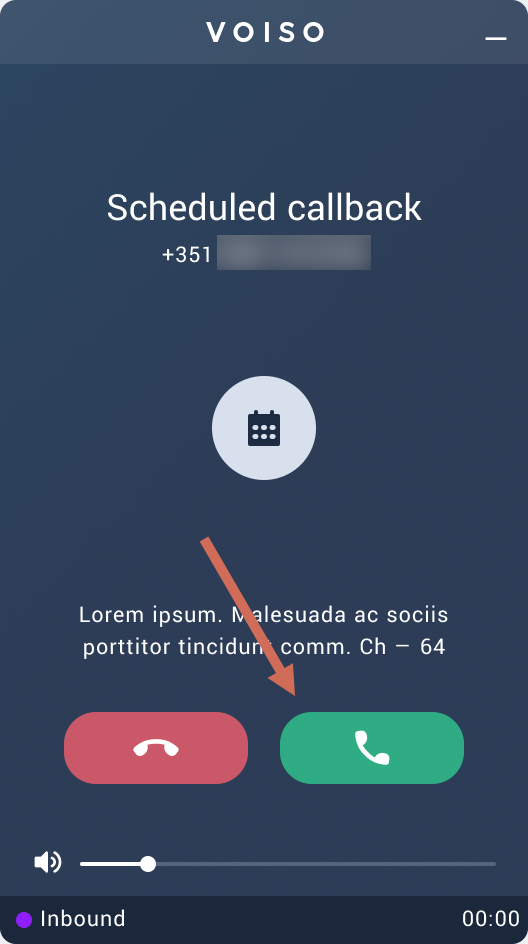
When the contact answers, your status changes to Outbound.
Scheduled callbacks may be retried multiple times based on how your contact center is configured. If you are not available to handle the callback, it may be rerouted to a queue for another available agent to handle.