Who should read this article: Agents
Two-factor authentication (2FA) helps to keep your account secure.
In rare cases, a contact center may choose to disable 2FA. If this applies to your contact center, the information in this article does not apply.
Introduction
All Voiso user accounts are protected by two-factor authentication (2FA), also known as multi-factor authentication.
Before using Voiso for the first time, including on the Voiso Mobile app, the Freshdesk integration, and the Salesforce integration, you must complete the two-factor authentication setup.
Once set up, you'll be required to enter a 6-digit code generated by Google Authenticator each time you sign in. This includes signing in from the Agent Panel, CRMs like Salesforce, and the Voiso Mobile app.
To complete setup, download and install the Google Authenticator app on an Android or iOS device that you have with you at all times. You’ll use this app to generate a sign-in code every time you access your account.
If you don't have access to an Android or iOS device, you can use the Authenticator Chrome extension instead. For more information, see Using the authenticator browser extension.
Setting up 2FA for your account
Watch the video below for a step-by-step demonstration of the 2FA setup process in Voiso. Then follow the instructions in the procedure to complete the setup on your account.
-
Get your contact center URL or sign-in link from your administrator, supervisor, or team lead.
-
On the Sign in page, enter the email address and password provided by your contact center.
-
Click Sign in to begin the setup process.
-
On the welcome screen, click Set it up now to display the Two-factor authentication page.
-
Click Get started to open the Install Google Authenticator app page.
-
On your Android or iOS mobile device, download and install the Google Authenticator app.
-
Launch the app on your mobile device.
-
Follow the on-screen instructions to sign in to a Google account or continue without one.
-
Back in Voiso, click Next on the Install Google Authenticator app page.
-
Use your mobile device to scan the QR code displayed on the Scan the QR code page, then click Next. If you're unable to scan the QR code, manually enter the setup key provided below it.
NoteIf you see a message like Looks like there aren't any Google Authenticator codes yet, click Add a code.
If you already have codes for other services, tap the + icon to add a new one.
If prompted with Set up your first account, scan the QR code or enter the setup key manually. -
The Google Authenticator app displays a 6-digit code.
-
On the Voiso Verify configuration page, enter the code and click Confirm.
-
A confirmation message appears indicating that the setup was successful. Click Go to Sign in to proceed.
-
On the Sign in page, enter your email and password again, then click Sign in.
-
On the Two-factor authentication page, enter a new 6-digit code from the Google Authenticator app and click Confirm.
You must repeat steps 14 and 15 each time you sign in to your Voiso contact center account.
Authenticator app and time syncing
Authenticator app 2FA codes rely on the time settings of your mobile device or computer. If you experience issues using the Authenticator app for 2FA, it might be the result of your device's time setting being out of synchronization. This can occur when you manually set the time on your device or if your device has not been connected to the internet for a long time.
To ensure that your device uses the correct time for your location, switch the time settings from Manual to Automatic. This is done in the Settings app where you specify the date and time. If the setting is already on Automatic, turn the setting off and back on to resynchronize the device time.
Using the Authenticator browser extension
If you do not have access to a mobile device, the Authenticator extension from the Chrome Web Store can be used to generate Google 2FA codes. Follow these steps:
- In the Chrome Web Store, search for Authenticator and add it to Chrome as an extension.
- Sign in to Voiso and click the Set it up now link to start the Voiso Two-factor authentication process.
- Skip the Install Google Authenticator app step.
- When the QR code is displayed, click the Authenticator extension icon in the toolbar.
- In the Authenticator panel, click the Scan QR Code icon, then drag a selection around the QR code. Click Next to verify the configuration.
- Click the Authenticator icon to obtain a 6-digit code.
- Click the code to automatically copy it, then paste the code into the Verify configuration panel. Click Confirm.
- When the Setup successful panel displays, click Go to Sign in to sign back in to Voiso.
- Sign in with a Voiso username and password, then repeat the process of obtaining a code from the Authenticator extension to complete the two-factor authentication sign in process.
2FA reset for lost devices
If you no longer have access to the Google Authenticator app—for example, because you've lost your mobile device or work computer—or if you experience errors during the initial 2FA setup, you can ask your supervisor or administrator to reset your 2FA status. This will allow you to complete the setup process again the next time you sign in.
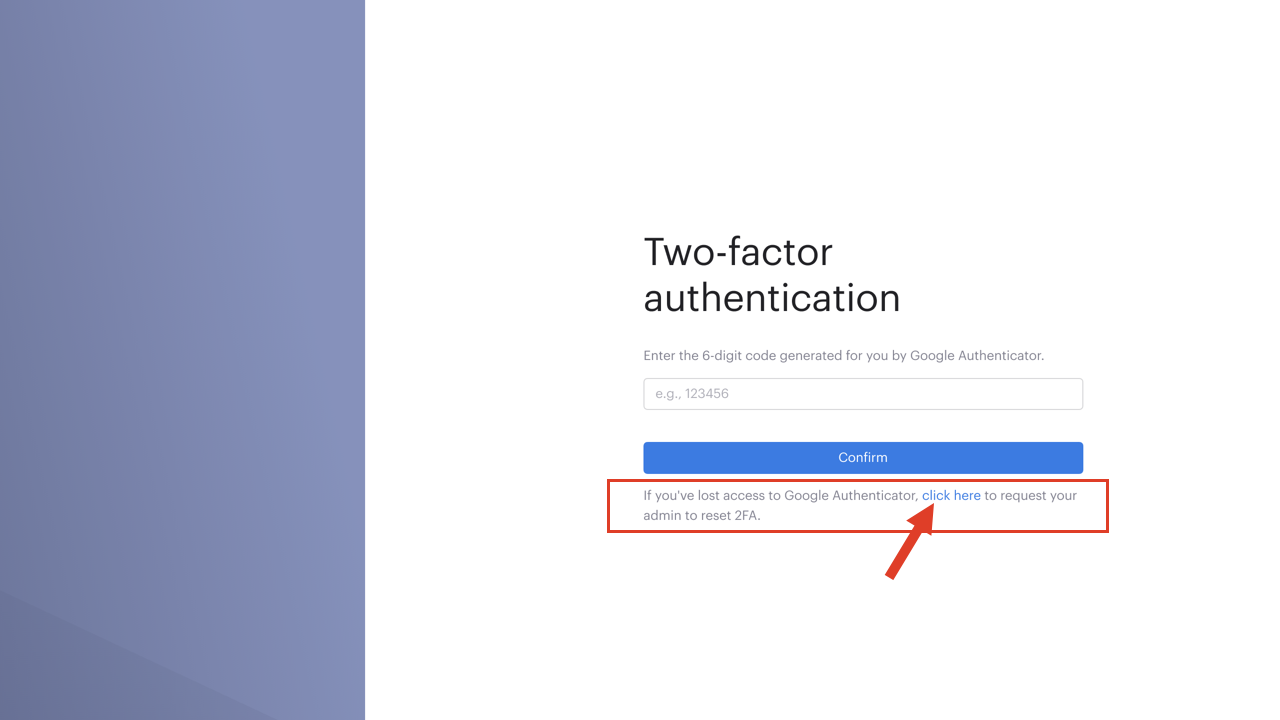
To request a 2FA reset, navigate to the Voiso sign-in page and attempt to sign in. On the Two-factor authentication page, click the link below the Confirm button to alert your supervisor that you need your 2FA status reset.
After your supervisor resets your 2FA status, sign in to Voiso and repeat the 2FA setup for your account.
To avoid delays, we recommend letting your supervisor know directly after requesting the reset.