Who should read this article: Administrators
Voiso's Webhooks feature allows you to subscribe to call events and integrate them into your automated workflows, custom applications, and external systems.
The Webhooks feature is available for contact centers on the Pro plan or higher.
Introduction
Webhooks enable real-time communication between applications by sending HTTP requests containing event data when a predefined trigger occurs. This allows you to automate processes, synchronize data, and build integrations tailored to your business needs.
For a complete list of Voiso webhook events and their payload structures, refer to the Webhooks overview in the Voiso developer documentation.
To protect your data, only secure HTTPS endpoint URLs are supported for webhooks.
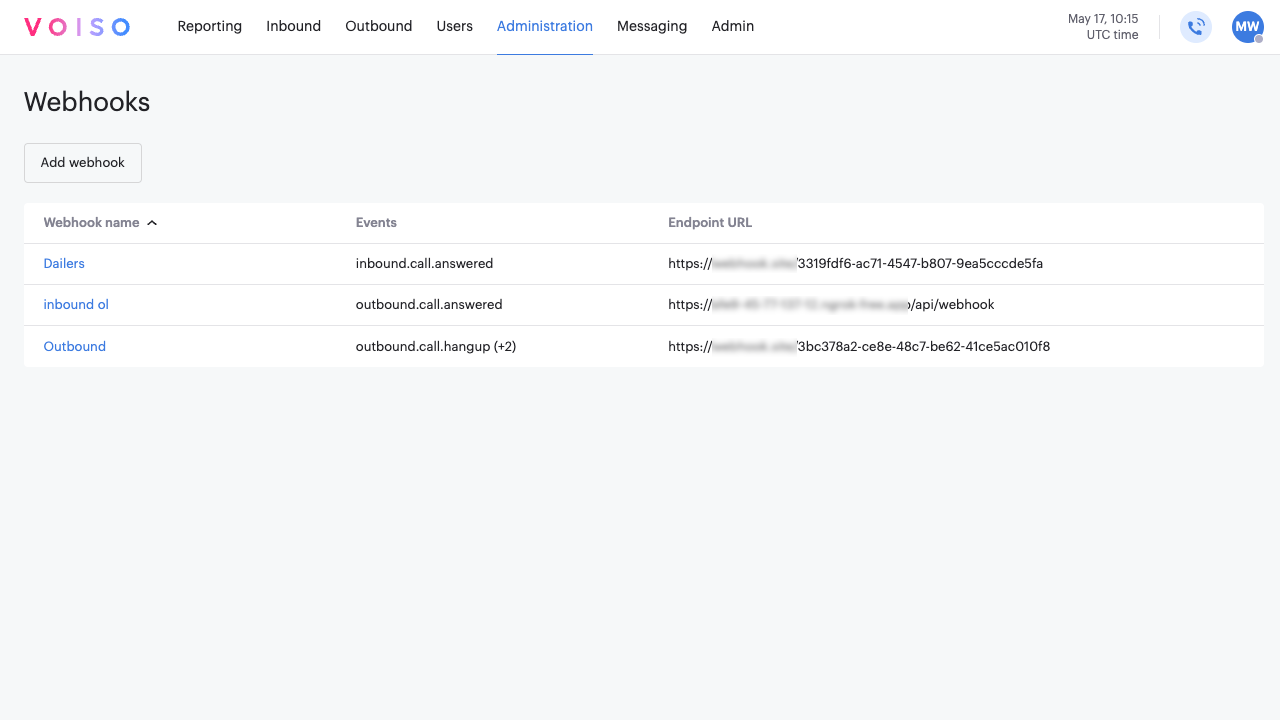
Managing Webhooks
To create and manage webhooks:
- In the Voiso navigation bar, go to Administration > Webhooks.
- The Webhooks page displays a list of existing webhooks configured for your contact center.
- Click a webhook name to view or edit its settings.
- Click Add webhook to create a new webhook.
- To delete a webhook, hover over its row and click the Delete (trash can) icon.
Creating a Webhook
To set up a new webhook, click Add webhook to open the Add webhook page. Complete the information required for each of the sections, then click Save to finalize the webhook configuration:
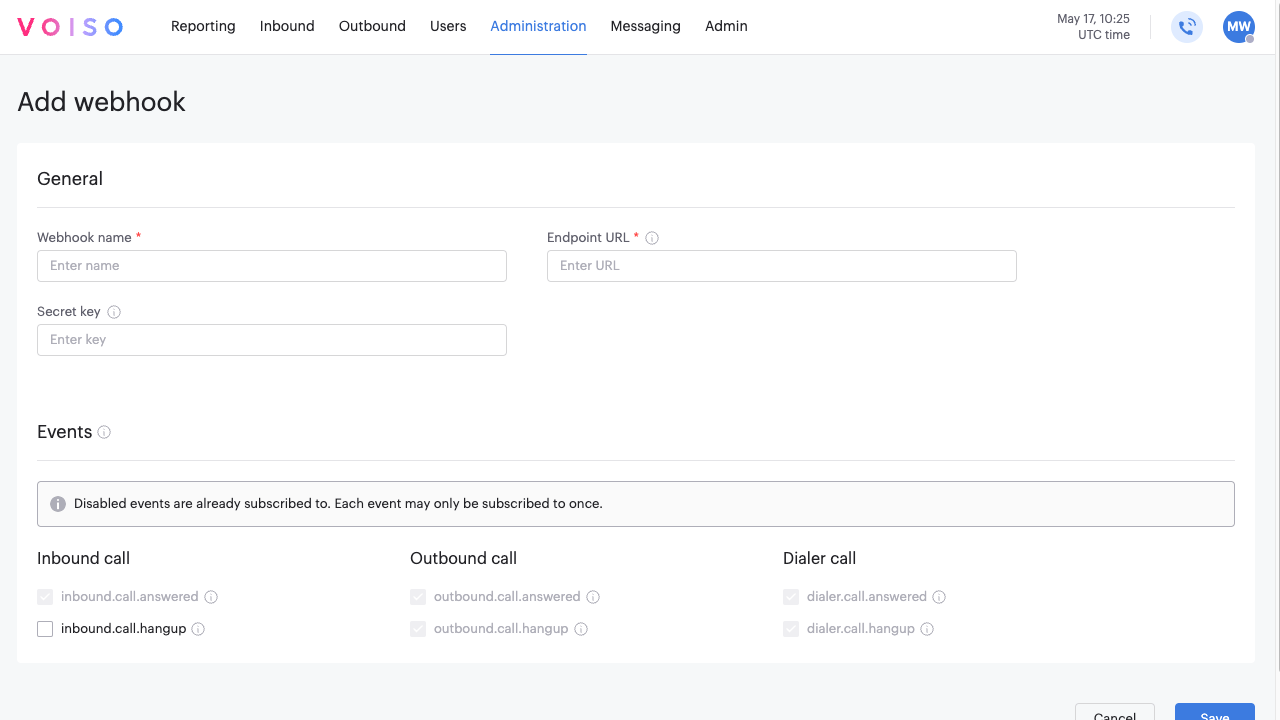
General section
The General section defines the core configuration for your webhook. These settings determine how the webhook is identified, where event notifications are delivered, and how request authenticity can be verified. Complete the following fields to establish a secure connection between your contact center and your external system.
- Webhook name – Enter a descriptive name that aligns with your business process.
- Endpoint URL – Specify the HTTPS URL where webhook notifications should be sent.
- Secret key (optional) – Enter a secret key for validating webhook requests on your system.
Authentication section
Use authentication to safeguard your data and contact center by ensuring that your webhook traffic is not exposed to spoofing, data tampering, or unauthorized access. There are four authentication options available from the Method menu:
- None – Not recommended. Disabling authentication means webhook traffic is sent without any verification, leaving your system vulnerable to spoofing, tampering, and unauthorized access. Consider using a custom header to provide an authentication key-value pair.
- API key – This method uses a custom header to transmit a static key. You define both the header name and the key value. The receiving system checks incoming requests for the expected header and key pair. This approach is straightforward to implement and effective for simple validation use cases.
- Basic – This method uses HTTP Basic Authentication by encoding a username and password combination into a base64 string. The credentials are included in the Authorization header of each webhook request. This method is widely supported and useful when integrating with systems that require username/password-based authentication.
- Bearer token – This method includes a token in the
Authorizationheader using the Bearer scheme (e.g.,Authorization: Bearer your-token). The receiving system verifies the token to confirm the request is legitimate. Bearer tokens are commonly used with OAuth 2.0 or similar token-based authentication mechanisms and are suitable for more secure, token-driven environments.
Headers section
The custom headers feature allows you to define up to five additional header key-value pairs to include in each webhook request. These headers can be used to pass extra information—such as authentication tokens, environment identifiers, or integration-specific metadata—alongside the payload. This is useful when the receiving system expects specific headers for request validation, routing, or logging.
Click Add header to display the Key and Value fields. Enter a key name and value, such as x.client.signature and 3ab24f91d6e84917a6f75bd849afc2ef.
Click X to remove a header key-value pair.
Events section
In the Events section, select one or more supported interaction events that should trigger the webhook. For a full list of available options, refer to the Supported Events table in the developer documentation. If an event is already assigned to another webhook, it will be unavailable for selection.
Monitoring and retrying inactive webhooks
Webhook events are maked as Inactive after five failed delivery attempts. Inactive events are flagged with a notification icon in the webhook list.
To programmatically manage failed deliveries:
- Use
GET /api/webhooks/v1/failuresto retrieve webhook events in the Inactive state. - Use
POST /api/webhooks/v1/failures/{id}/retriggerto manually retry a failed webhook.
These endpoints are intended for users with custom webhook implementations who need to detect and resolve failures outside of the Voiso application.