Who should read this article: Administrators
How to integrate Voiso with the HubSpot CRM.
Introduction
Voiso integrates with the HubSpot CRM through an app that you connect with when you authenticate and enable HubSpot in your contact center. Contact your Voiso account manager to add the HubSpot integration to your contact center. The Voiso HubSpot integration provides calling list import for outbound Dialer campaigns and click-to-call, call history, and screen-pop functionality for your agents while using HubSpot. Agents can make calls using the Agent Panel by clicking the phone icon or a phone number in HubSpot.
Features
The Voiso Integration app for HubSpot enables the following CRM features:
| Feature | Description |
|---|---|
| Calling List Import | Voiso pulls selected contact phone numbers directly from the HubSpot contact list for Dialer campaigns. |
| Screen Pop | The contact record is automatically displayed in HubSpot when an agent handles a call in Voiso. |
| Click-to-call | Agents initiate calls in HubSpot by clicking the Make a phone call icon instead of manually dialing the number. |
| Call History | Call outcome logging and call details are automatically transmitted to the HubSpot database after a call and are available from the Calls table. |
| WhatsApp messages | CRM Card Conversation view as a timeline event |
Integration
To integrate Voiso with HubSpot, navigate to Administration > Integrations, then click the HubSpot tile.
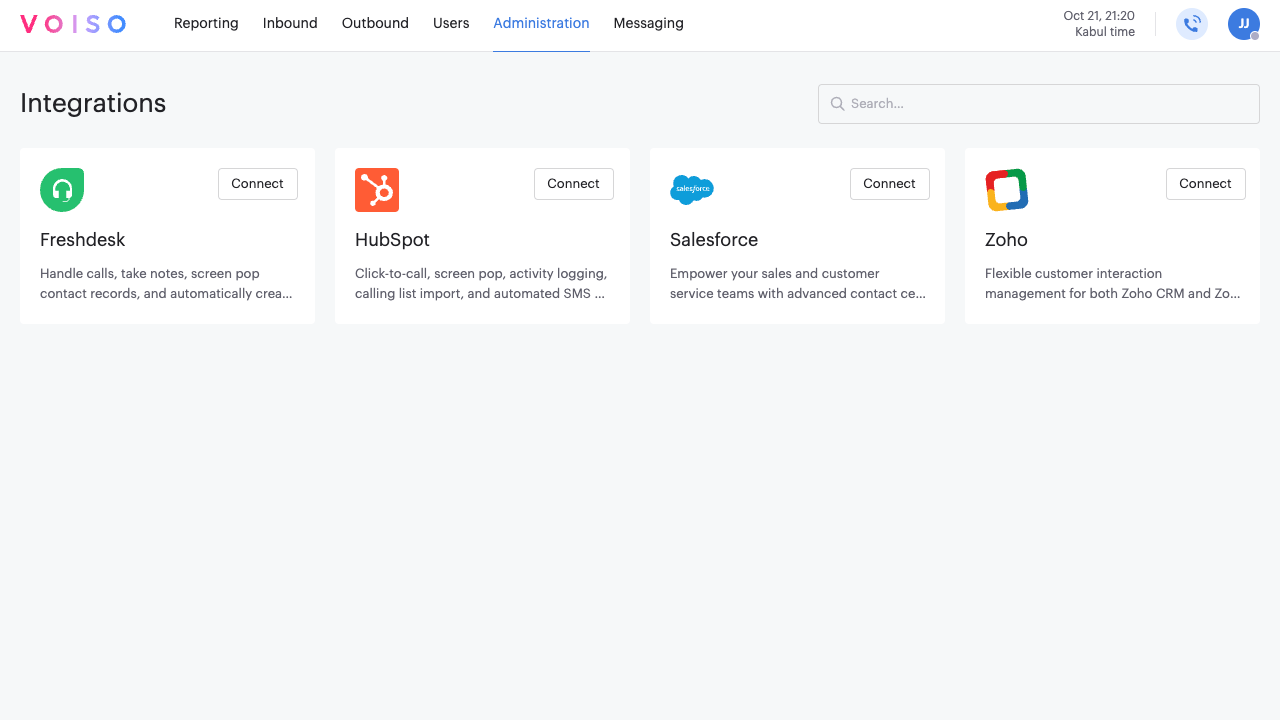
The HubSpot page provides information about the HubSpot integration, instructions for connecting the integration, and a list of prerequisites you should have in place before clicking Connect.
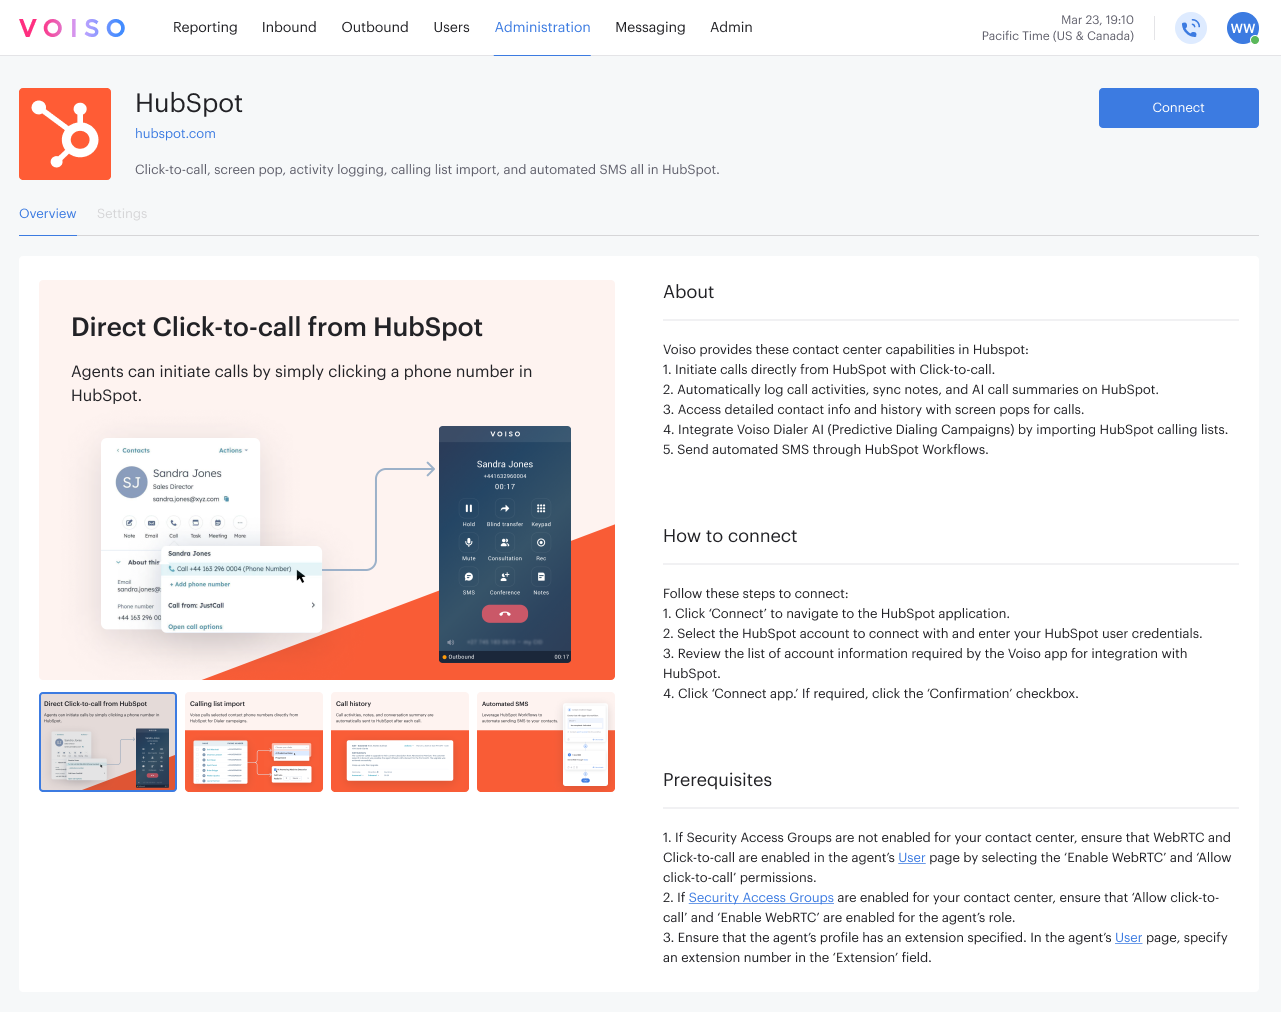
The following video walks you through the integration process.
Managing your integration
To manage an existing HubSpot integration, navigate to Administration > Integrations, then click the HubSpot tile.
On the HubSpot integration page, you can reconnect an integration that has lost connection or disconnect a connected integration.
Click the Edit connection button and selected either Reconnect or Disconnect.
Reconnecting an integration
To reconnect an integration that has been disconnected, either manually or as the result of an error, or to modify the connection, click Edit connection, then select Reconnect.
Follow the on-screen instructions to connect your integration.
Disconnecting an integration
To disconnect an integration, click Edit connection, then select Disconnect.
In the Disconnect integration panel, click Disconnect to remove the integration from your contact center.
Settings
The Hubspot page Settings tab enables you to view your account ID and enable available features.
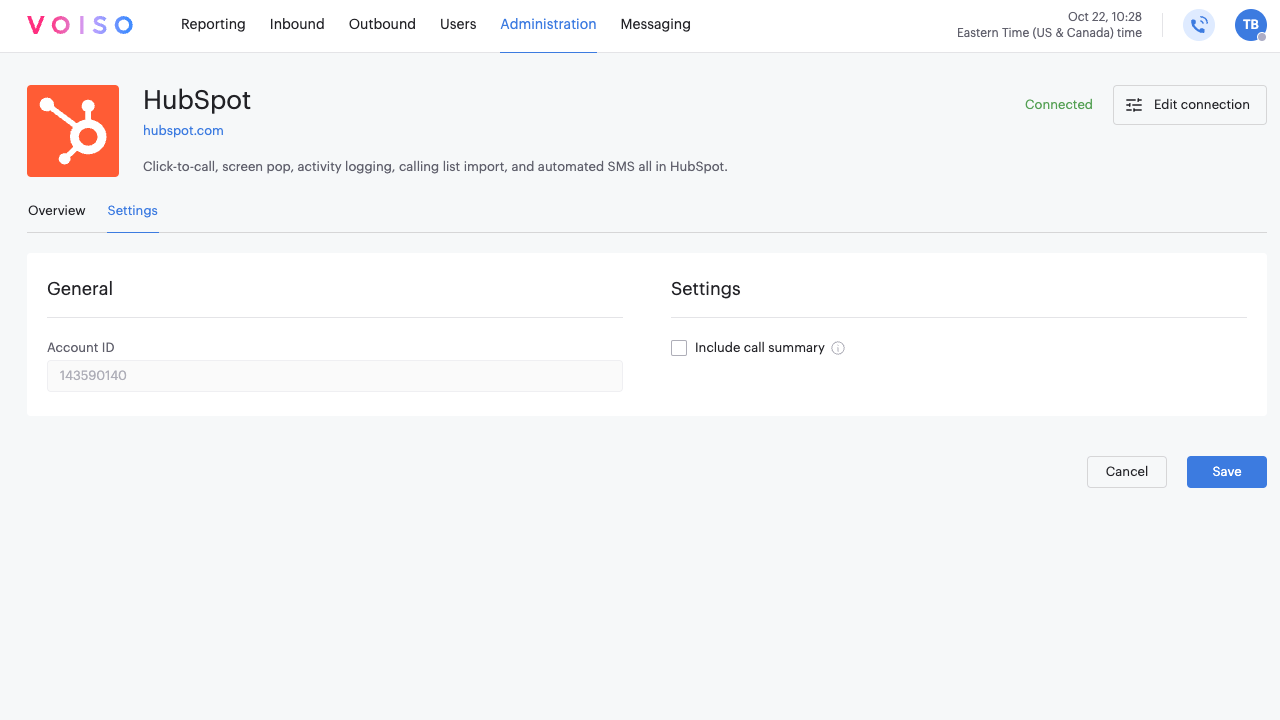
General
This section displays the HubSpot account ID used to register the integration.
Settings
This section enables you to enable the following features:
- Include call summary: This feature highlights important points and key topics of voice interactions. If Speech Analytics is enabled in your contact center, select the Include call summary option to include a summary of the call transcript in the call history.
- Contact lookup: This feature enables you to view contact details and an interaction history of the contact in Agent Workspace.
- Call logging for Inbound Calls: Automatically creates HubSpot call logs for all inbound calls that are answered, missed, answered by voicemail, or abandoned.
- Call logging for Manual Outbound Calls: Automatically creates HubSpot call logs for all manual outbound and click-to-call calls.
- Call logging for Callbacks: Automatically creates HubSpot call logs for all queue callbacks and scheduled callbacks.
- Call logging for Dialer: Automatically creates HubSpot call logs for all dialer calls.
Contact masking in HubSpot
The Contact masking in HubSpot CRM section enables you to control whether agents can see contact phone numbers in HubSpot when using click-to-call. Refer to the HubSpot contact masking article for details on how to set up masking in HubSpot and then configure Voiso to retrieve and dial the contact's actual phone number.
HubSpot automation workflows
HubSpot CRM provides task automation using the Workflow module. The HubSpot Workflow module enables you to trigger actions based on specified criteria such as call events.
The Voiso HubSpot connected app includes the Send SMS action that you can trigger based on a call event such as Contact enrollment, Call started, Call ended and so on.
Refer to Create workflows in the HubSpot knowledge base for detailed information about creating a new workflow. If you are already familiar with workflows, follow these steps below to automate sending an SMS based on the Call ended event trigger:
- Navigate to Automation > Workflows.
- Click Create workflow and select From scratch.
- On the How do you want this workflow to start? page, select Blank workflow. Click Next.
- On the Actions tab, click Set up trigger in the Contact enrollment trigger panel.
- Click When an event occurs on the Enrollment triggers menu.
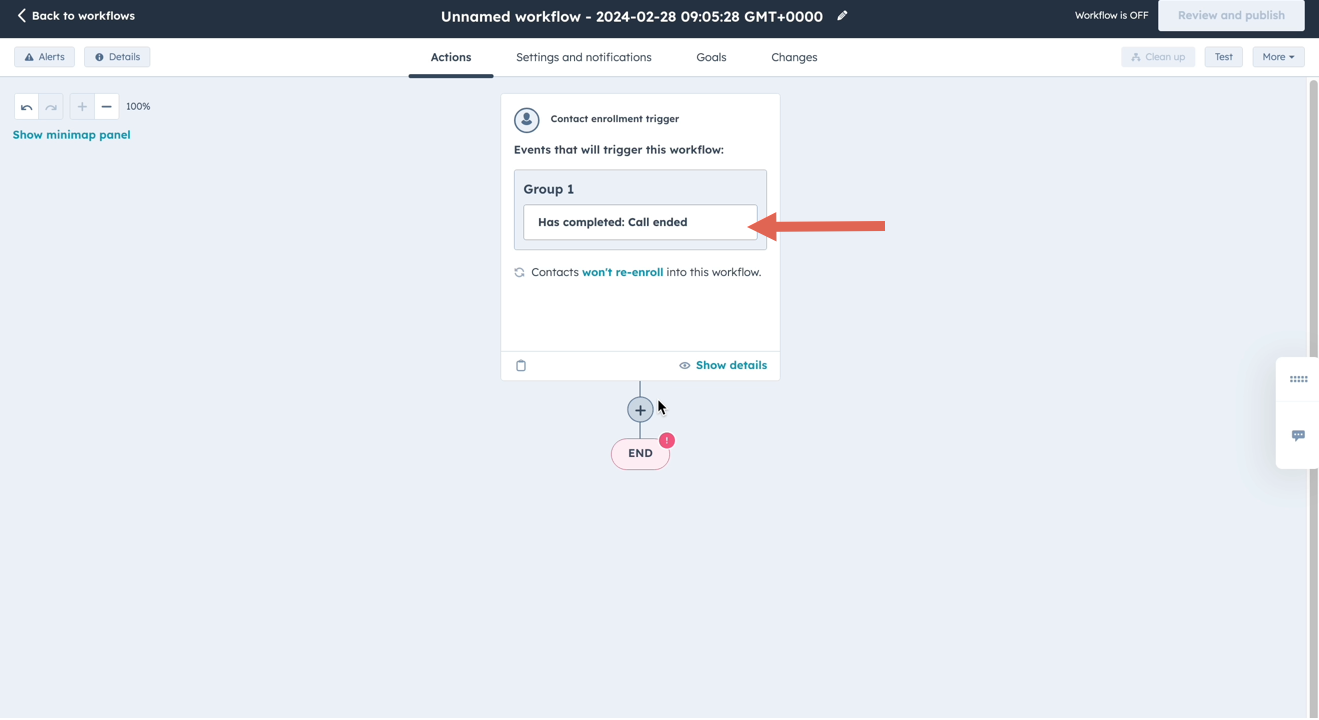
- Click Call ended on the Add trigger menu then click Done and Save.
- The Contact enrollment trigger panel should look something like this:
- Click + to add a new action based on the trigger.
- On the Choose an action menu, scroll down to Connected apps, then click the Voiso app. Click > to display the app options.
- Click Send SMS.
- Configure the message template in the Send SMS panel:
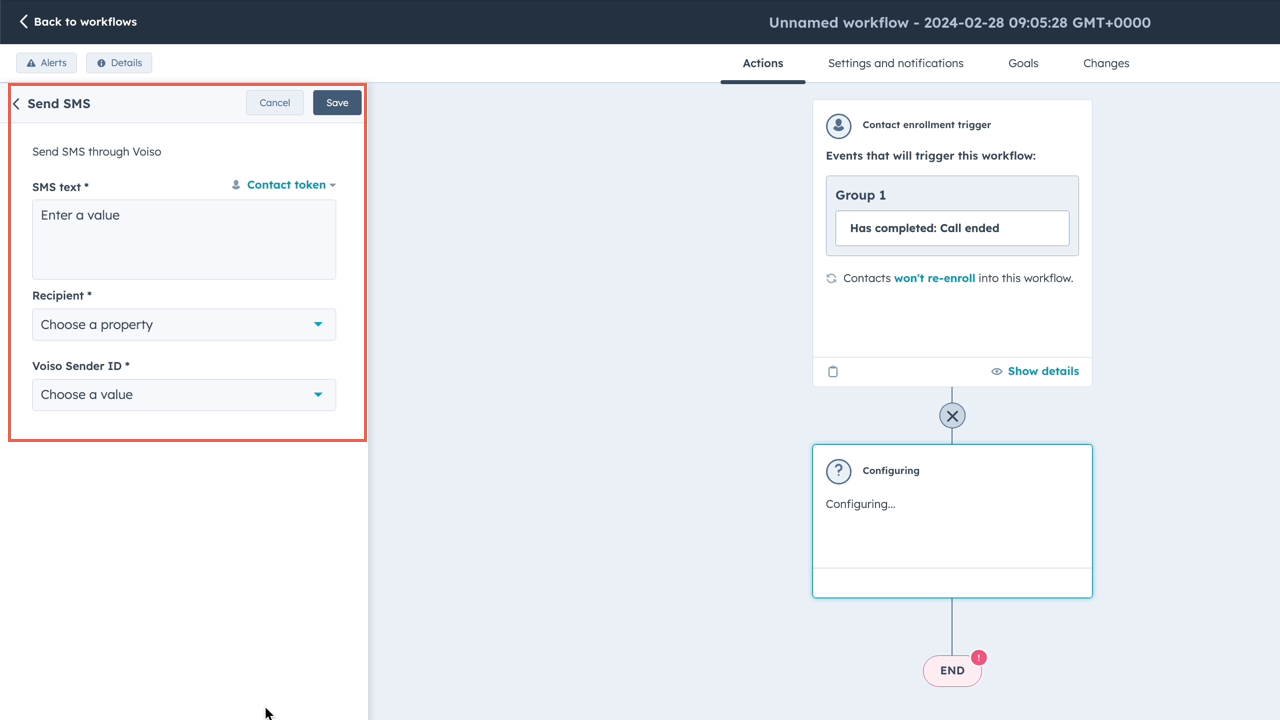
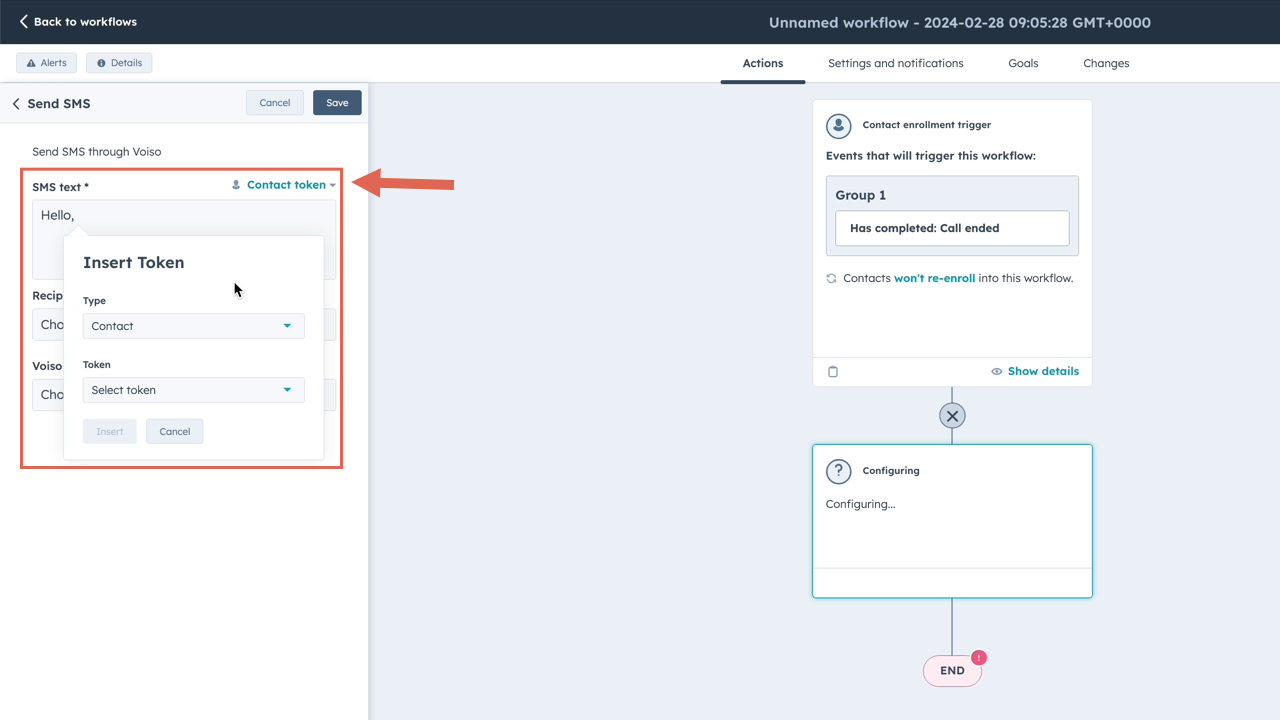
- Enter the message body in the SMS text field. Click the Contact token menu to insert placeholders, such as the name of the contact, into the message.
- Select the recipient's phone type from the Recipient menu.
- Select the sender ID of your contact center from the Voiso Sender ID menu.
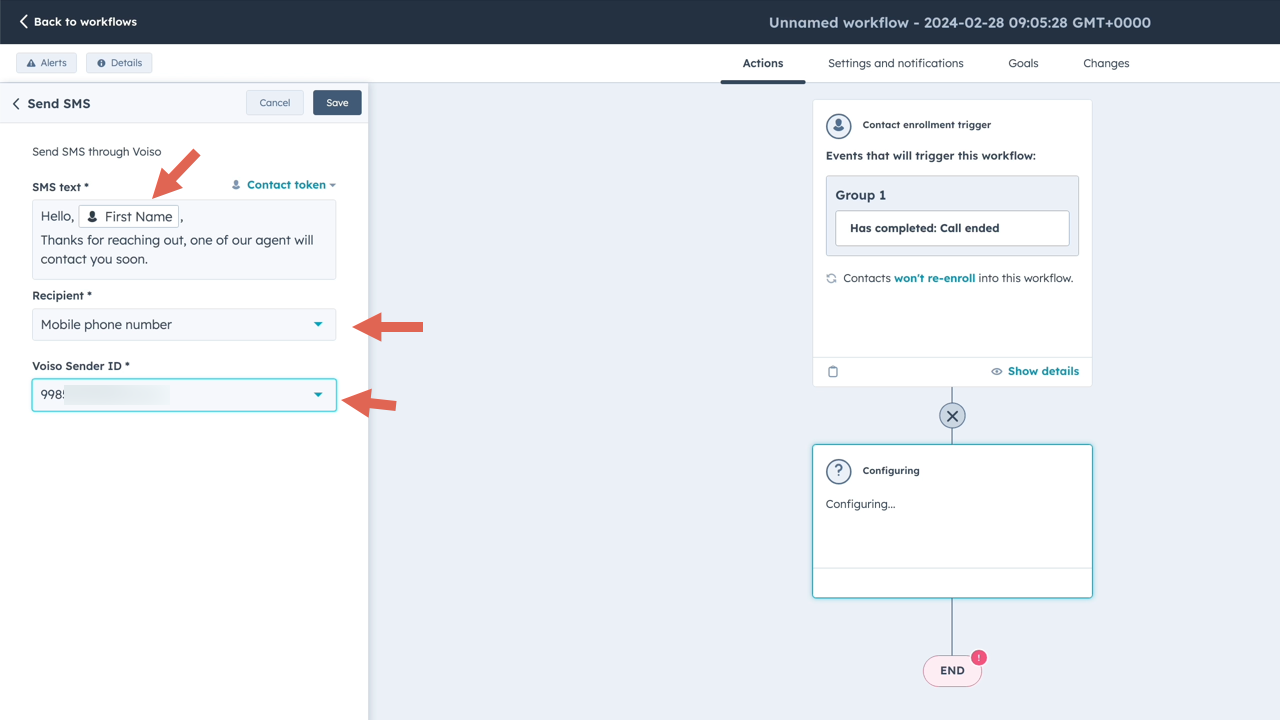
- Click Save.
- Enter the message body in the SMS text field. Click the Contact token menu to insert placeholders, such as the name of the contact, into the message.
- Name your flow by clicking the Edit icon on the workflow title bar.
- Click Review and publish to verify the steps.
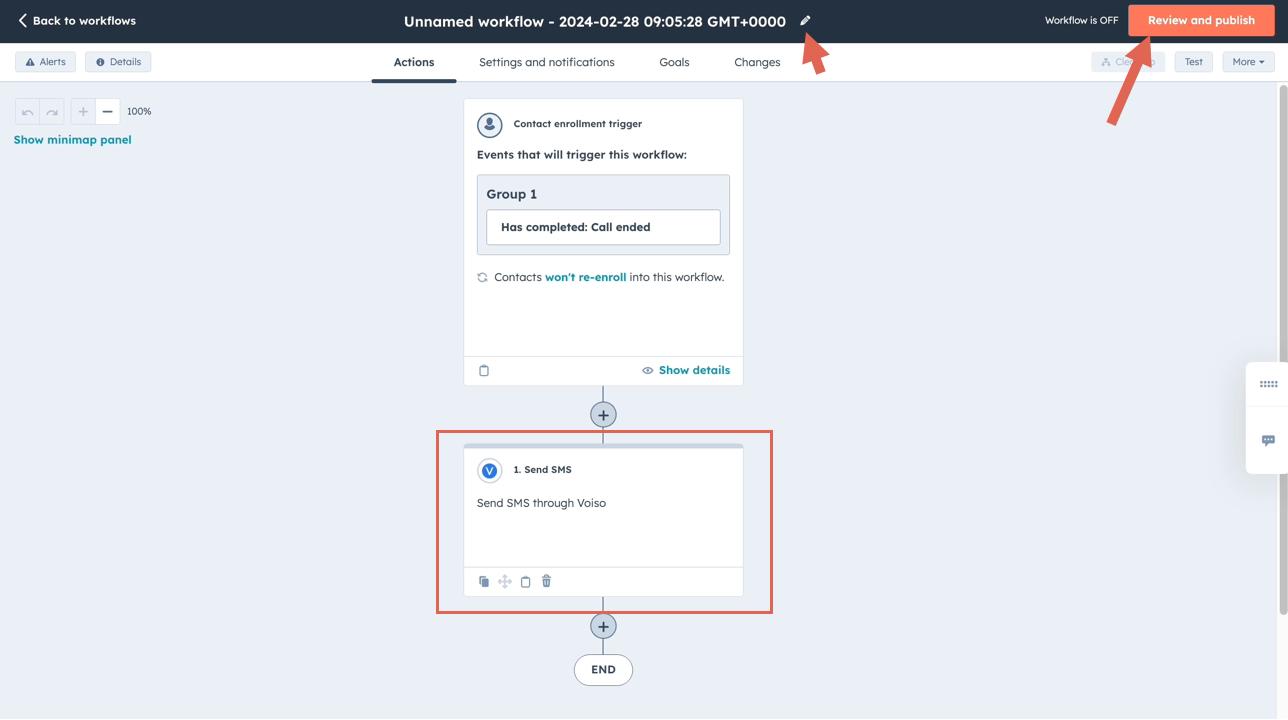
- Finally, click Turn on to make your workflow active. You can access, review, and edit your workflows at any time from the Workflows page.
Troubleshooting
Click-to-call does not open the Agent Panel
When my agents click the call button, the Voiso Agent Panel does not open.
Solution 1
Ensure that the agent's profile is enabled for Click-to-call. In the agent's User page, select Allow click-to-call. If Security Access Groups are enabled for your contact center, ensure that Allow click-to-call is enabled for the agent's role.
Solution 2
Ensure that the agent's profile has an extension specified. In the agent's User page, specify a 4-digit extension in the Extension field.
Solution 3
HubSpot requires the latest version of Google Chrome to operate correctly. Voiso also recommends using the latest version of Google Chrome for optimal performance.
Click-to-call error messages
The following error message might be displayed to the agent when they attempt to use Click-to-call in HubSpot but they are not signed in to their Voiso account.
Error message 1
To place a call, first log in to your {{variable.BrandName}} contact center account to launch Agent Panel, then retry this activity.
Solution
- Open the Voiso contact center in the latest Chrome browser.
- Sign in to Voiso.
- Launch Agent Panel.
- Repeat the click-to-call action.
Error message 2
Agent logged off. Please reload Agent Panel.
Solution
- Navigate to Voiso contact center in the latest Chrome browser.
- Click the Agent Panel icon in the top navigation bar.
- Repeat the click-to-call action.
Error message 3
No connection.
Solution
There is a system problem. If the issue persists, agents should contact their supervisor or administrator.
My contact center moved to a new cluster and now HubSpot integration does not work
Your contact center was moved from one Voiso to another and now the HubSpot integration is not available.
Solution
To resolve this issue, follow these steps:
- Go to Administration > Integrations.
- Click the HubSpot tile.
- Click Edit connection.
- Follow the on-screen instructions.
Screen pop is not working
My agents receive an inbound call in Voiso, but there is no screen pop in HubSpot.
Solution
Contact matching between Voiso and HubSpot is done using the ANI (calling number). Ensure that the contact's phone number in HubSpot matches the ANI.