Who should read this article: Administrators
Learn how to enable your agents to start receiving inbound calls with Voiso.
14-day trial users should start with these articles. They walk you through initial setup, calling configuration, and key steps to get the most out of your trial experience.
Introduction
Voiso provides an intuitive interface that helps you set up Numbers, Caller IDs, Users (agents), and Teams to ensure your contact center is ready to handle incoming calls from your clients (contacts).
Phone Numbers
To start receiving calls through Voiso, you need at least one phone number.
Voiso allows you to either buy new phone numbers or add your own. Manage your numbers on the Numbers page by selecting Inbound > Inbound Numbers from the navigation bar.
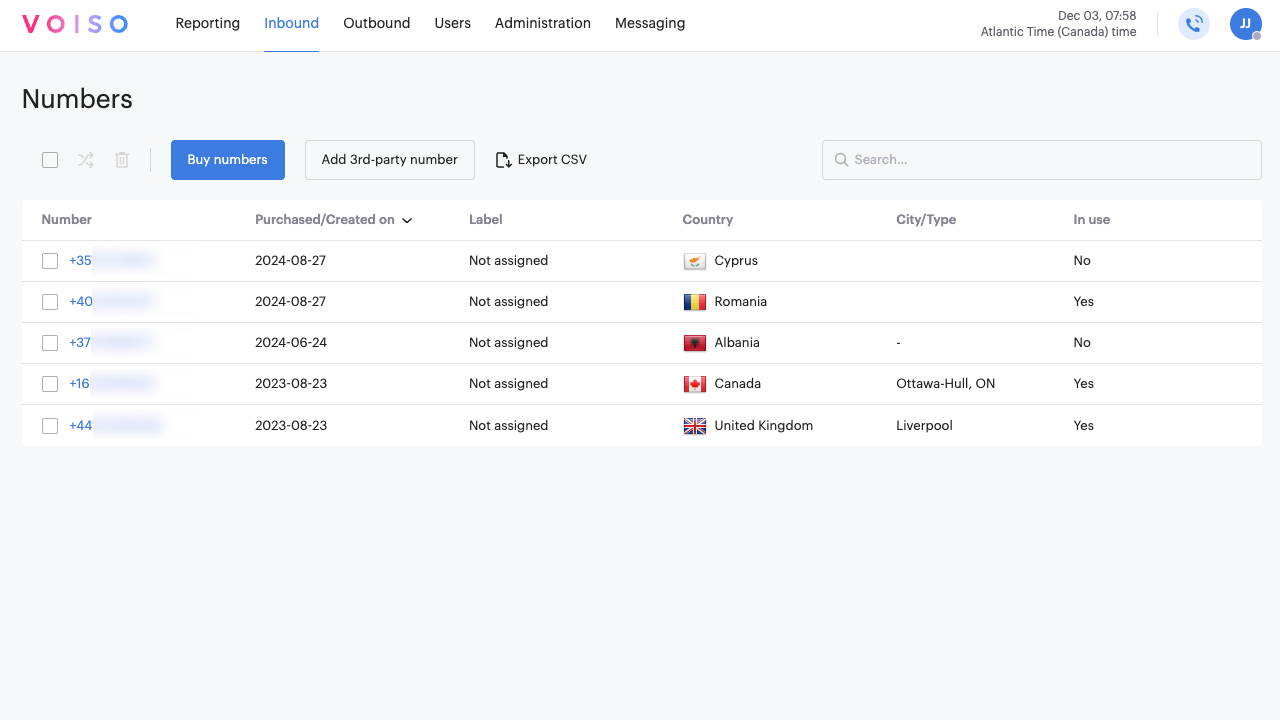
Buying Numbers
- Click Buy Numbers.
- Search for numbers by country or geographic region.
- Select the numbers you want to purchase and click Buy Numbers to add them to your list.
Adding Your Own Numbers
- Click Add 3rd-party number.
- Enter the number, country, and number type.
For assistance, contact your Voiso account manager.
Buying numbers in detail
This tutorial video steps you through the process of buying numbers.
Creating a queue
A call queue is essential for distributing inbound calls to your agents based on defined conditions.
Watch this tutorial video about creating a queue.
Steps to create a queue
- Go to Inbound > Queues to open the Queues view.
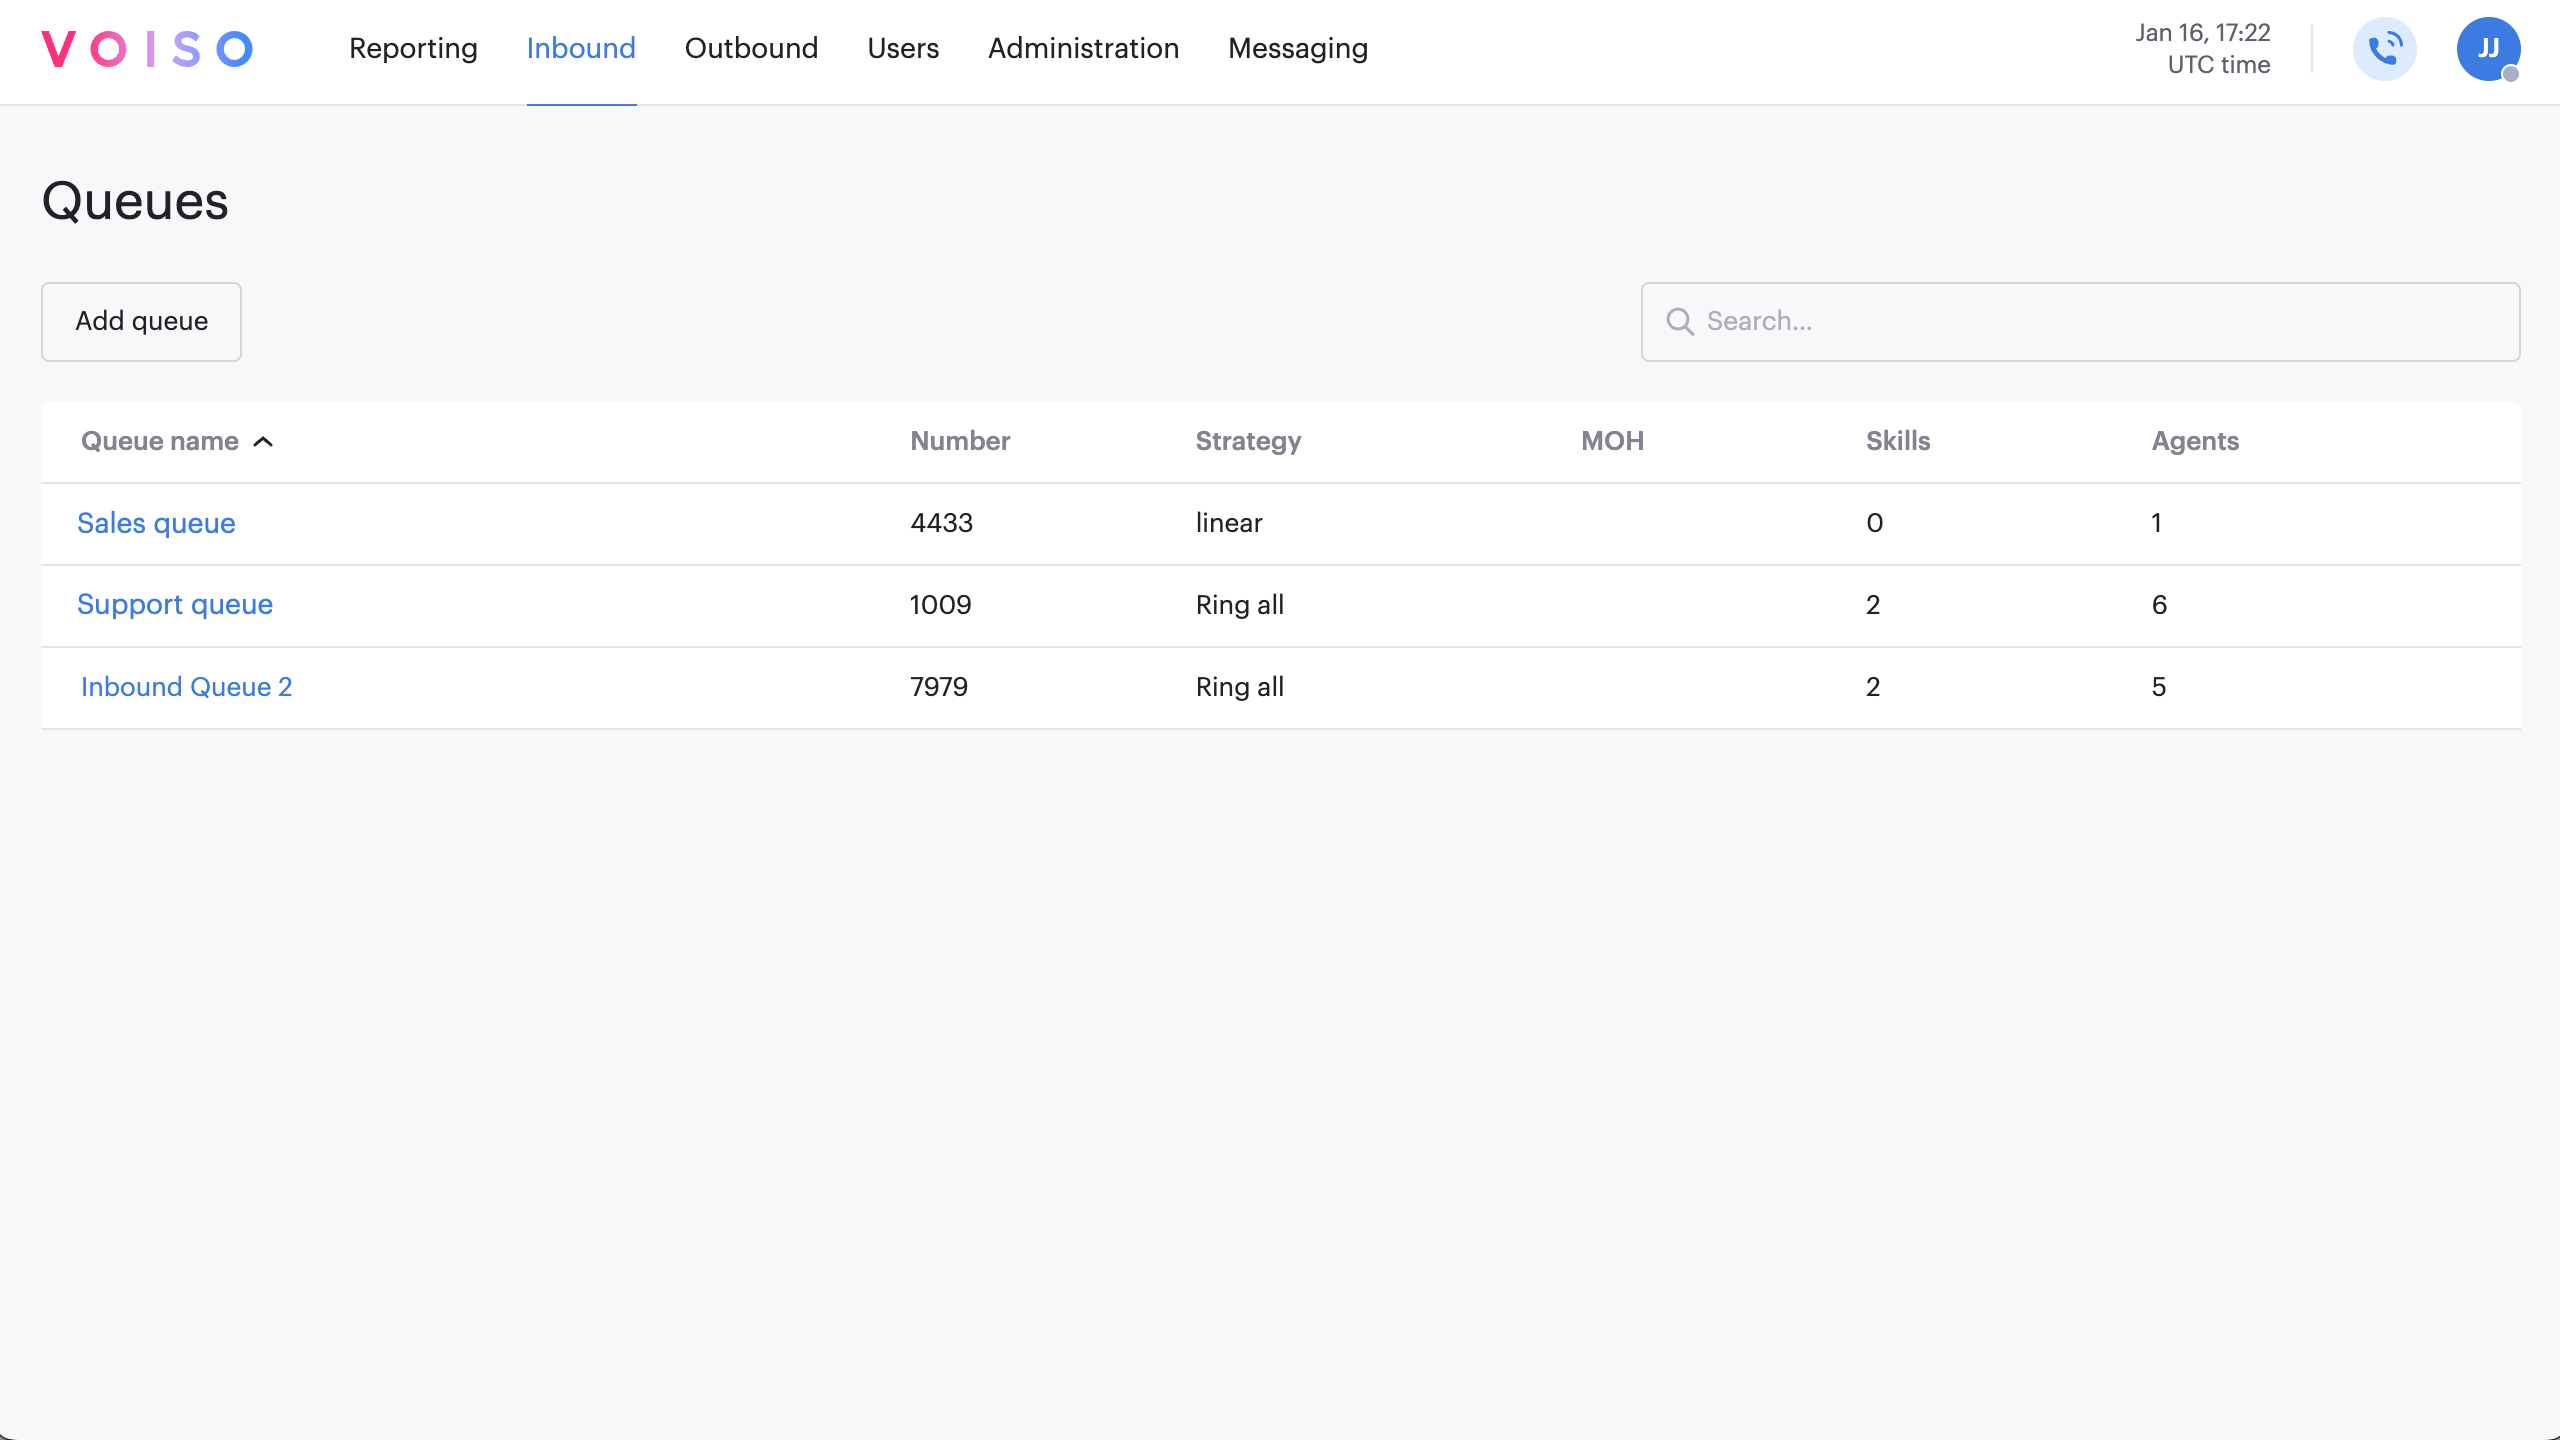
- Click Add New Queue to open the Add Queue view.

- Name your queue to reflect its purpose, and optionally assign an extension for internal routing or transfers.
Assigning agents to the queue
- In the Assigned agents section, click Manage.
- Select agents to assign to the queue, or choose All Agents to assign everyone.
Choosing a call distribution strategy
Select a strategy from the Strategy menu to determine how calls are distributed:
| Strategy | Description |
|---|---|
| Linear | Calls are routed to agents in the order they joined the queue. |
| Circular | Calls are routed to the next agent in the list. |
| Fewest Calls | Calls are routed to the agent with the fewest completed calls. |
| Least Recent | Calls are routed to the agent who has waited the longest for a new call. |
| Ring All | All agents receive the call. If rejected, the call cycles back to all agents. |
To optimize performance and customer experience, consider adding a Supervisor, Skills, hold music, in-queue announcements, Digital channels, and a failover destination for unanswered calls.
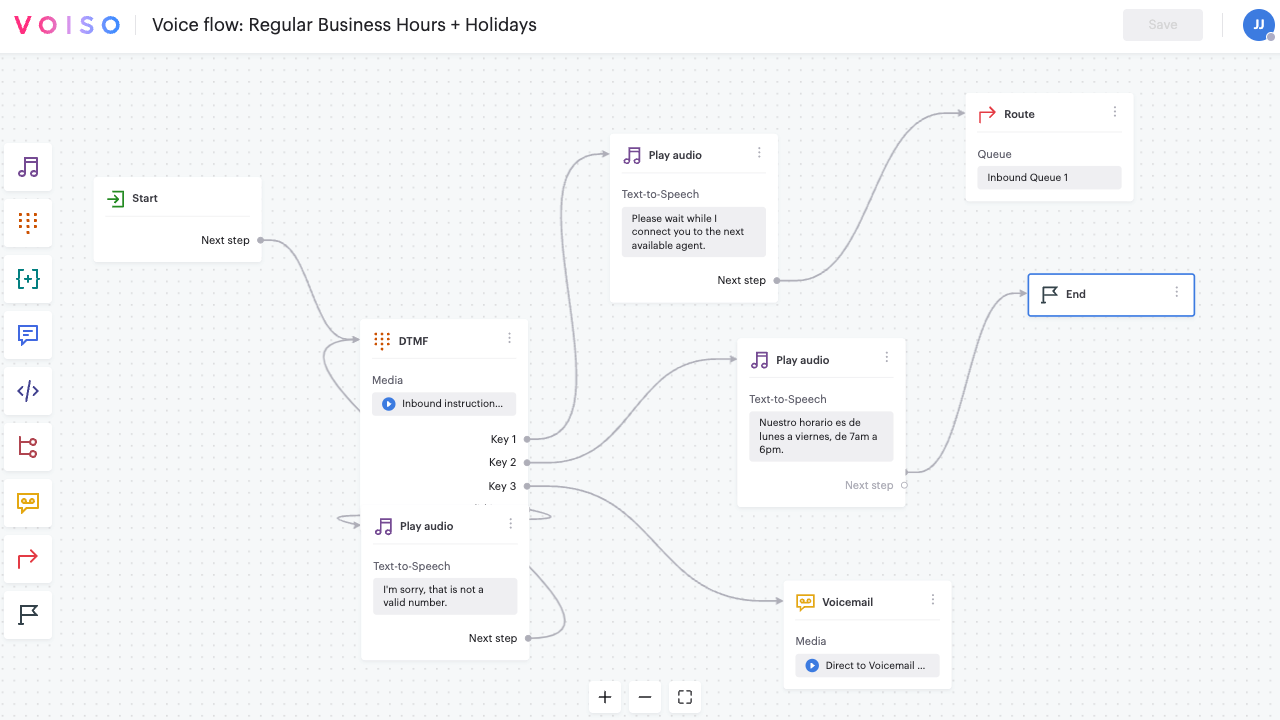
Creating a Flow
Inbound flows define how and when calls are routed in your contact center.
Ensure you have inbound phone numbers assigned to a queue before creating a flow.
Steps to Create a Flow
- Navigate to Inbound > Flows to open the Flows page.
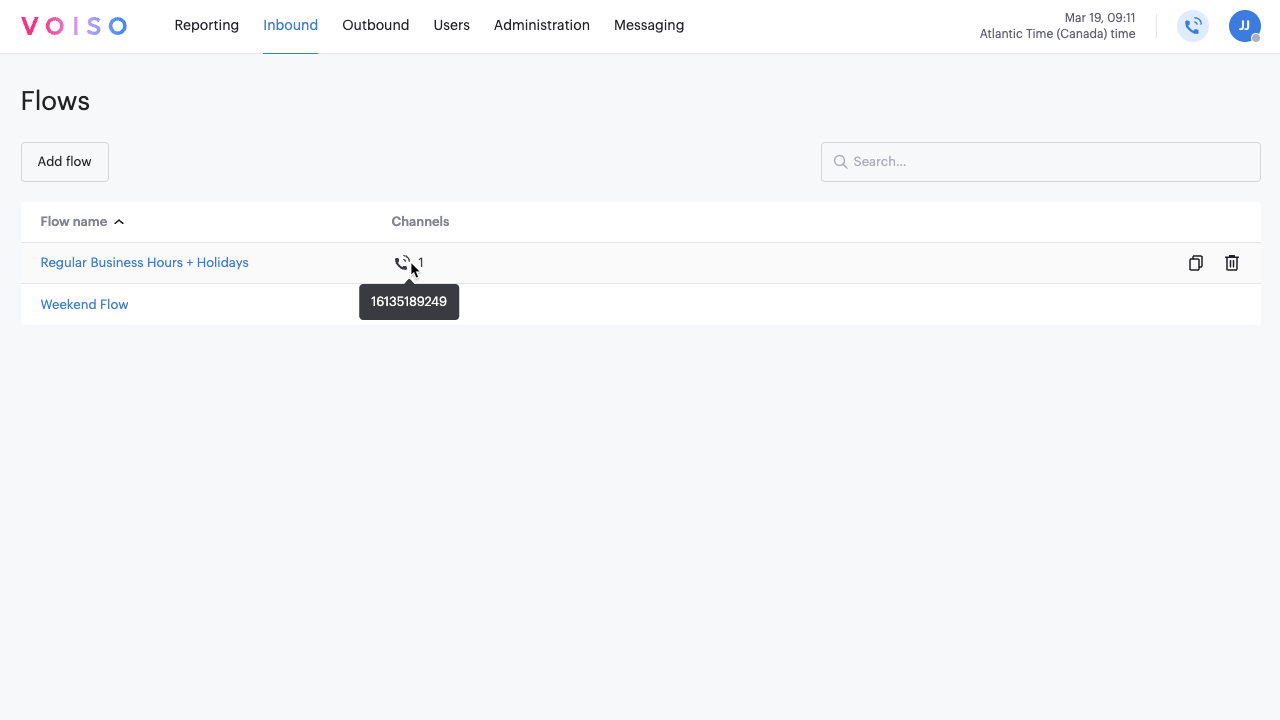
- Click Add Flow to open the Add Flow panel.
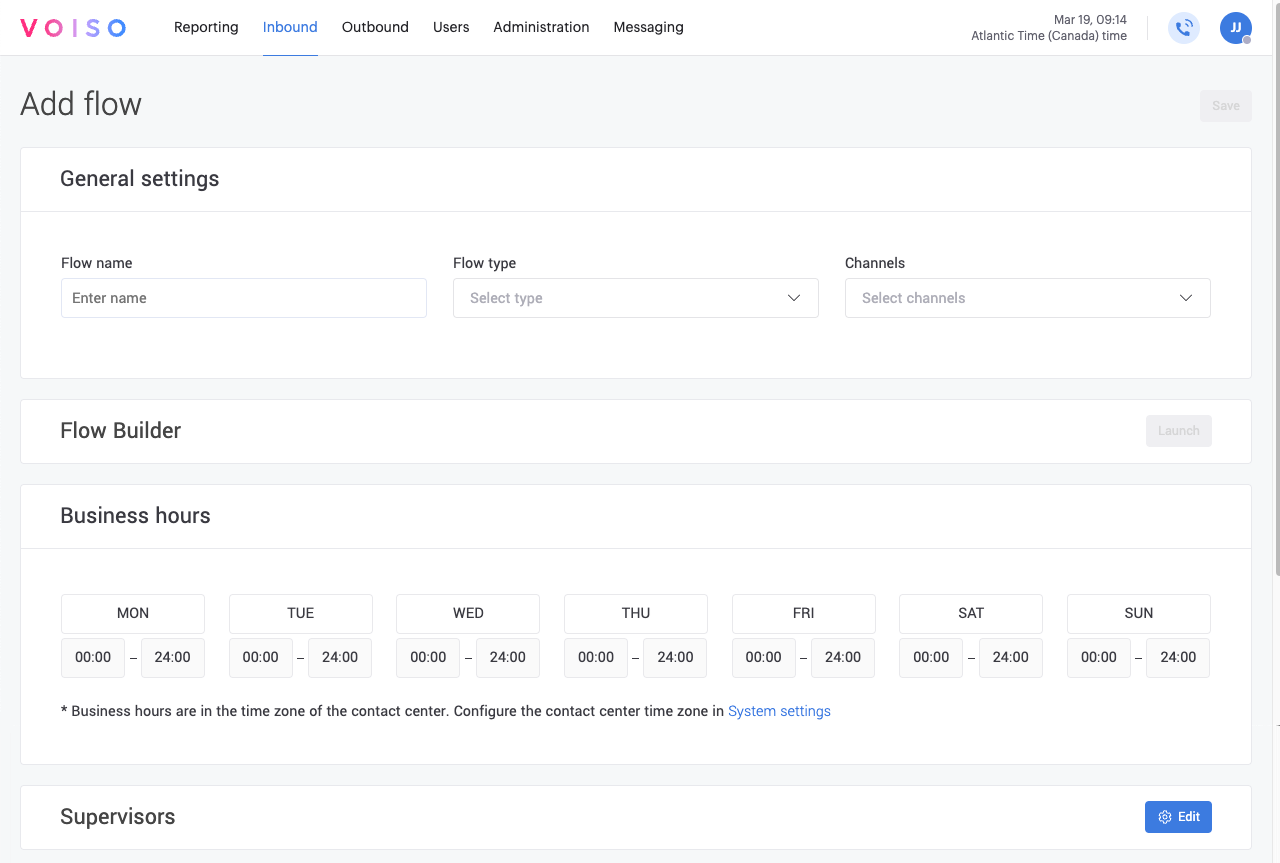
- Enter a name for your flow.
- From the Flow Type menu, select Voice.
- Click Continue.
- Specify the business hours when your flow is active.
- If requried, specify the flow to use outside of business hours.
- In the Assigned numbers section, click Manage to choose the inbound number or numbers for the queue in the Numbers assignment panel, then click Assign.
- Configure additional settings as needed based on your business processes, then click Save to create the flow.
- Open the flow again, then click Launch builder.
- Use Flow Builder to create a call flow. For example, add the DTMF node as an IVR to play a message to your callers and capture their dialpad input. Route the call based on the caller's selection to a queue, voicemail, or audio message, then save your flow. Check out Creating a simple IVR with Flow Builder to help you get started building your first call flow.
You are now ready to start receiving inbound calls.
Creating a flow in detail
This tutorial video steps you through the process of creating an inbound interaction flow.