Who should read this article: Administrators, Supervisors
Learn how to enable agents to send SMS from the Agent Panel.
The Voiso SMS feature is available for contact centers on the Pro plan or higher.
Introduction
Short Message Service (SMS) messages allow Agents to send short text messages directly from the Agent Panel, powered by the WebRTC Softphone, to a contact's smartphone or cellphone.
This feature is ideal for sending text messages as follow-ups to calls. SMS messages can include confirmation details, appointment reminders, or other important information that helps resolve the contact’s needs. Additionally, SMS messages can contain useful content such as web links, phone numbers, or credentials to access account information.
You can send up to 20 SMS messages to a specific number per day.
Voiso offers SMS templates to simplify and streamline the process. With templates, agents can quickly send pre-written messages, saving time and ensuring consistency and accuracy in communication.
To enhance message recognition, Voiso allows you to include a Sender ID with every SMS. The Sender ID ensures that both the contact and their telecom network recognize the source of your messages.
Enabling SMS for your contact center
To add the SMS feature to your contact center, contact your Voiso Account Manager or Sales Representative.
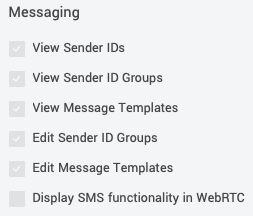
Once SMS is enabled, the following options will appear in the Administration menu in the Voiso navigation bar:
Users with the Admin role (or a custom role if your contact center uses the Security Access Groups feature) can access the Message templates and Sender ID groups pages.
Creating message templates
To create a new message template, follow these steps:
- In the Voiso navigation bar, go to Administration > Message templates.
- Click Add template to open the New template page.
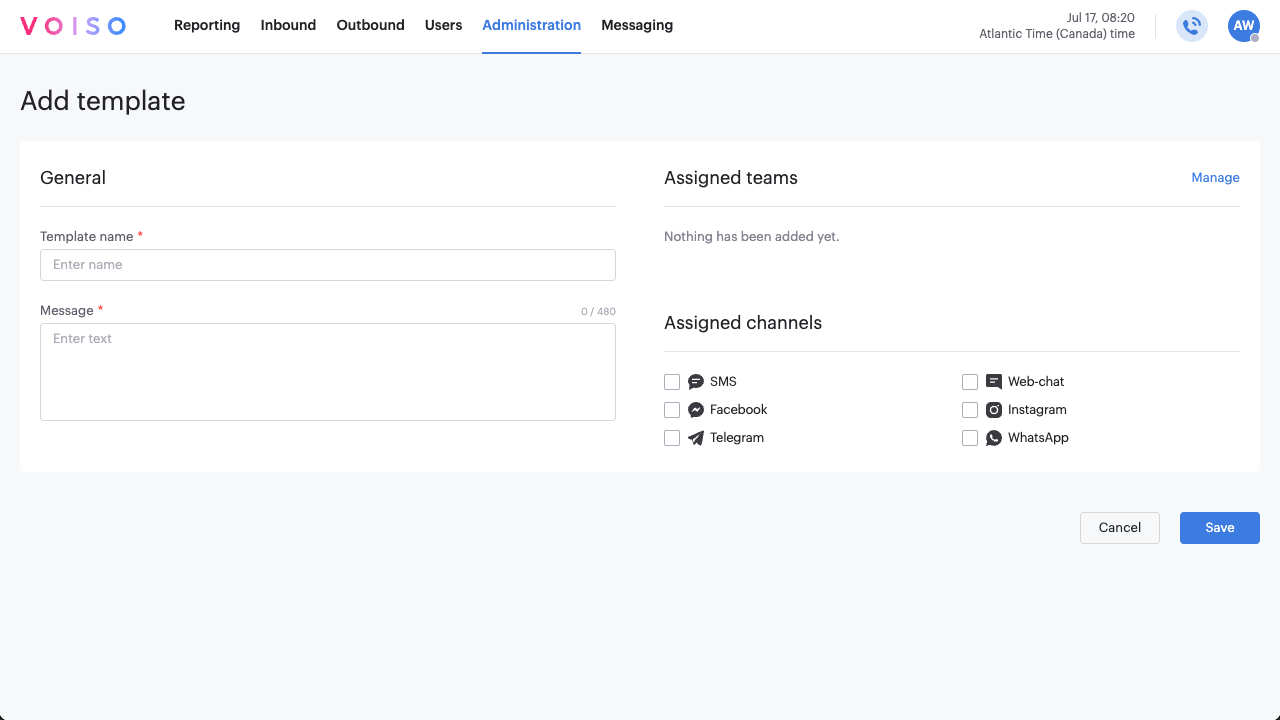
- Enter a name for the template and specify the message content.
- Click Manage to assign the template to specific teams.
- Select one or more channels where the template will be used.
- Click Save to finalize the message template and make it available to the selected teams.
Your message template is now ready to use, helping agents save time and ensure consistent communication.
Creating Sender IDs
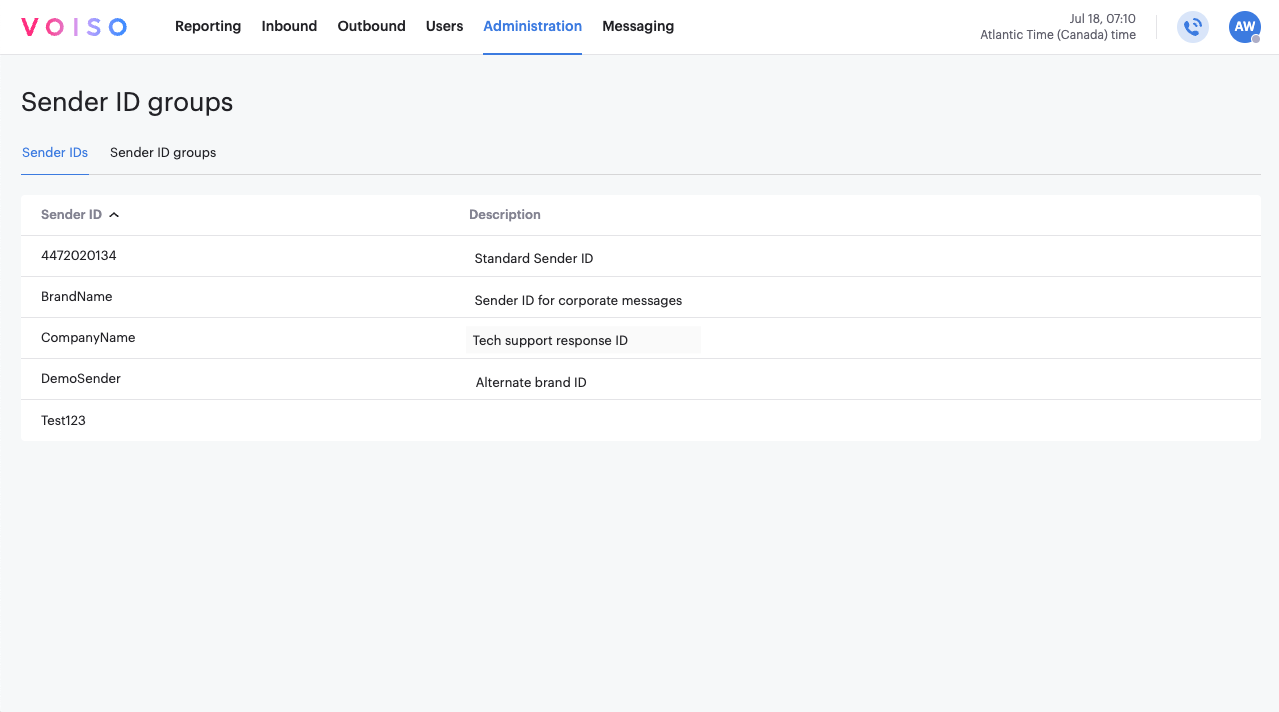
A Sender ID is required for all outgoing SMS to ensure the message source is recognized by your contacts and their telecom networks.
To create Sender IDs, contact your Voiso Account Manager. Once your Sender IDs are set up, you can view them on the Sender ID groups page. Navigate to Administration > Sender ID groups in the Voiso navigation bar.
SMS Sender IDs in detail
Setting up Sender IDs for SMS and SMS campaigns can be complex due to varying requirements and restrictions across countries and telecom networks. Here are some considerations:
Country and Carrier Requirements
Each country and telecom provider may have specific rules regarding business SMS or outbound SMS campaigns. You may need to pre-register your Sender ID for approval or provide detailed information about your SMS content.
Content Restrictions
Many countries limit the types of content businesses can send via SMS, such as hyperlinks or marketing information.
Volume Limitations
Some countries impose limits on the number of SMS you can send, while others use a rating system that increases your sending capacity as your rating improves.
SMS-Enabled Phone Numbers
In some cases, you must purchase an SMS-enabled phone number for specific countries. These numbers often need to be allowlisted (formerly whitelisted) for registration.
Opt-in/Opt-out Policies
Most telecom providers allow their customers to opt in or out of receiving commercial SMS messages.
Your Voiso Account Manager will guide you through these requirements and help you create the correct Sender IDs and plan your SMS messages and campaigns for any country or telecom network.
Creating Sender ID groups
After your Sender IDs are created, you can organize them into Sender ID groups. Similar to Caller ID groups, Sender ID groups allow you to assign specific Sender IDs to teams. Agents can then select from only those Sender IDs when sending SMS.
Steps to create a Sender ID group
- Navigate to Administration > Sender ID groups in the Voiso navigation bar.
- Click Add template to open the New template page.
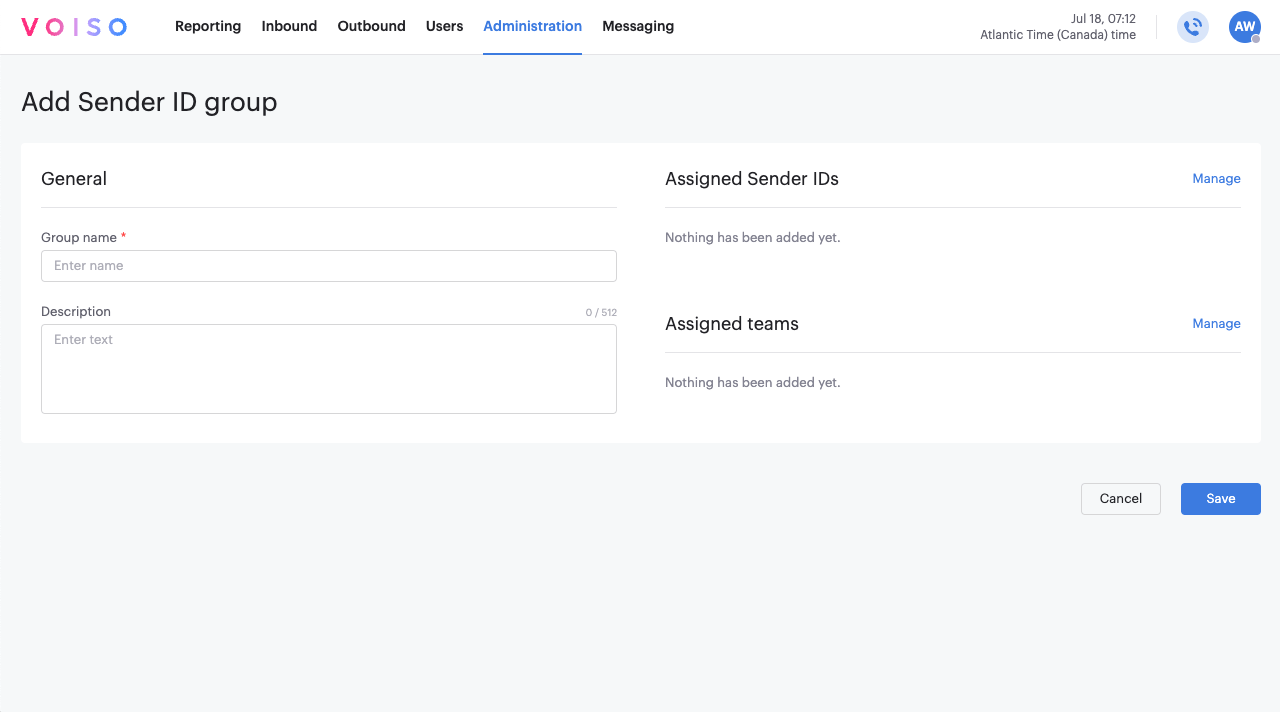
- Enter a name and description for the group.
- Click Manage to specify one or more Sender IDs to include in the group.
- Click Manage to assign the group to specific teams.
- Click Save to finalize the Sender ID group and make it available to the selected teams.
These Sender ID groups help streamline SMS management and ensure agents use appropriate Sender IDs for their assigned teams.
Sending an SMS
Voiso provides three ways for agents to send SMS messages to a contact: during an active call, from the call history, or directly to a contact.
Agent must be a member of a team that has:
- At least one message template.
- At least one Sender ID group.
- The Display SMS functionality in Agent Panel permission granted in the user's security access group role.
From an active call
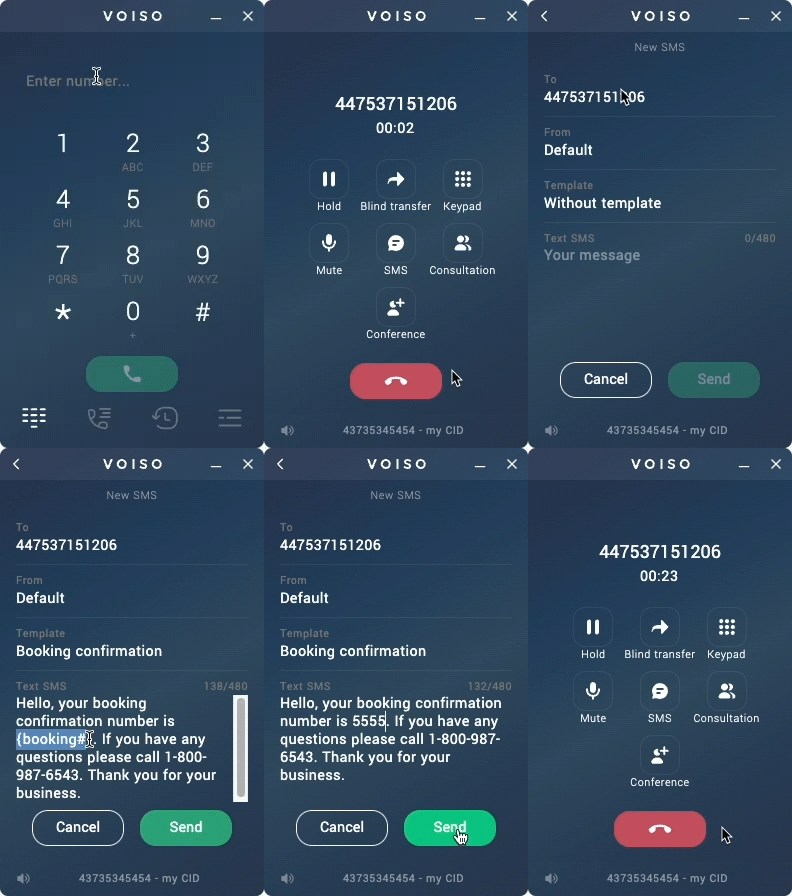
- During a call, click SMS to open the New SMS panel.
- The From field displays the default Sender ID for the agent's team. To select a different Sender ID, click the From field and choose from the available options.
- By default, the Template field shows Without template.
- If not using a template, compose a message in the Text SMS field.
- To use a template, click the Template field and select one from the list. You can edit the template in the Text SMS field if needed.
- Click Send to send the message.
From the call history
Agents can also send SMS messages based on previous interactions in their call history.
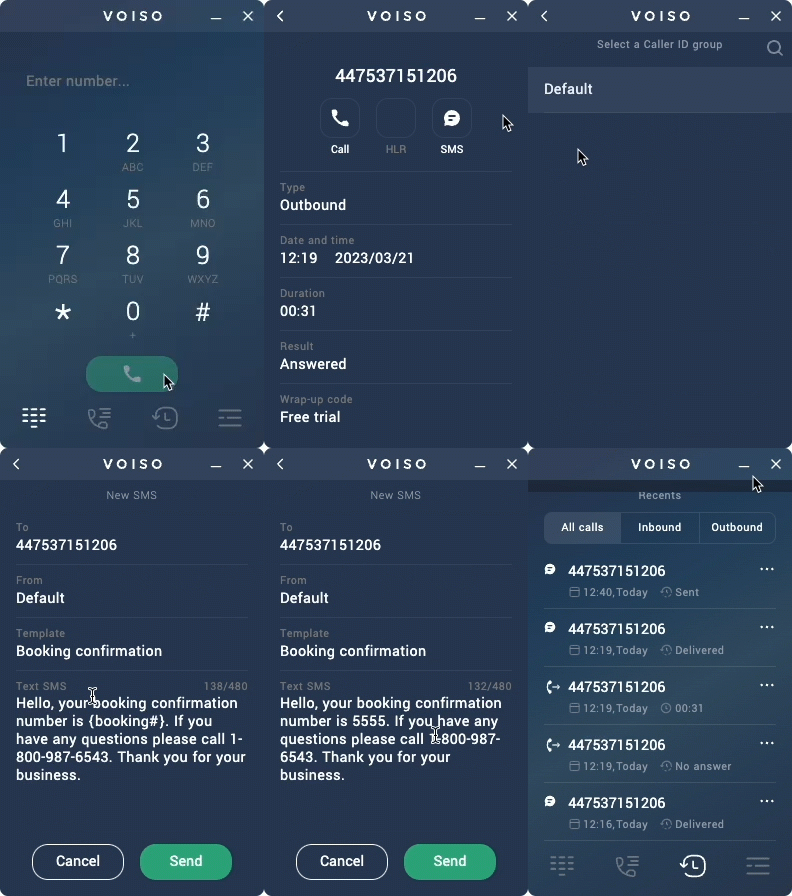
- Click Recents to view the agent's recent calls.
- Locate the interaction and click the kebab menu next to it to open the interaction details.
- Click SMS to open the New SMS panel.
- The From field displays the default Sender ID for the agent's team. To select a different Sender ID, click the From field and choose from the available options.
- By default, the Template field shows Without template.
- If not using a template, compose a message in the Text SMS field.
- To use a template, click the Template field and select one from the list. You can edit the template in the Text SMS field if needed.
- Click Send to send the message.
Directly to a contact
To send an SMS directly to a contact, follow these steps:
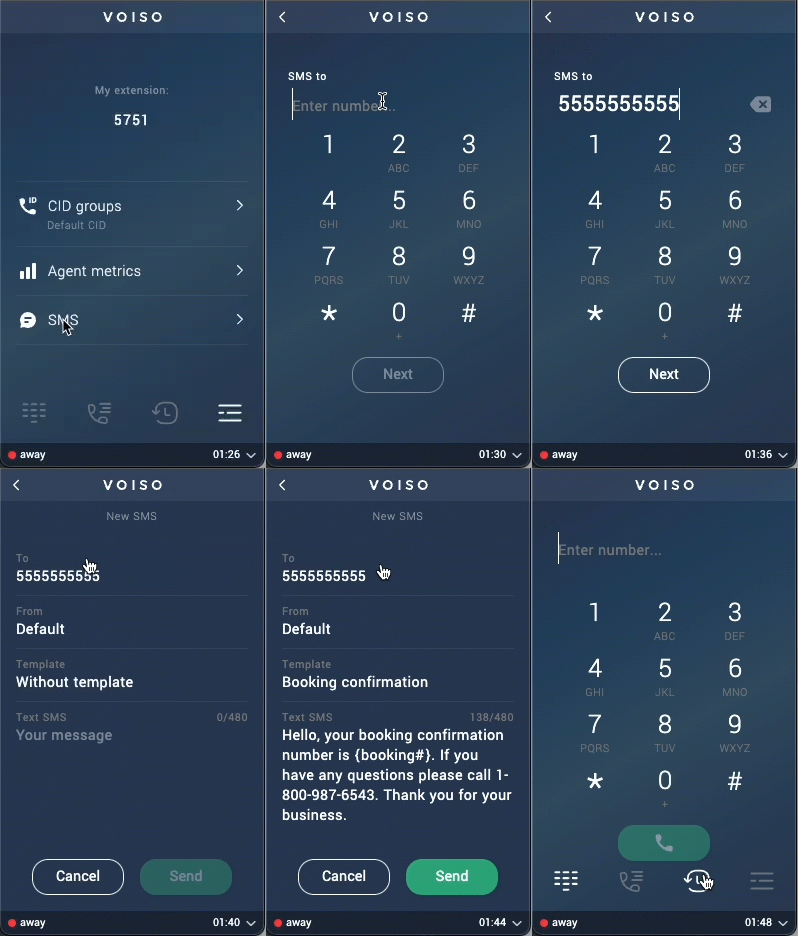
- Click Menu to open the Menu screen.
- Click SMS to display the New SMS screen.
- In the To field, enter the contact's phone number using the dialing panel, then click Next.
- The From field displays the default Sender ID. To select a different Sender ID, click the From field and choose one from the list.
- By default, the Template field shows Without template.
- If not using a template, compose a message in the Text SMS field.
- To use a template, click the Template field and select one from the list. You can edit the template in the Text SMS field if needed.
- Click Send to send the message.
Call Detail Records for SMS
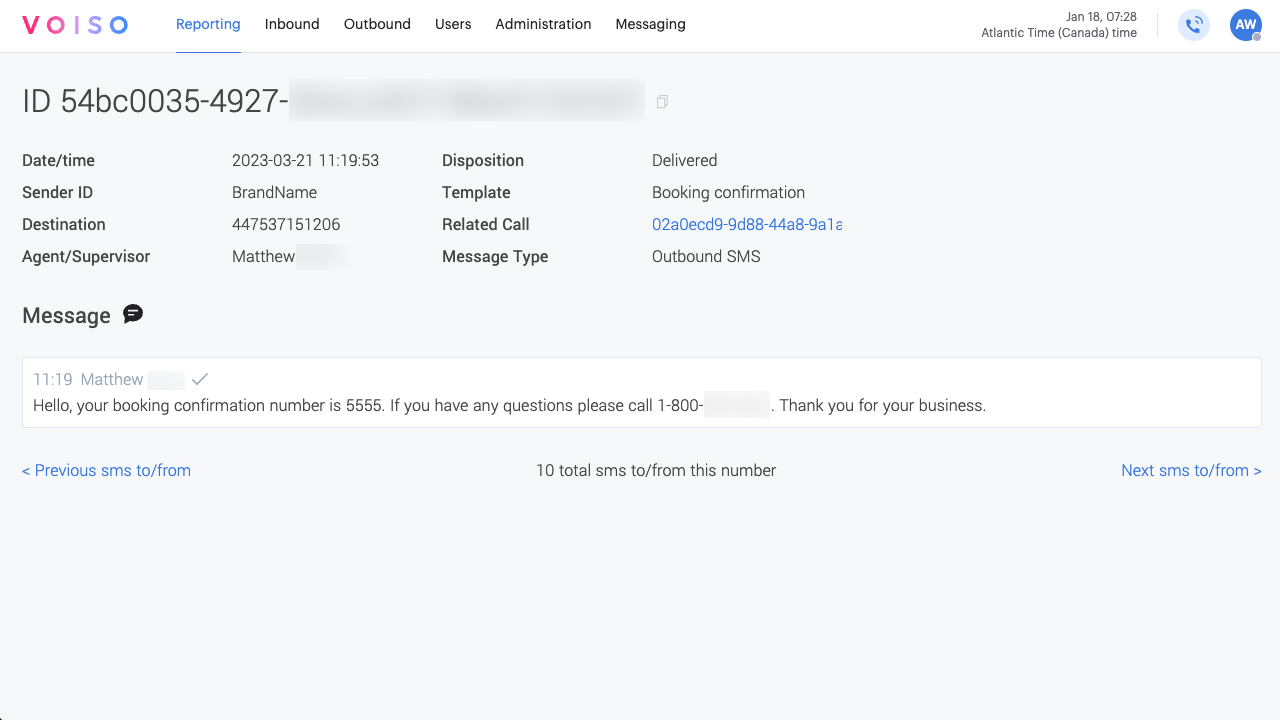
Like with voice calls and other interactions, Voiso saves information in the Call Detail Records (CDR) about the SMS interactions your agents send.
Each SMS CDR includes a unique ID and the message body along with the following details:
| Detail | Description |
|---|---|
| Date/time | The timestamp of when the SMS was sent. |
| Sender ID | The Sender ID specified by the agent. |
| Destination | The DNIS of the recipient. |
| Agent/Supervisor | The name of the user who sent the SMS. |
| Disposition | Sent, Not Sent, Route Unavailable, or Delivered. |
| Template | The name of the message template specified by the agent. |
| Related Call | The UUID of the voice call to which the SMS is related. |
| Message Type | The type of interaction: Outbound SMS |
