Who should read this article: All users
View HubSpot contact details automatically when handling inbound messages in the Omnichannel Workspace.
Introduction
When your contact center is integrated with HubSpot and CRM Contact Lookup is enabled, Voiso automatically retrieves and displays the associated HubSpot contact details for inbound digital interactions. If the sender’s phone number matches a HubSpot contact, their information appears in the Contact panel in the Omnichannel Workspace. This allows you to view key contact details without switching applications or searching manually.
Using the Contact panel
Viewing Contact Details in the Contact Panel
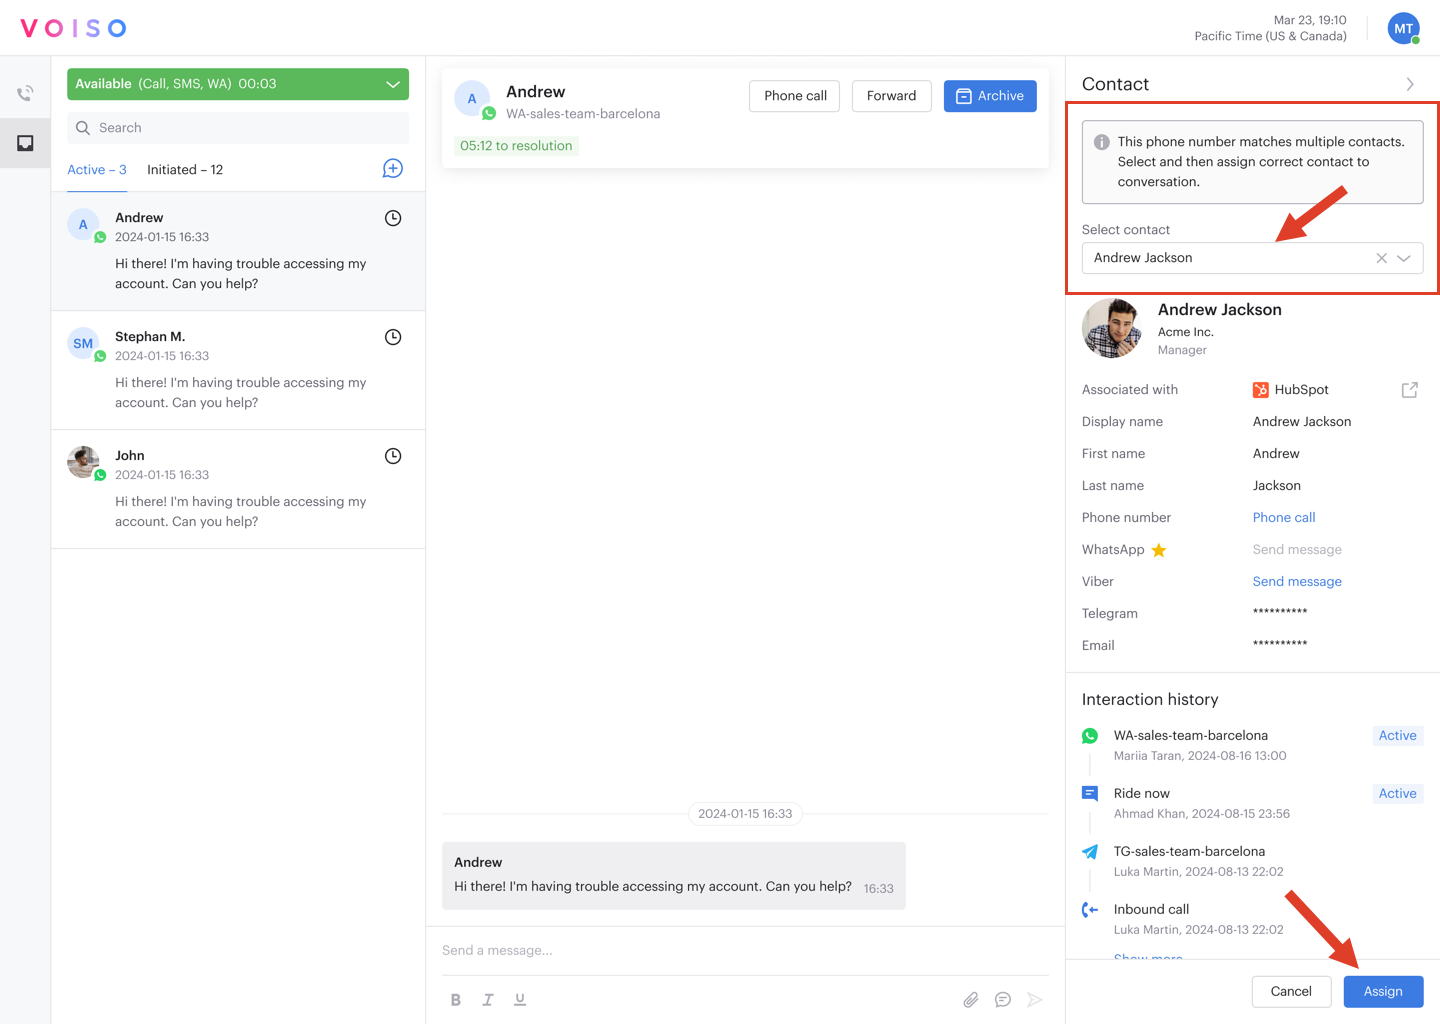
When a digital message is received through WhatsApp, Viber, or Telegram, Voiso checks for a matching contact in your connected CRM. If a match is found, the contact's information is displayed in the Contact panel of the Omnichannel Workspace. If more than one match is found, a Select contact drop-down appears. You can select a contact to view their information, assign the interaction, or cancel to dismiss the panel.
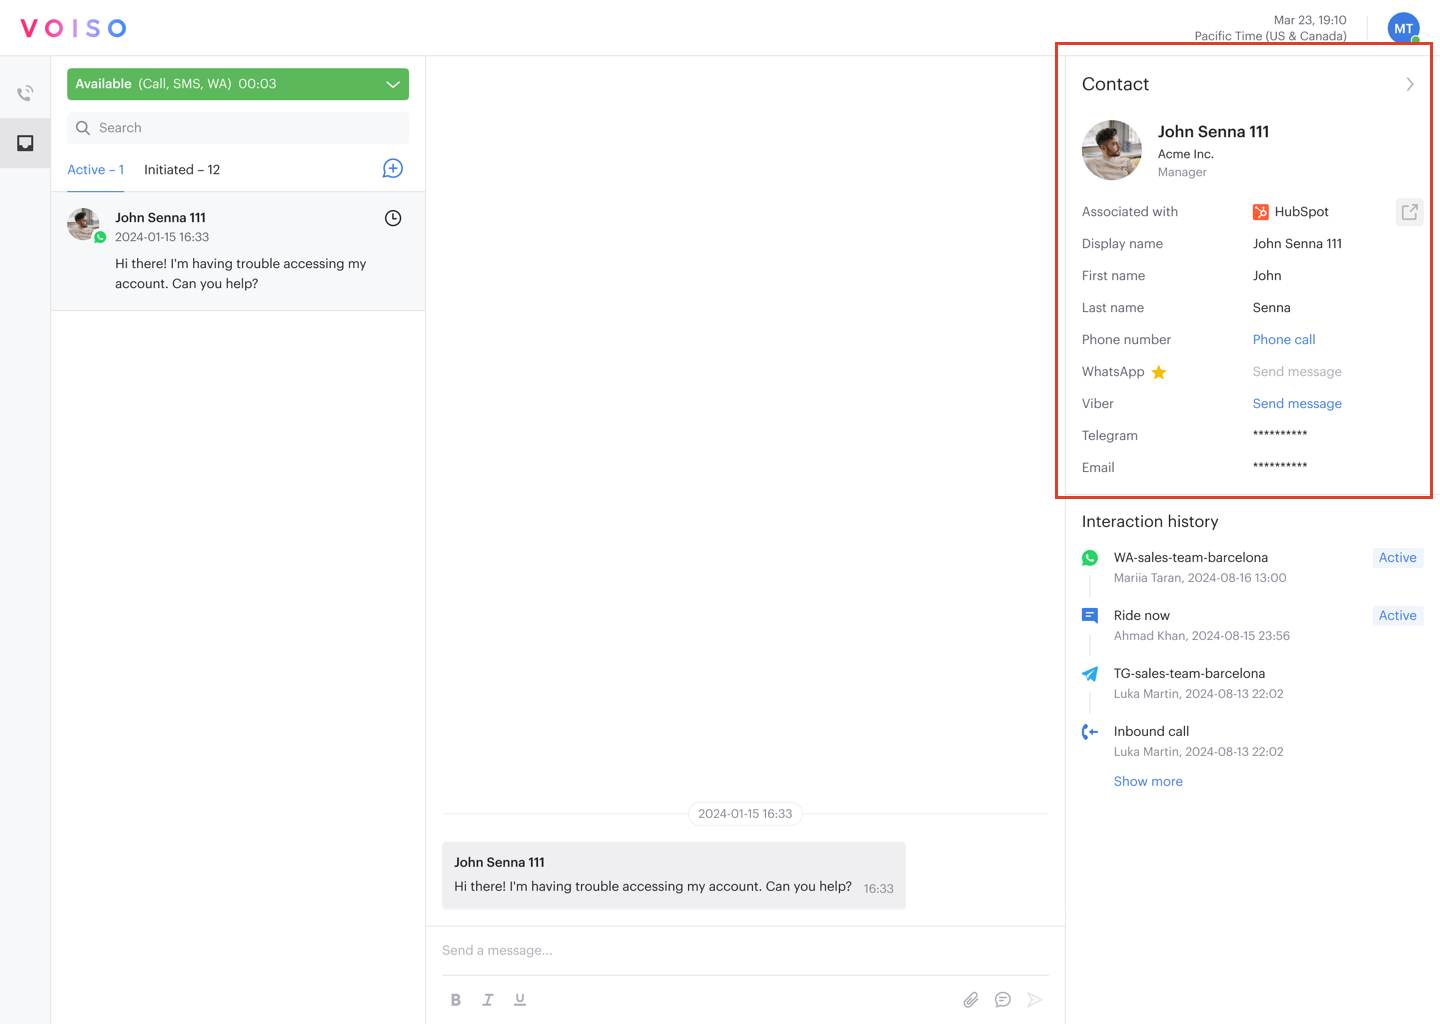
The table below describes the information and actions available in the Contact panel:
Contact Panel Reference
| Heading | Description |
|---|---|
| Associated with | The name of the CRM where the contact phone number was matched. Click the link to open the contact record in the CRM. |
| Display Name | The full name of the contact |
| First name | The contact's first name. |
| Last name | The contact's last name. |
| Company name | The business name associated with the contact. |
| Job title | The business position held by the contact at the associated business. |
| Mobile phone number (Masked) | Click the link to call the contact. |
| Phone number (Masked) | Click the link to call the contact. |
| Email (Masked) | |
| Other digital channels (Masked) | Click the link to message the contact. If you are not assigned the channel, no link is available. |
The preferred contact method is highlighted by a gold star.
Assigning the interaction to a contact
If multiple CRM contacts match the sender’s phone number, a Select contact drop-down menu appears. Choose the correct contact to preview their details in the Contact panel. You can then:
- Click Assign to associate the current interaction with the selected contact.
- Click Cancel to close the panel without linking the contact.
Once assigned, the contact’s information remains visible in the panel for the duration of the interaction.
Viewing interaction history
The Interaction history panel shows the contact’s past interactions across all channels. You can click any listed interaction to view more details:
- Active interaction – Opens the interaction inside the Agent Workspace. This option is not available for the current interaction, since you are already in it.
- Archived interaction – Opens the interaction in a new tab, linking to the Call Detail Record (CDR).
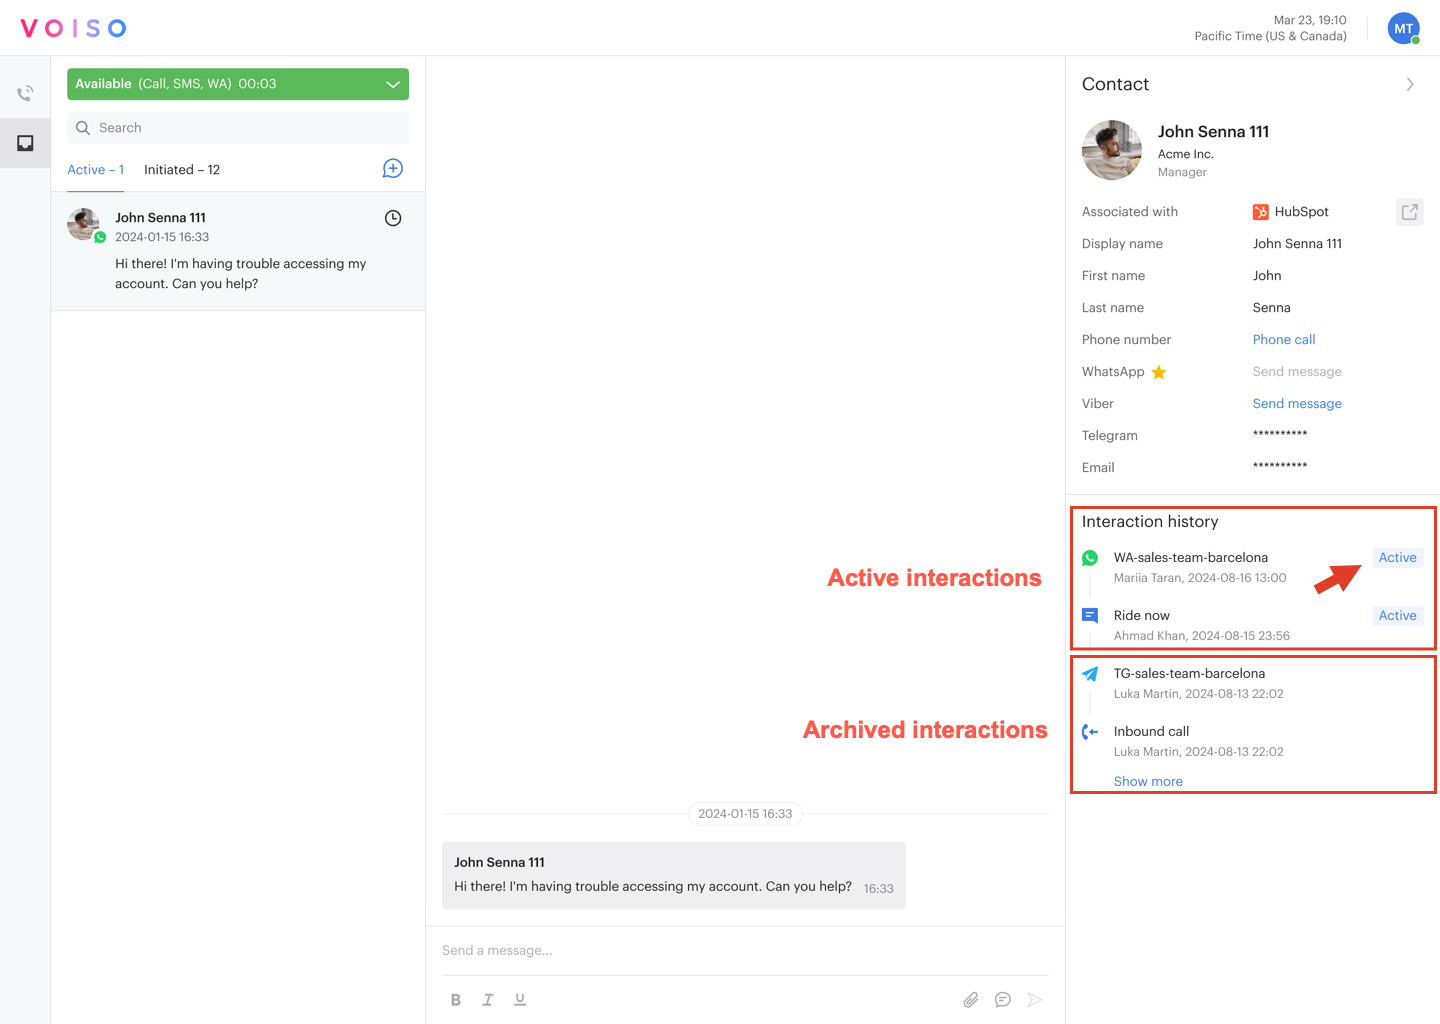
If you do not have permission to view CDRs, the archived interaction tab will open as a blank page.