Who should read this article: Administrators, Supervisors
Enables telephony workflows between Zenoti and Voiso, providing click-to-call, call logging, screen pop, and outbound Dialer campaign calling list import.
Introduction
Voiso integrates with the Zenoti CRM to enable agents to use the Voiso Chrome extension click-to-call feature to initiate and handle calls in Agent Panel, and screen pop contact information and log call information in Zenoti. You can also import calling lists from Zenoti into Voiso Dialer campaigns.
Features
The Voiso integration for Zenoti enables the following CRM features:
| Feature | Description |
|---|---|
| Click-to-call | Agents can place calls or send SMS from Zenoti without manually dialing by using the Voiso Chrome extension in each agent’s browser. Phone numbers in Zenoti become clickable when the extension is active. |
| Calling List Import | Voiso can import guests from a Zenoti Center to build dialer campaign calling lists. |
| Screen Pop | An existing contact record is automatically displayed in Zenoti when an agent handles an inbound or outbound call in Voiso. |
| Call History | Call outcome logging and call details, including call type, phone number, agent identifier, start and end time, duration, and the selected wrap-up code or disposition, are automatically transmitted to Zenoti as a note after a call. If enabled, Voiso adds an AI generated call summary to the Zenoti note created for the call. |
Click-to-call
Agents must be signed in to their Voiso and Zenoti accounts for calling to work.
Zenoti click-to-call and click-to-SMS is supported through the Voiso Chrome extension. When an agent installs and enables the Voiso Chrome browser extension, phone numbers in Chrome browser windows are detected and become clickable.
Here's how it works:
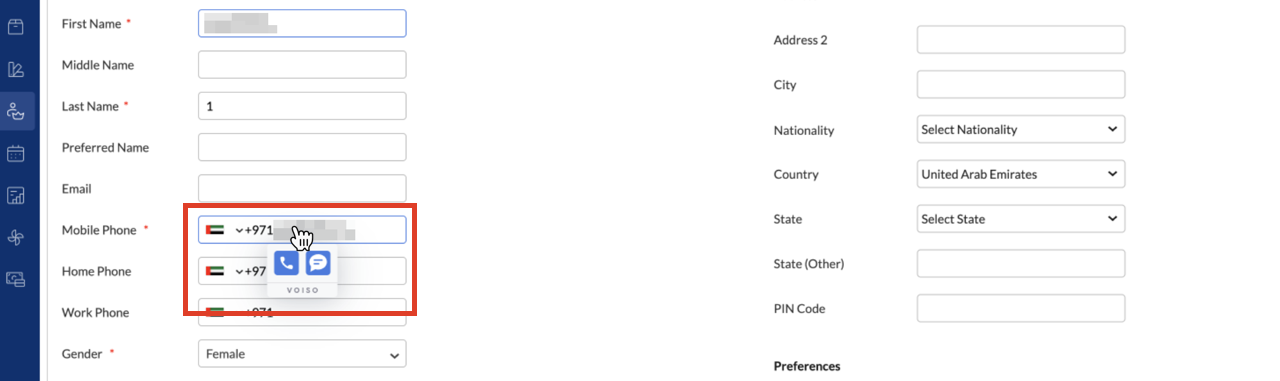
- Phone numbers in Zenoti are detected in the browser and become interactive. Fields containing phone numbers are highlighted and show a call or SMS dropdown on hover.
- When an agent clicks the phone number they can select a phone call to initiate a voice call in Agent Panel.
- When an agent clicks the phone number they can select an SMS to initiate a SMS message to the phone number in Agent Panel.
The Voiso Chrome extension normalizes phone numbers that do not include country codes by applying a default country code specified in the settings. Refer to Chrome extension for Agent Panel for details about enabling default country codes in the Voiso Chrome extension.
Calling List Import
Voiso can import guests based on Zenoti Centers (an organizational unit under a Zenoti account) and use them as calling lists for outbound Dialer campaigns. When a campaign starts, Voiso automatically dials the contacts in the list and connects them to available agents. This streamlines campaign setup by eliminating manual CSV exports and ensuring agents always dial the most up-to-date records. Use the integration to support faster list creation, cleaner contact data, and more efficient outbound dialing workflows.
To allow Voiso to identify contacts in Zenoti, the Zenoti organization setting Search for guests across centers must be enabled.
Screen Pop
When an inbound call arrives, Voiso looks up the caller’s phone number in Zenoti in real time.
- If a guest match is found, Voiso opens the guest profile automatically in the agent’s browser.
- If no guest match is found, the call is handled normally and the agent can create a new guest manually according to your business practices.
Screen pops support these call types:
- Inbound calls
- Manual outbound calls, including click-to-call
- Dialer campaign calls
- Callback calls
Transfer and routing support:
- Screen pops are also shown after consult transfers and blind transfers.
- Screen pops are also shown when a call is delivered to an agent through a Route to agent node in Flow Builder.
Call History
After every call, Voiso creates a note in the guest profile that includes call details such as:
- Call ID
- Call type (inbound, outbound, missed, and so on)
- Caller phone number
- Agent identifier
- Start time and end time
- Call duration
- Selected wrap-up code or disposition
- A link to the call recording stored in Voiso
Agents can view full guest contact details and history in Zenoti.
No guest details are stored in Voiso. Guest name and details are not displayed in Agent Panel during ringing or in call.
Set up Zenoti and generate an API Key
To connect Zenoti with Voiso, create a new app in Zenoti, generate an API Key, and enable the required scopes and organization settings following the steps below.
Step 1. Create an app
- Sign in to Zenoti at the organization level.
- Select the Configuration icon.
- Search for and open Apps under Integrations.
- Select Add.
- Complete the required fields:
- Name: Give the app a meaningful name such as Voiso Integration.
- URI: Enter your Voiso contact center website URL.
- Description: Describe the app, for example, "Voiso contact center integration".
- Login User Type: Select Employee.
- Source App: Select Client App.
- Select Next.
Step 2. Enable the required API scopes
On the Scope selection screen, enable the following permissions:
- Guests: Read
- Guests: Write, Update, Delete
- Center Master: Read
Then:
- Select API Keys (APIKEY GROUPS) as the authentication method.
- Select Next, then select Generate API Key.
- Copy and securely store the API Key. You will need it when connecting Zenoti in Voiso.
- Select Finish.
Zenoti API keys expire after a defined period. Configure expiry alerts at the organization level if needed.
Step 3. Enable cross center guest search (required for Dialer campaigns)
This setting is required if you want Voiso to pull guests across all Zenoti Centers when importing calling lists for outbound Dialer campaigns.
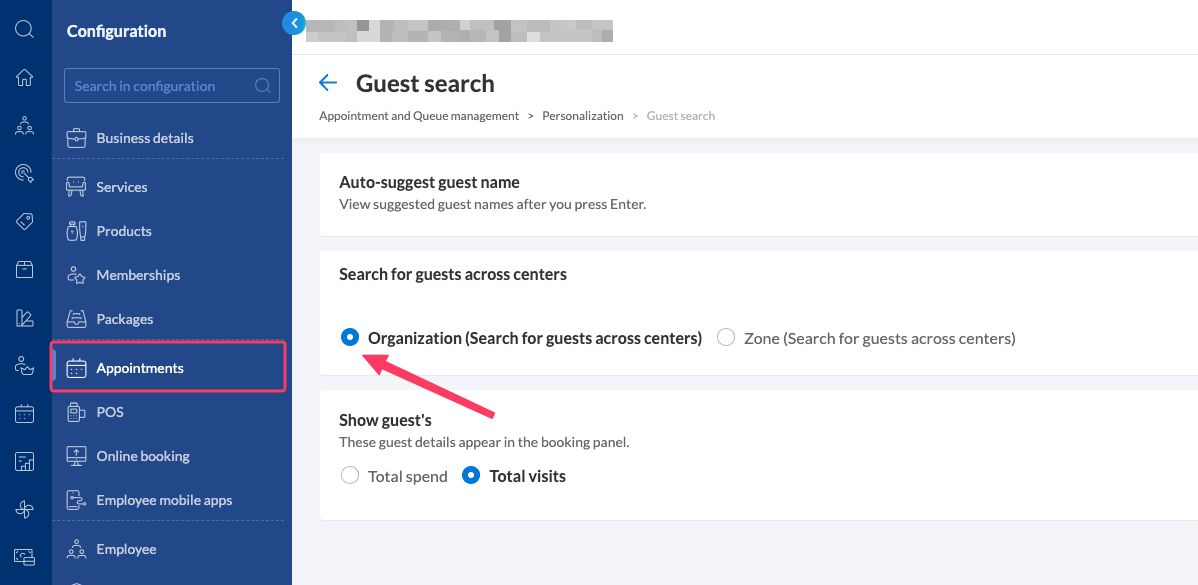
- At the organization level, select the Configuration icon.
- Go to Appointments then Personalization then Guest Search.
- Turn on Search for guests across centers.
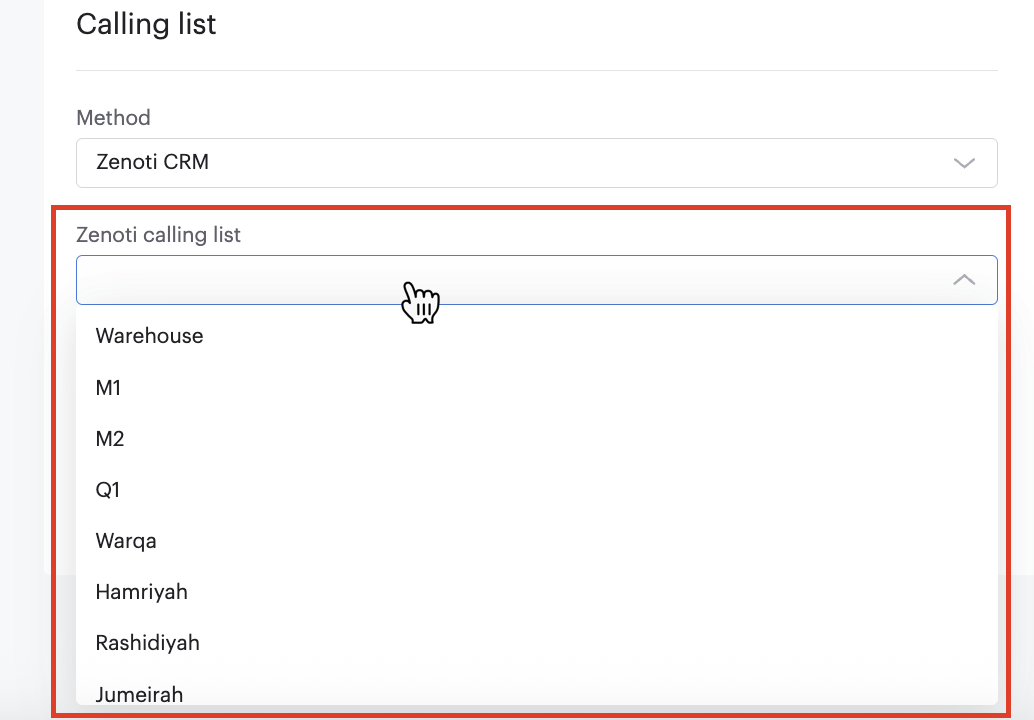
- Then, to create calling lists that can be imported into a Dialer campaign, create a Center in Zenoti and add the guests to it that you want to be called during the campaign. When you create a new Dialer campaign, Voiso searches your Zenoti connection for Centers that are associated with the integration and enables you to select one for the campaign.
Integration
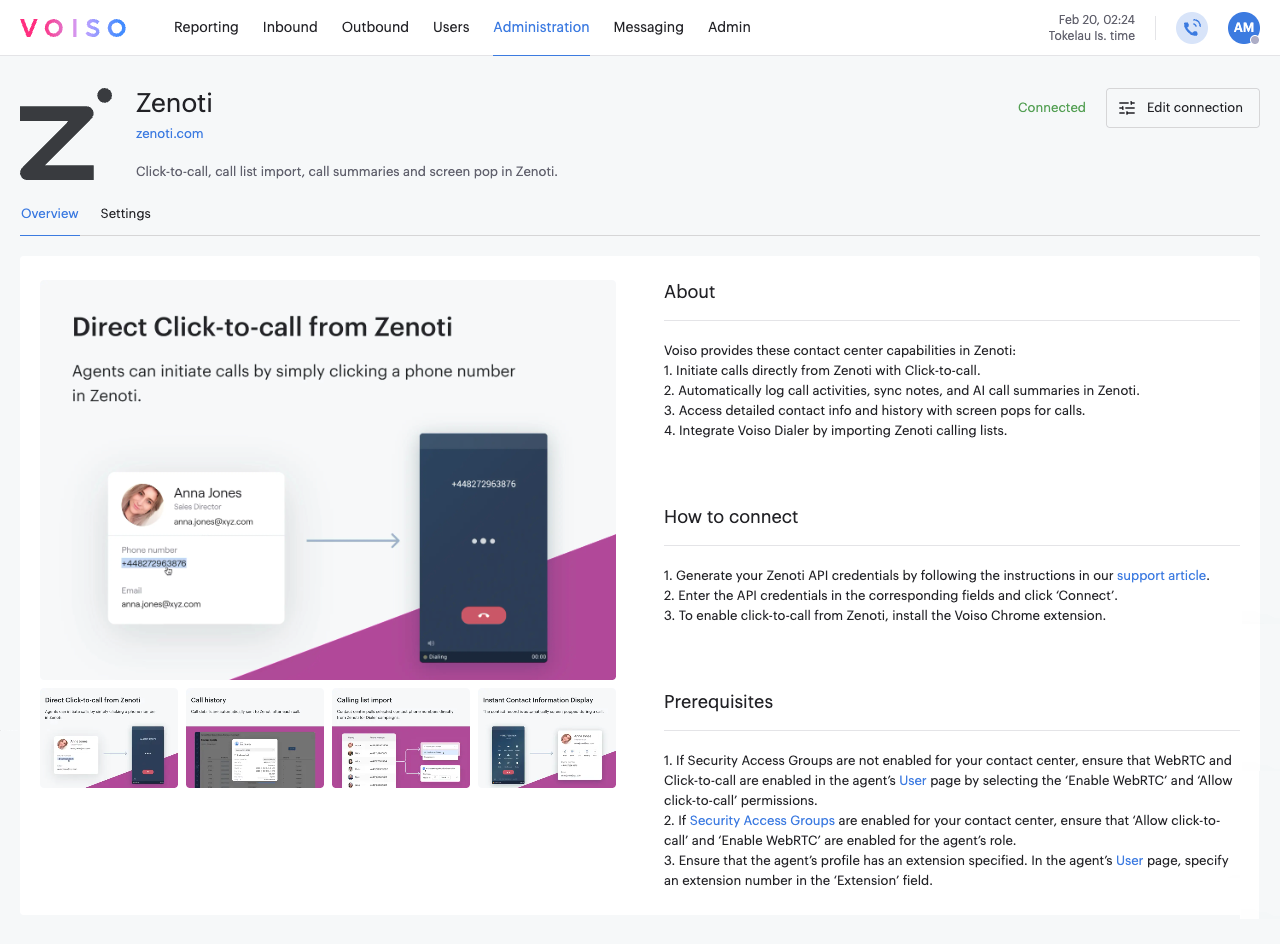
To integrate Voiso with Zenoti, navigate to Administration > Integrations, then click the Zenoti tile.
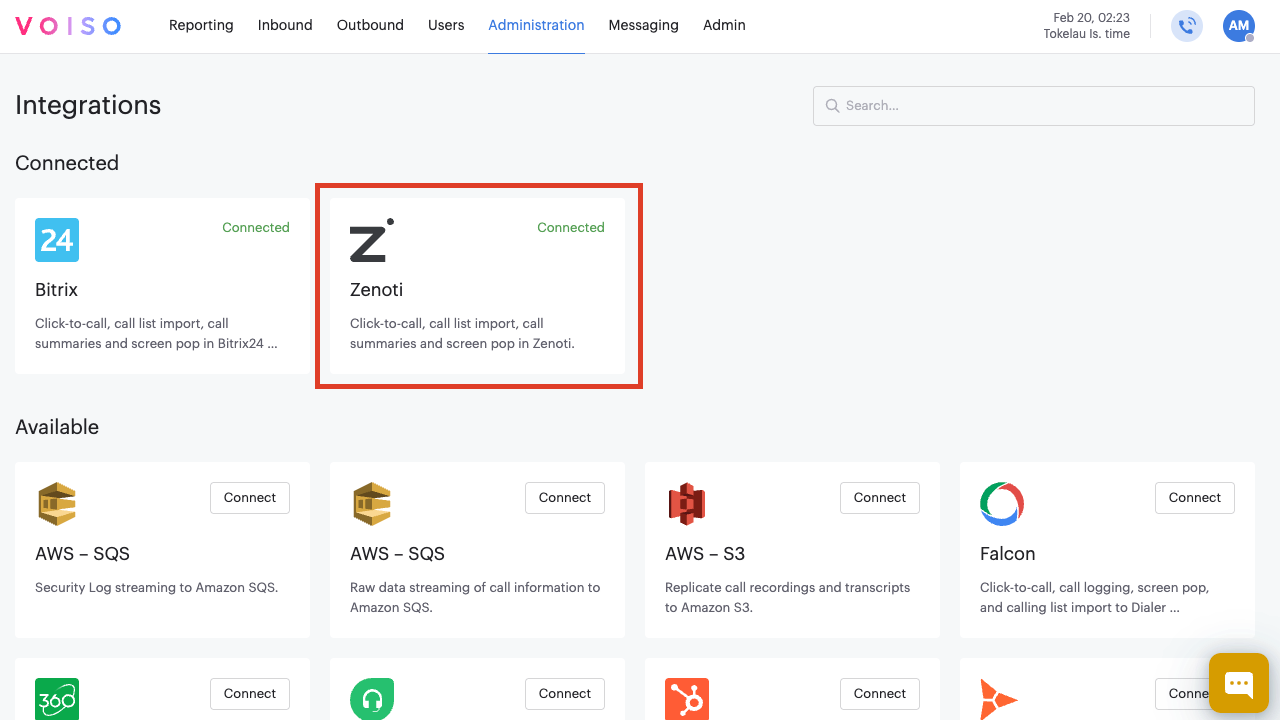
The Zenoti page provides information about the Zenoti integration, instructions for connecting the integration, and a list of prerequisites you should have in place before clicking Connect.
Connect to Zenoti
To complete your integration, click Connect and follow these steps:
- In the Integration setup panel, click Next.
- In the Connection setup panel, enter the following information:
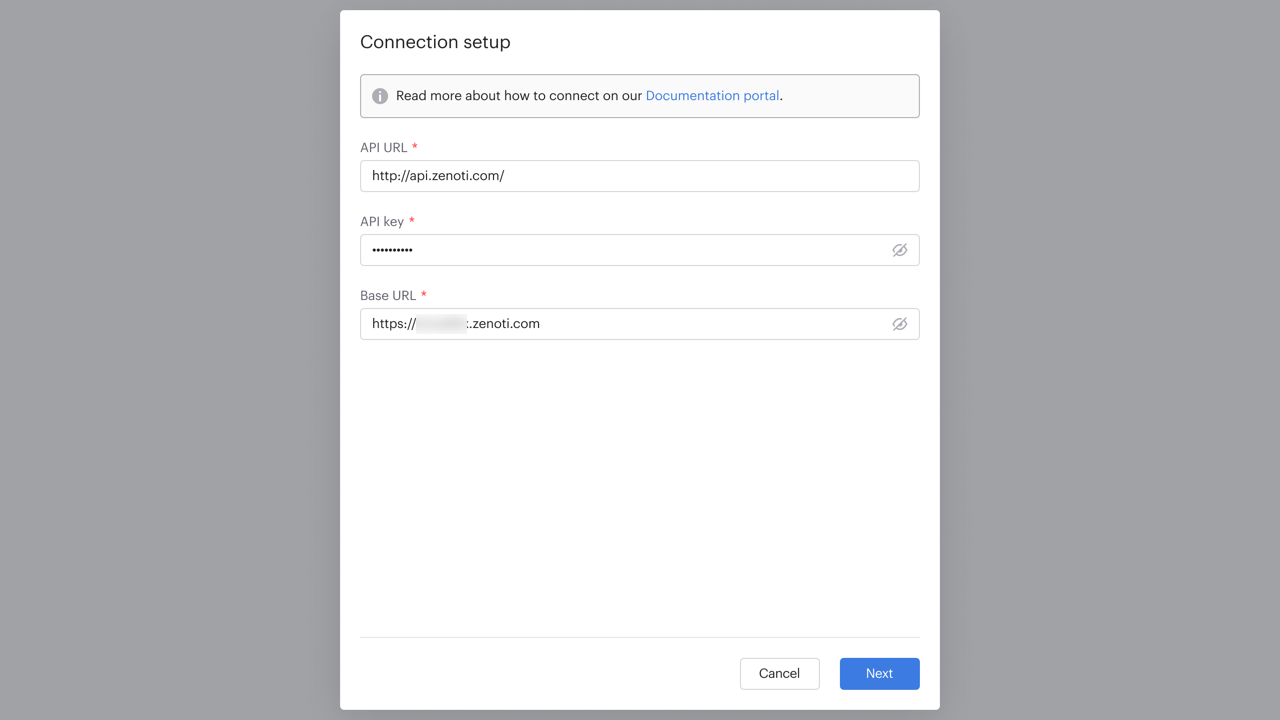
- API URL: By default this value is
https://api.zenoti.com. If Zenoti provides a staging or test endpoint, replace the API URL with the value provided for your account. - API Key: Paste the API Key generated in Zenoti.
- Base URL: Enter your Zenoti account URL in the following format:
https://yourcompany.zenoti.com. This URL is used to access Zenoti and identifies your organization.
- API URL: By default this value is
- Click Next.
- Click Finish. You can now manage your integration and configure settings on the Zenoti integration page.
Managing your integration
To manage an existing Zenoti integration, navigate to Administration > Integrations, then click the Zenoti tile.
On the Zenoti integration page, you can reconnect an integration that has lost connection or disconnect a connected integration.
Click the Edit connection button and selected either Reconnect or Disconnect.
Reconnecting an integration
To reconnect an integration that has been disconnected, either manually or as the result of an error, or to modify the connection, click Edit connection, then select Reconnect.
Follow the on-screen instructions to connect your integration.
Disconnecting an integration
To disconnect an integration, click Edit connection, then select Disconnect.
In the Disconnect integration panel, click Disconnect to remove the integration from your contact center.
Settings
The Zenoti page Settings tab allows you to enable available features.
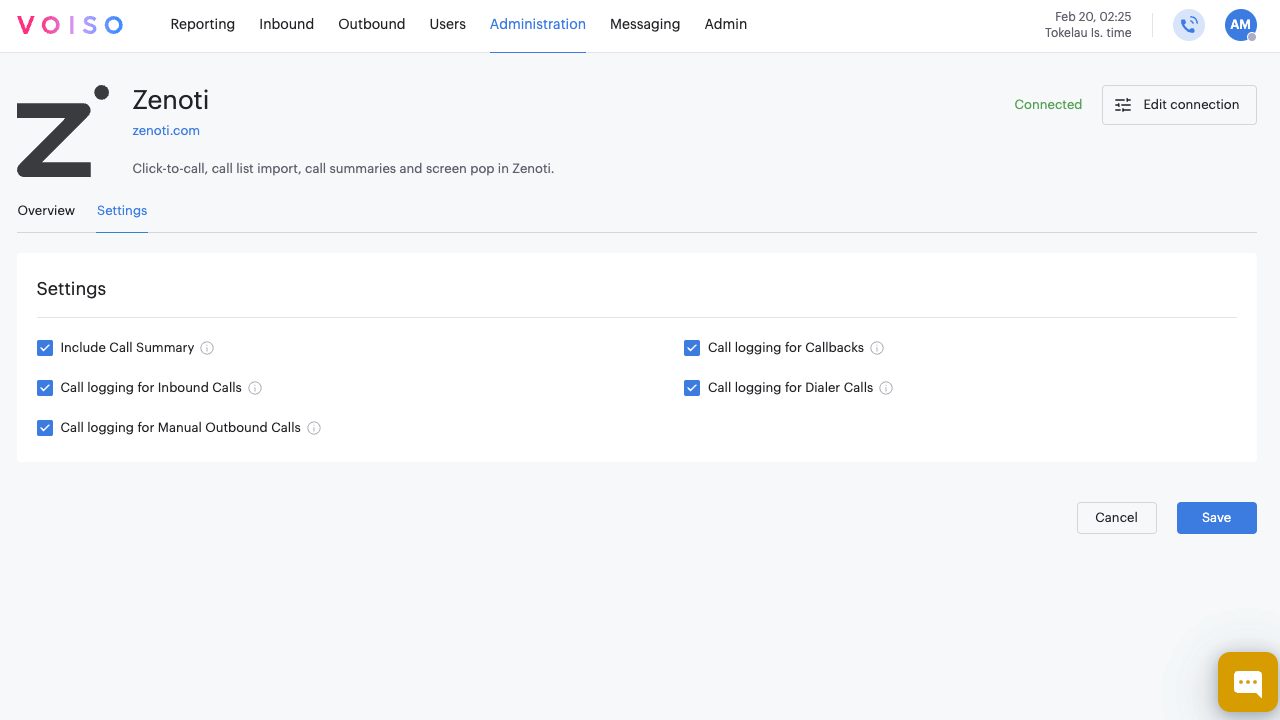
- Include call summary: This feature highlights important points and key topics of voice interactions. If Speech Analytics is enabled in your contact center, select the Include call summary option to include a summary of the call transcript in the call history.
- Contact lookup: This feature enables you to view contact details and an interaction history of the contact in Agent Workspace.
- Call logging for Inbound Calls: Automatically creates Zenoti call logs for all inbound calls that are answered, missed, answered by voicemail, or abandoned.
- Call logging for Manual Outbound Calls: Automatically creates Zenoti call logs for all manual outbound and click-to-call calls.
- Call logging for Callbacks: Automatically creates Zenoti call logs for all queue callbacks and scheduled callbacks.
- Call logging for Dialer: Automatically creates Zenoti call logs for all dialer calls.