Who should read this article: Administrators, Supervisors
Align your outbound calling with “do not call” preferences by uploading a Do Not Call list to your contact center.
Introduction
Use the Do Not Call Registry (DNCR) to prevent outbound calls to contacts who have opted out of receiving calls from your organization.
In many countries, regulators, telecom providers, or industry bodies maintain a national “do not call” list or registry. Contact centers are expected or required to check their calling lists against these registries and avoid calling numbers that are marked as “do not call.”
The Do Not Call Registry page enables you to upload DNCR (do-not-call) lists and automatically blocks outbound calls to numbers on the list.
- Contact your Voiso representative or global admin to enable this feature.
- The Do Not Call Registry page enables you to enforce your outbound calling policy, but your contact center remains responsible for DNCR compliance and for keeping DNCR data accurate and up to date according to local regulations in each territory where you operate.
- Voiso does not connect directly to external DNCR services. You must upload your do-not-call list as a CSV file.
- Every new file upload adds numbers to the existing DNCR list. Uploads do not overwrite previously added numbers unless you clear the list.
Access and permissions
In contact centers that do not use security access groups, users with the admin role assigned have access to the Do Not Call Registry page.
In contact centers that use security access groups, the Access to Do Not Call Registry can be assigned to an access group. Users assigned to the access group may access the Do Not Call Registry page.
Enabling the Do Not Call Registry feature
To enable the Do Not Call Registry feature, navigate to Administration > System Settings, then click the Features tab. In the Do Not Call Registry section, Enable Do Not Call Registry, optionally select a service provider (if available), then click Save.
Providers
If your contact center is configured to use a DNCR service, you can select one of the following services from the Providers menu:
- Etisalat
- Zen
Preparing a DNCR CSV file
To use the Do Not Call Registry feature you must first create a do-not-call list as a CSV file. Obtain the list from your DNCR provider, then add the list to your CSV file with the optional heading Number in the first row and a single number in each subsequent row, similar to this sample:
Number
447700900001
447700900002
34600123457
491601234568
393201234568
33612345679
You can download a CSV template file from the Do Not Call Registry page. Click Import CSV, then on the Import CSV panel, click Download CSV template.
Do Not Call Registry page
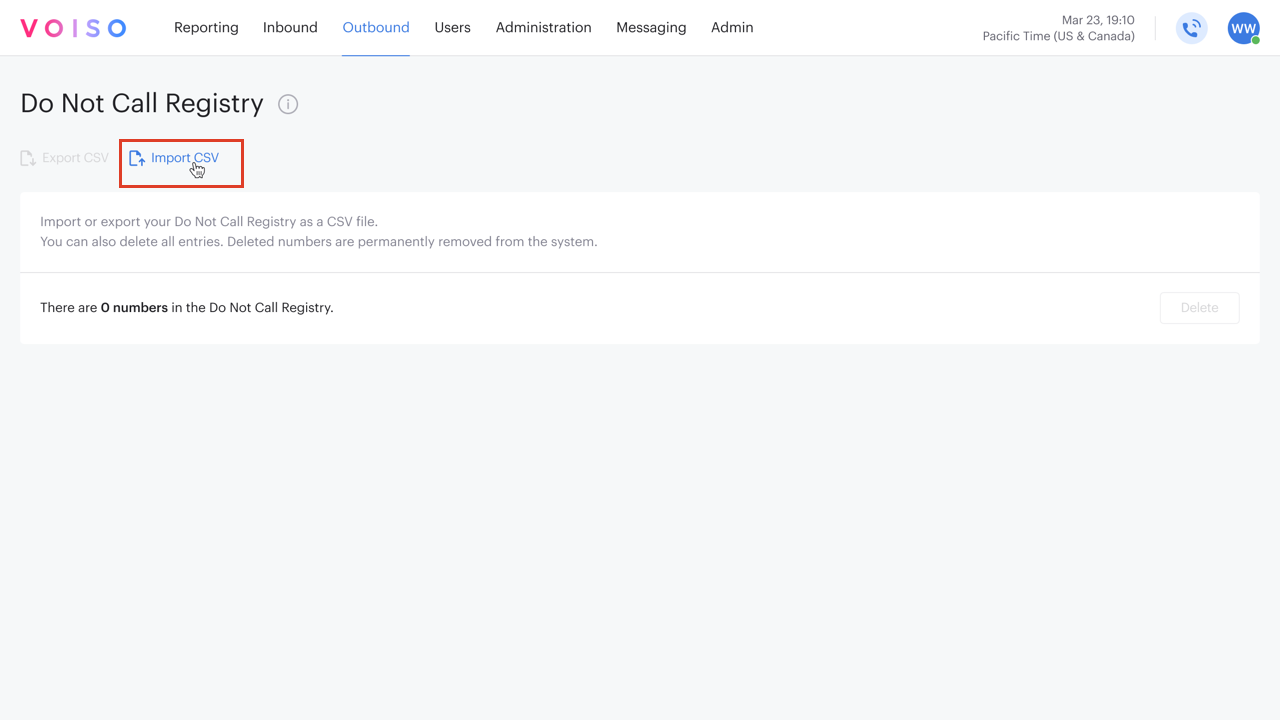
To access the Do Not Call Registry page, navigate to Outbound > Do Not Call Registry. The first time you use this page it is blank. To add your do-not-call list CSV file, click Import CSV to open the Import CSV panel.
Import CSV panel
Use the Import CSV panel to upload a CSV file containing the phone numbers in E.164 format of your do-not-call list. Drag the CSV file onto the panel or click Browse to navigate to the file on your computer.

Before the numbers are imported, they are validated using the same rules as the Number validator feature. Numbers with invalid formats are not added to the DNCR list. Click Import to upload and validate your do-not-call list.
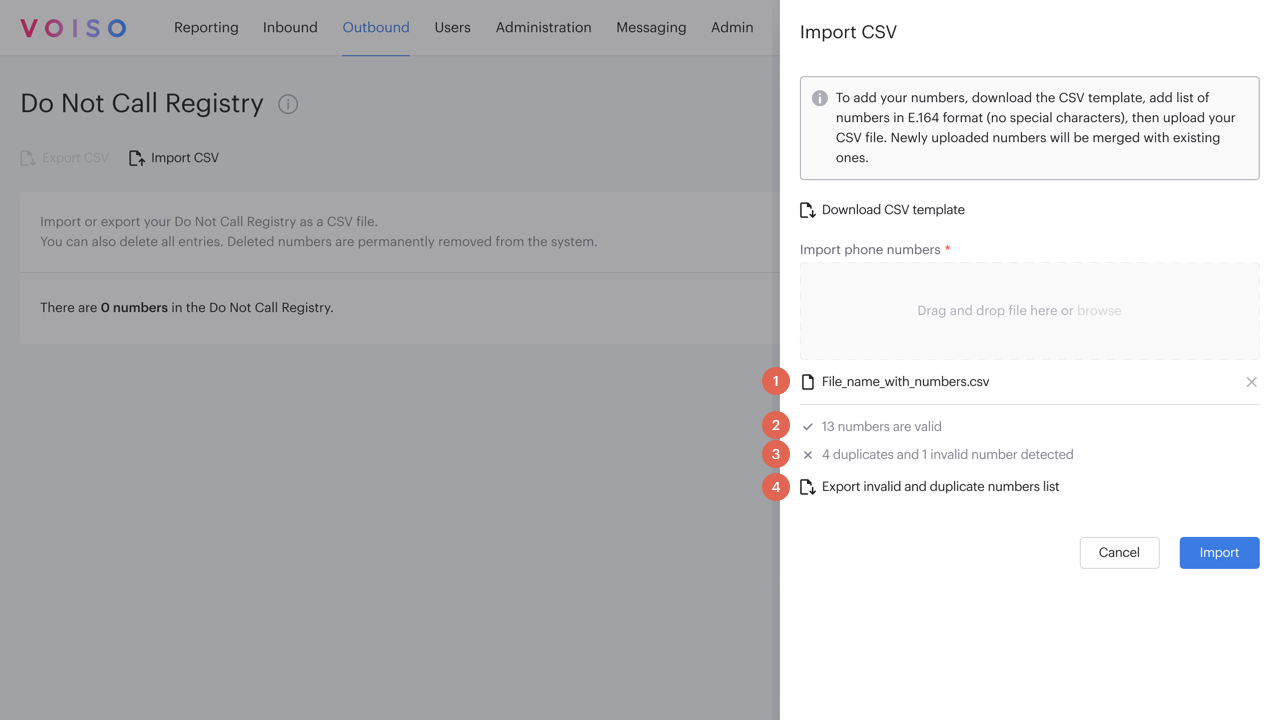
After uploading, the Import CSV panel displays information about the CSV:
- The file you uploaded. Click X to remove the file without importing the numbers.
- The number of valid phone numbers.
- The number of duplicate and invalid numbers in the file.
- A link to download the list of invalid and duplicate phone numbers.
When you are ready, click Import to add the numbers to the Do Not Call Registry.
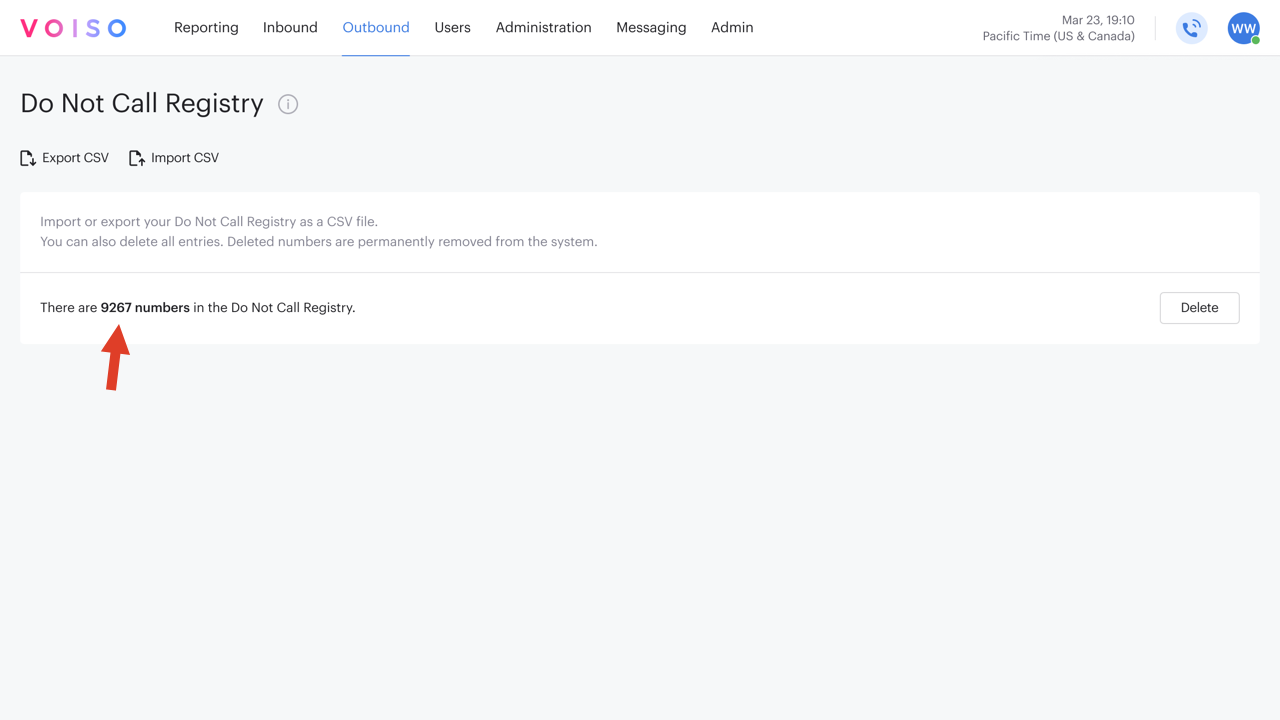
The Import CSV panel closes and the Do Not Call Registry page displays a count of the phone numbers in the DNCR.
Exporting the DNCR
To export a CSV file containing a list of the numbers in the Do Not Call Registry, click Export CSV.
Deleting the DNCR
To remove all phone numbers from the Do Not Call Registry, click Delete.
Updating the DNCR
Each time you import a new CSV file of phone numbers to the Do Not Call Registry, the numbers are added to the existing list.
To remove individual numbers from the list, follow these steps:
- Click Export CSV to download a copy of the Do Not Call Registry.
- Click Delete to clear the Do Not Call Registry.
- Modify the exported CSV as required.
- Click Import CSV and follow these steps to upload, validate, and import the modified do-not-call list.
How the DNCR list is applied
When the Do Not Call Registry feature is enabled in your contact center, every outbound call attempt, including manually dialed, click-to-call, and Dialer campaign calls, is checked against the list.
- If the dialed number is on the DNCR list:
- The call is blocked before it is placed.
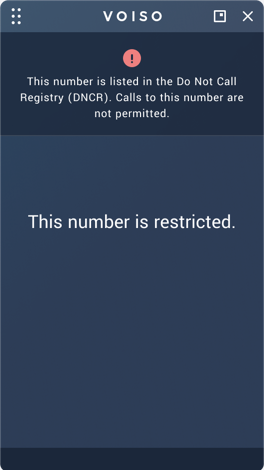
- The agent sees a message explaining that the number cannot be dialed because it is on the Do Not Call Registry.
- If the number is not on the DNCR list:
- The call continues as usual, subject to any other outbound policies or restrictions.
Extended Call Detail Records
Attempted calls to numbers that are on the DNCR are recorded in the Extended Call Details for the interaction. The System reject end reason and disposition are recorded.
Agent experience
When an agent attempts to call a number, by manually dialing the call or using click-to-call, that is on the DNCR list:
- The call does not start.
- Agent Panel displays a message indicating that the number is blocked by the Do Not Call Registry.
API integration with the Etisalat Safecall service
For contact centers operating in the UAE, Voiso supports an API integration with the Etisalat Safecall service to verify outbound UAE numbers against the Do Not Call Registry in real time.
This integration applies only to UAE numbers (+971). All outbound call types are supported, including agent dialed calls, click-to-call calls, and Dialer campaigns.
Connecting to the Etisalat Safecall service
Prerequisites
- An Etisalat developer account.
- A DNCR check app in your Etisalat My App section.
- From your DNCR check app:
- Consumer Key
- Consumer Secret
Connecting to your Etisalat app
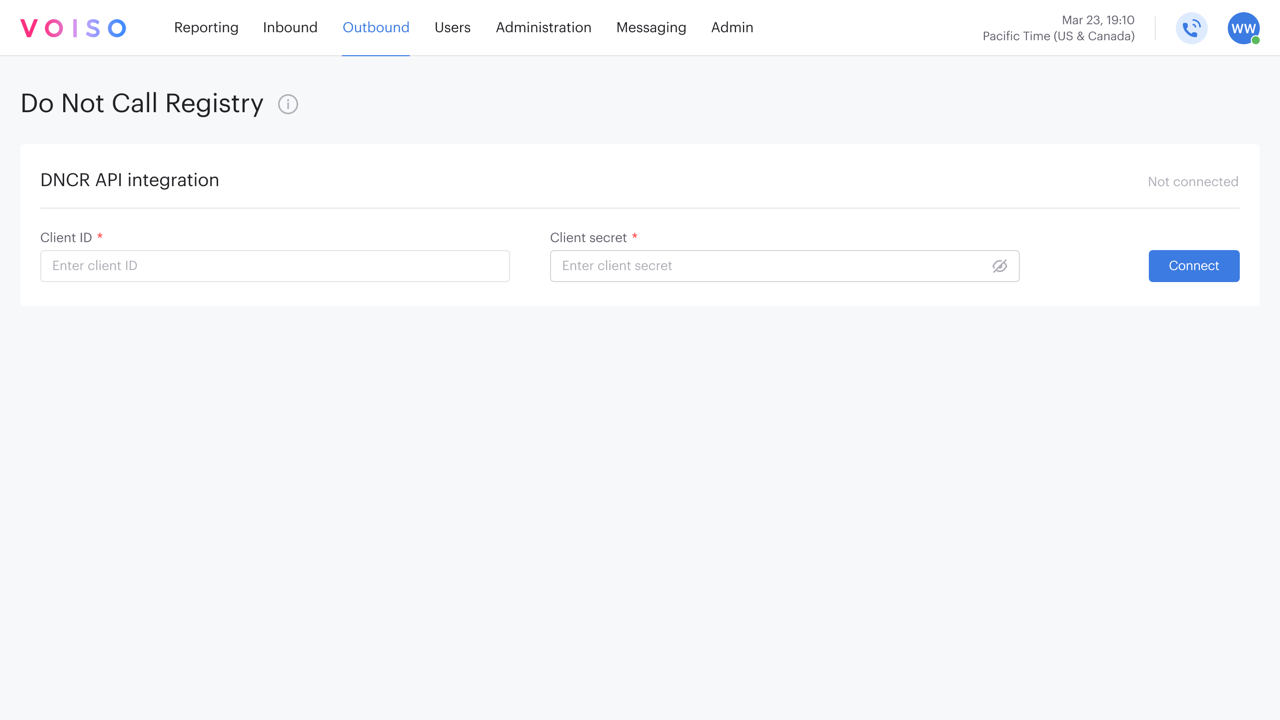
To access the Do Not Call Registry page, navigate to Outbound > Do Not Call Registry. To connect to your app in your Etisalat account, complete the following fields, then click Connect.
- Client ID — Enter your Etisalat Consumer Key
- Client secret — Enter your Etisalat Consumer Secret
How the Etisalat Safecall service DNCR list is applied
Voiso automatically performs a verification check immediately before each outbound call is placed. If the Etisalat Safecall service indicates the number is restricted, Voiso blocks the call and records the outcome and End reason in call records for audit and reporting.
If the API is unavailable or verification cannot be completed, Voiso blocks the call by default and notifies administrators so the issue can be addressed quickly.
Disconnecting from the Etisalat Safecall service
To disconnect from the Etisalat Safecall server, navigate to Outbound > Do Not Call Registry. Click Disconnect.
After disconnecting, numbers will no longer be checked against the registry and outbound calls will not be blocked.
API integration with the ZEN service
For contact centers operating in the UAE, Voiso supports an API integration with the Zen service to verify outbound UAE numbers against the Do Not Call Registry in real time.
This integration applies only to UAE numbers (+971). All outbound call types are supported, including agent dialed calls, click-to-call calls, and Dialer campaigns.
Connecting to the Zen service
Prerequisites
- A Zen developer account.
- Zen account information:
- API Key
- Account ID
- Parent ID
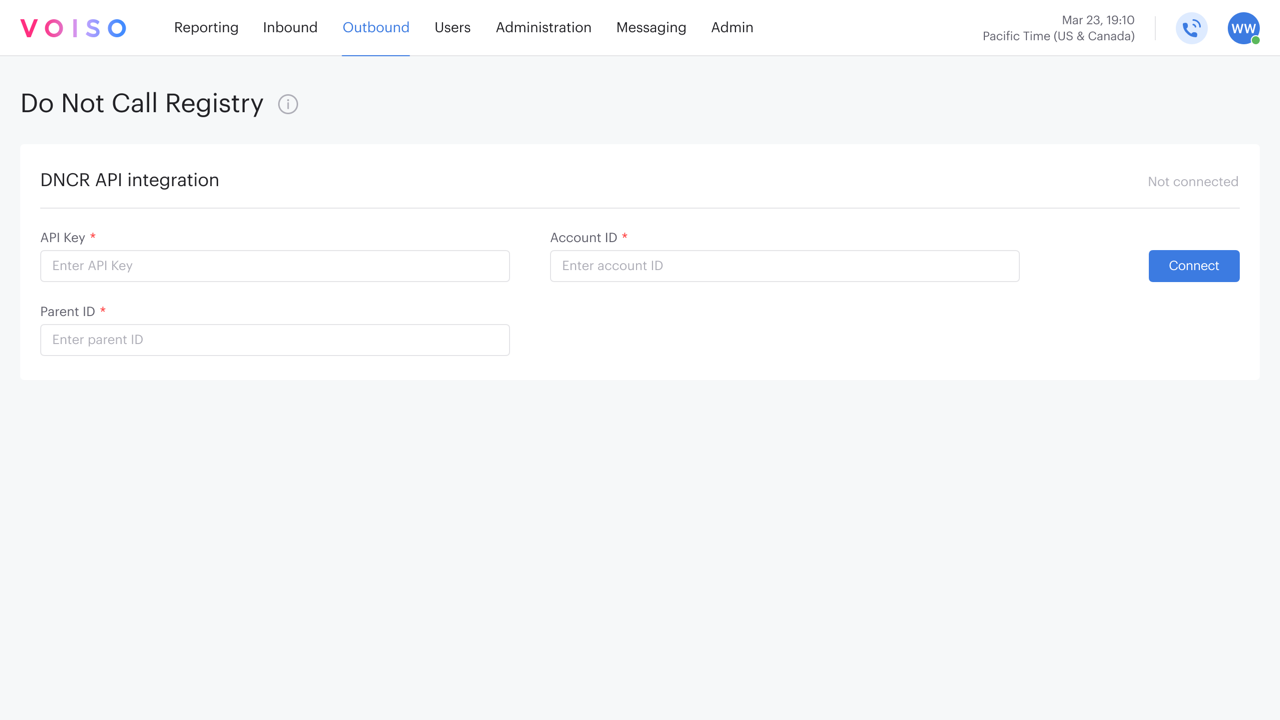
Connecting to your Zen account
To access the Do Not Call Registry page, navigate to Outbound > Do Not Call Registry. To connect to your Zen account, complete the following fields, then click Connect.
- API key — Enter your Zen API Key
- Account ID — Enter your Zen Account ID
- Parent ID — Enter your Zen Parent ID