Who should read this article: Administrators
Create custom unavailable codes that agents may select for their unavailability status.
Introduction
Agents might be Unavailable to take calls for many reasons, including lunch breaks, coffee breaks, and team meetings. The Unavailable codes feature lets you specify custom codes that agents may select when they set their statuses to Unavailable in the Agent Panel.
The default unavailable status is Unavailable; however, if you want to analyze agent unavailability, you might want to know why each agent was unavailable, when, and for how long.
You can analyze agent unavailability usage and duration using the Historical reports and Real-time dashboards features.
The Unavailable codes page
To create and manage unavailable codes, in the Voiso navigation bar, navigate to Administration > Unavailable codes to display the Unavailable codes page. The page contains a list of unavailable codes for your contact center. The default unavailable code is marked with a black star. Click a code name to view or edit it. Click Add unavailable code to add a new code. To delete a code, hover your mouse pointer over the code row, then click Delete (trash can icon).

Creating unavailable codes
To create a new unavailable code, click Add unavailable code to display the Add unavailable code panel.
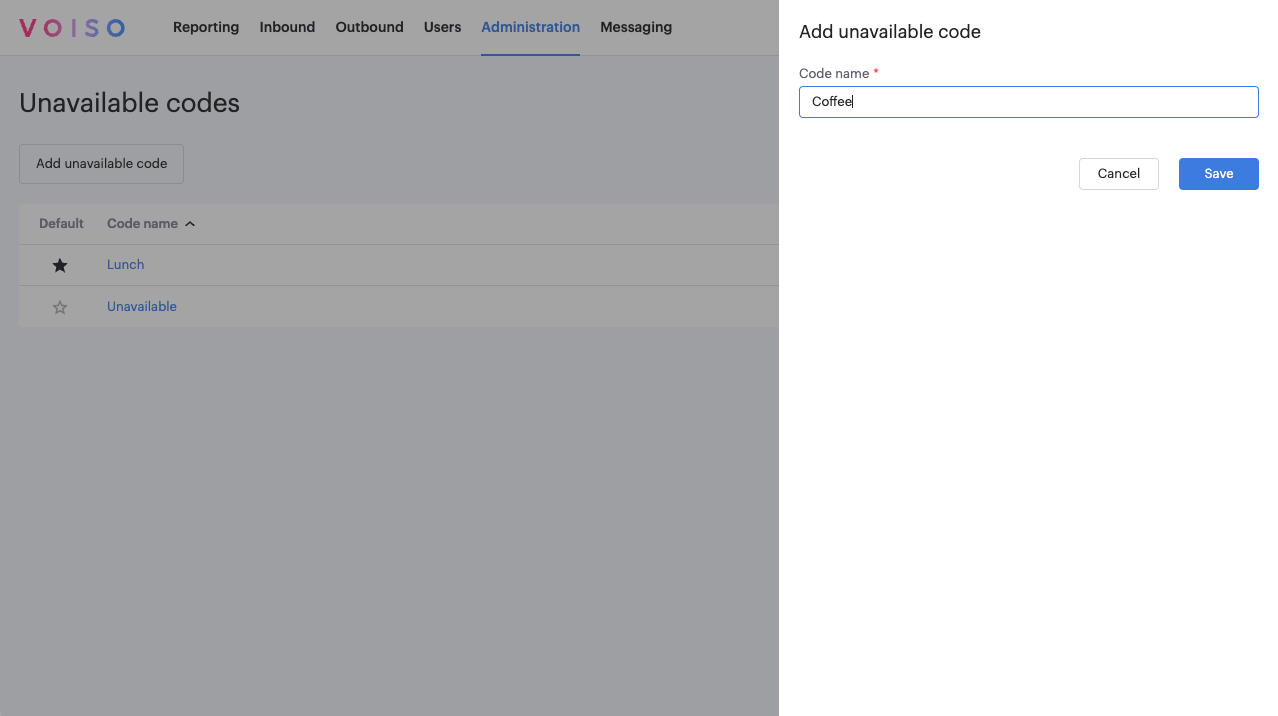
Add the name of the new unavailable code, then click Save. The new code is added to the Unavailable codes page.
- To set the default unavailable code, click the star next to the name of the code.
- To delete a code, click the trash can icon (Delete button) at the far right of the code field.
- To edit the name of a code, click the code name to open the Edit code page, edit the name of the code, then click Save.
When the Agent Panel is first opened, the default unavailable code is the initial status.
The default unavailable code cannot be deleted. To delete the default code, first set another code to be the default code.
Reporting
The Historical reports and the Real-time dashboard can be used to review agent availability status.
Historical reports
You can create historical reports that track agent availability status. To create a report, in the Voiso navigation bar, navigate to Reporting > Historical reports to display the Scheduled reports page.
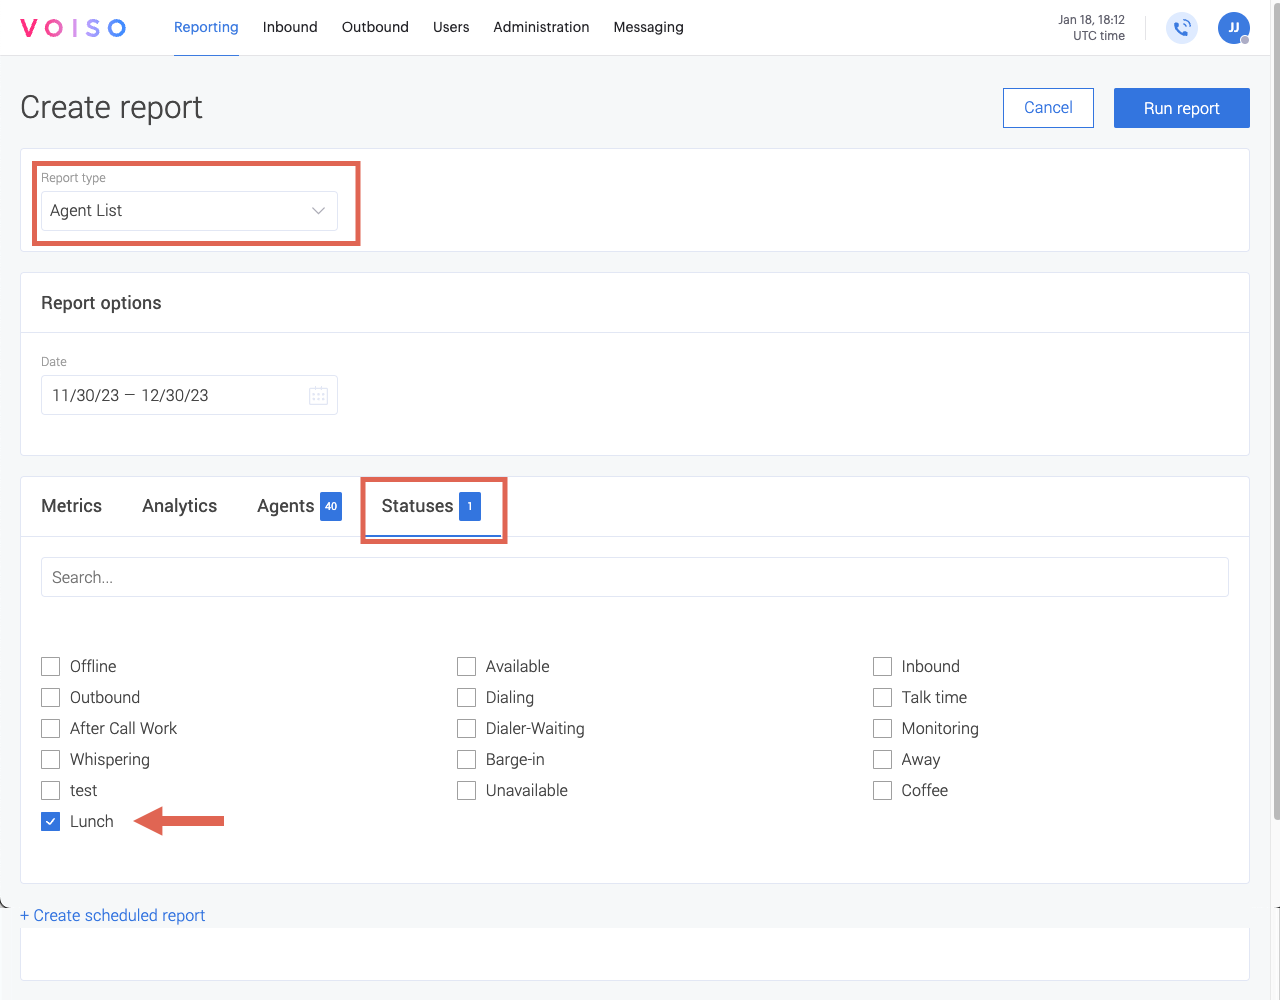
Click Add report to display the Add report page. From the Report type menu, select Agent List. Select the Statuses tab to choose the statuses you want to add to your report.
For more information about creating and running reports, refer to Historical reports.
Real-time dashboard
You can create a Real-time Dashboard widget that tracks agent availability status. To create a report, in the Voiso navigation bar, navigate to Reporting > Real-time dashboard to display the Real-time dashboard page.
Click Add widget to display the Add new widget panel. Select Agent List, then click Add. Select the elements to add to the widget (for more information about creating widgets, refer to Real-time dashboard) and save the new widget to add it to your Real-time dashboard.
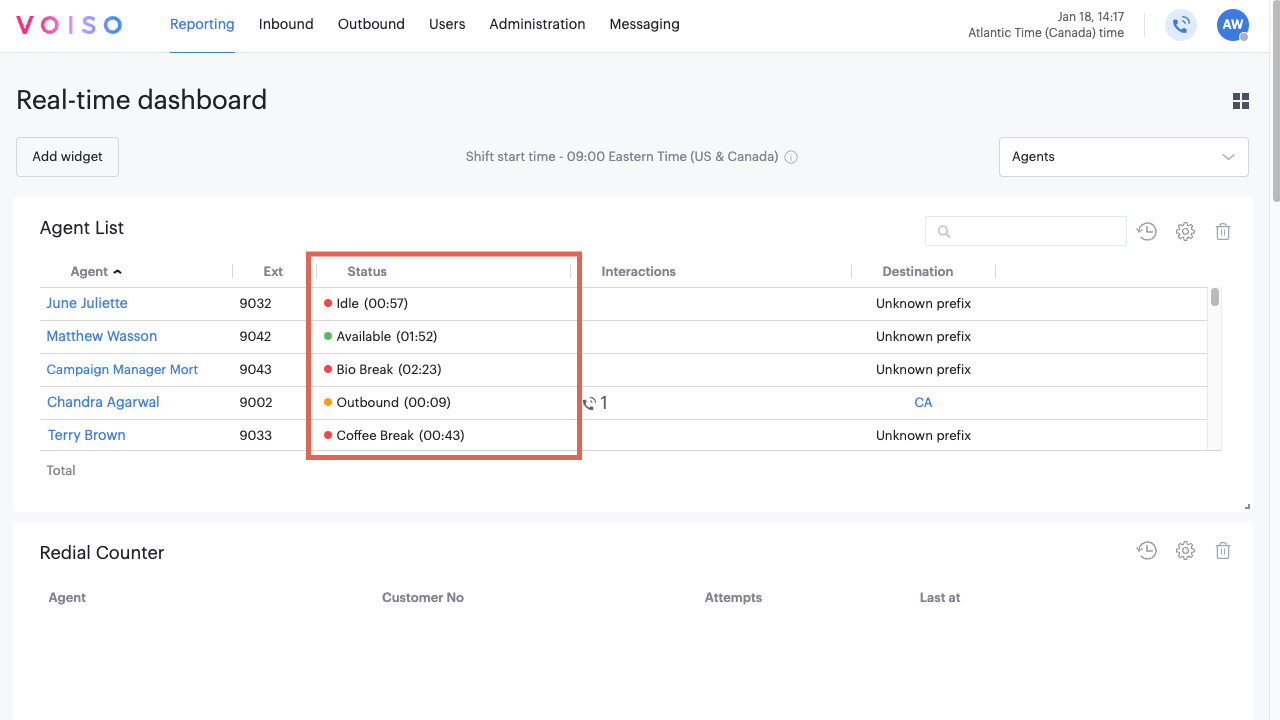
In the Agent List Real-time dashboard, the Status column displays the currently selected status in the Agent Panel of each agent in the selected list. Use the Search field to find the status of individual agents.
Agent Panel
Unavailable codes are displayed in the Agent Status menu at the bottom of the Agent Panel. Agents click the status menu to set their statuses to available or unavailable or to log out.