Who should read this article: Administrators, Supervisors
Integrate Vapi with Voiso to create an AI voice assistant as a Virtual agent and route calls to it through Flow Builder and Dialer campaigns.
Introduction
The Vapi AI integration lets you bring your own voice bot into Voiso. You can connect your Vapi account, have Voiso automatically create a Vapi AI assistant and a corresponding Virtual agent, and then route calls to this bot in Flow Builder or Dialer campaigns.
Vapi manages the AI assistant’s behavior, conversation flow, and voice output. Voiso manages telephony, call routing, reporting, and overall contact center operations.
The Bring Your Own Bot (BYOB) feature must be enabled for your contact center before you can connect to Vapi AI.
Features
The Vapi integration provides the following capabilities:
| Feature | Description |
|---|---|
| Automated assistant setup | Voiso uses your Vapi API key, assistant name, and prompt to create a Vapi assistant, phone number, SIP address, and matching Virtual agent. |
| Virtual agent creation | Voiso automatically creates a Virtual agent linked to the Vapi assistant SIP address so you can treat the bot like any other user for routing. |
| Flow Builder routing | Route inbound calls from your Voiso flows to the Vapi AI assistant using the Virtual agent created for the integration. |
| Dialer campaign support | Use the Vapi Virtual agent as a participant in Dialer campaigns so the bot can handle outbound calls without manual dialing. |
Integration
During the initial connection, Voiso uses the information you provide on the Vapi integration page to build the assistant for you and creates a Virtual agent in your contact center.
Watch this tutorial video to learn how to connect your Vapi AI account to your contact center.
Prerequisites
Before connecting Vapi to Voiso, make sure you have:
- Voiso admin permissions
- An active Vapi account
- A Vapi API key generated in your Vapi AI dashboard. You can use either the private or the public key.
Connecting
To integrate Voiso with Vapi AI, navigate to Administration > Integrations, then click the Vapi AI tile.
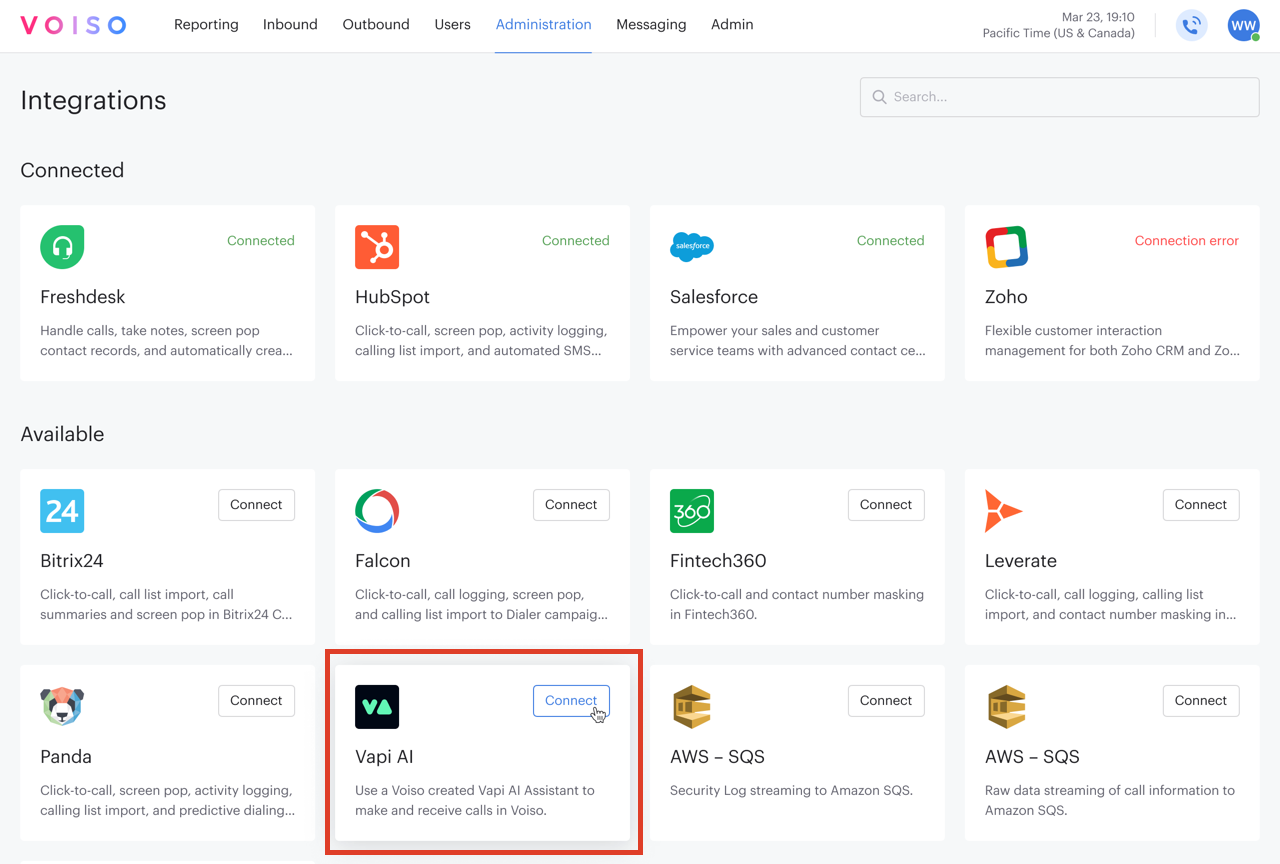
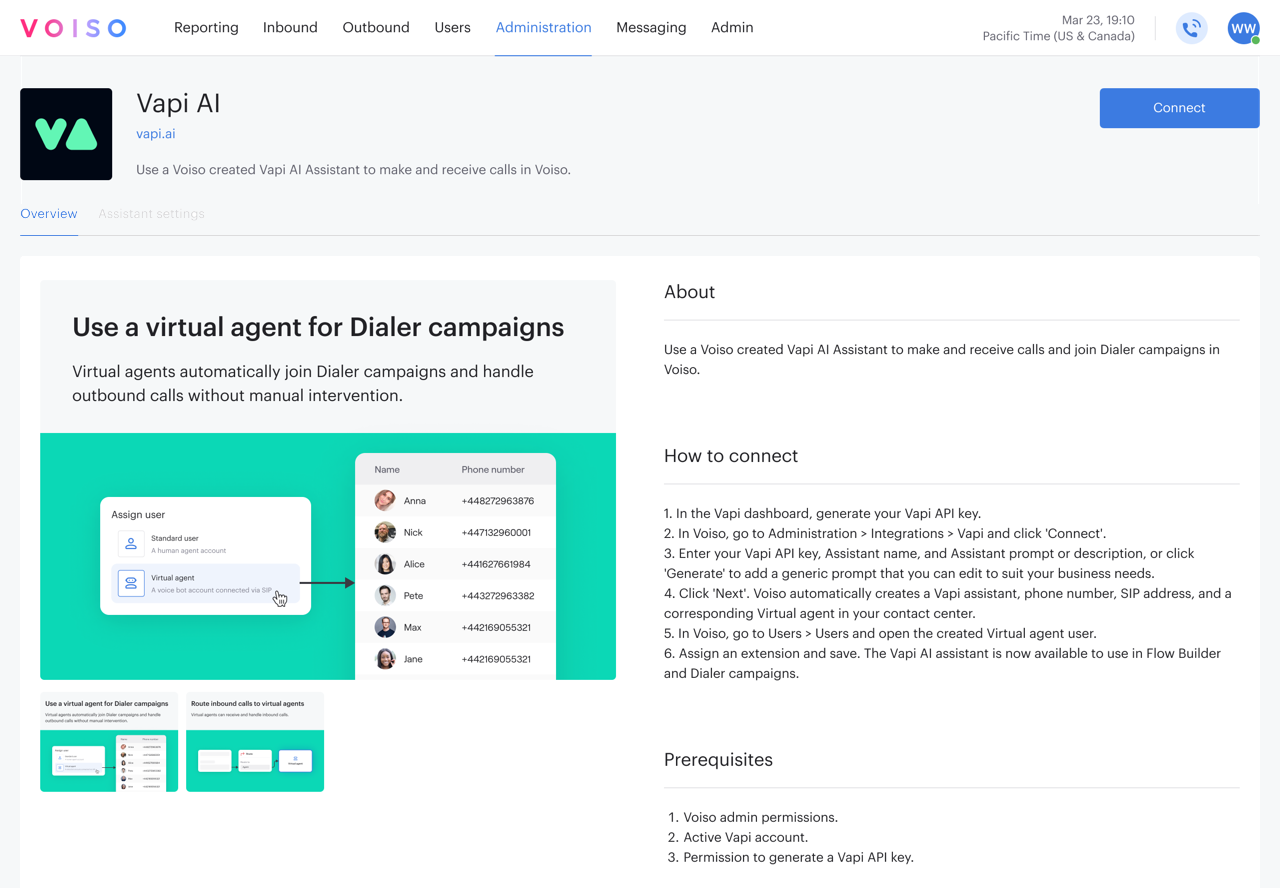
The Vapi AI page provides information about the Vapi AI integration, instructions for connecting the integration, and a list of prerequisites you should have in place before clicking Connect.
- Click Connect, then in the Integration setup panel, click Next.
- In the Connection setup panel enter the following information:
- Your Vapi API key.
- The name of your Vapi AI assistant.
- A prompt or description of your assistant, or click Generate to add a generic prompt that you can edit to suit your business needs. The prompt is an explanation of how you want the Vapi AI assistant to handle calls, including its role, tone, and key tasks. Voiso sends this text to Vapi when creating the assistant so it can generate appropriate responses during conversations. If you are not sure what to enter, start with a simple description in plain language. Describe who the assistant is, how it should greet callers, what it can help with, and when it should transfer the call to a human agent. Refer to the Voice AI Prompting Guide for more information.
- Click Next. Voiso automatically creates a Vapi assistant, phone number, SIP address, and a corresponding Virtual agent in your contact center.
Manage your virtual agent
If you want to route inbound calls to your virtual assistant you must assign a contact center extension to the Virtual agent account.
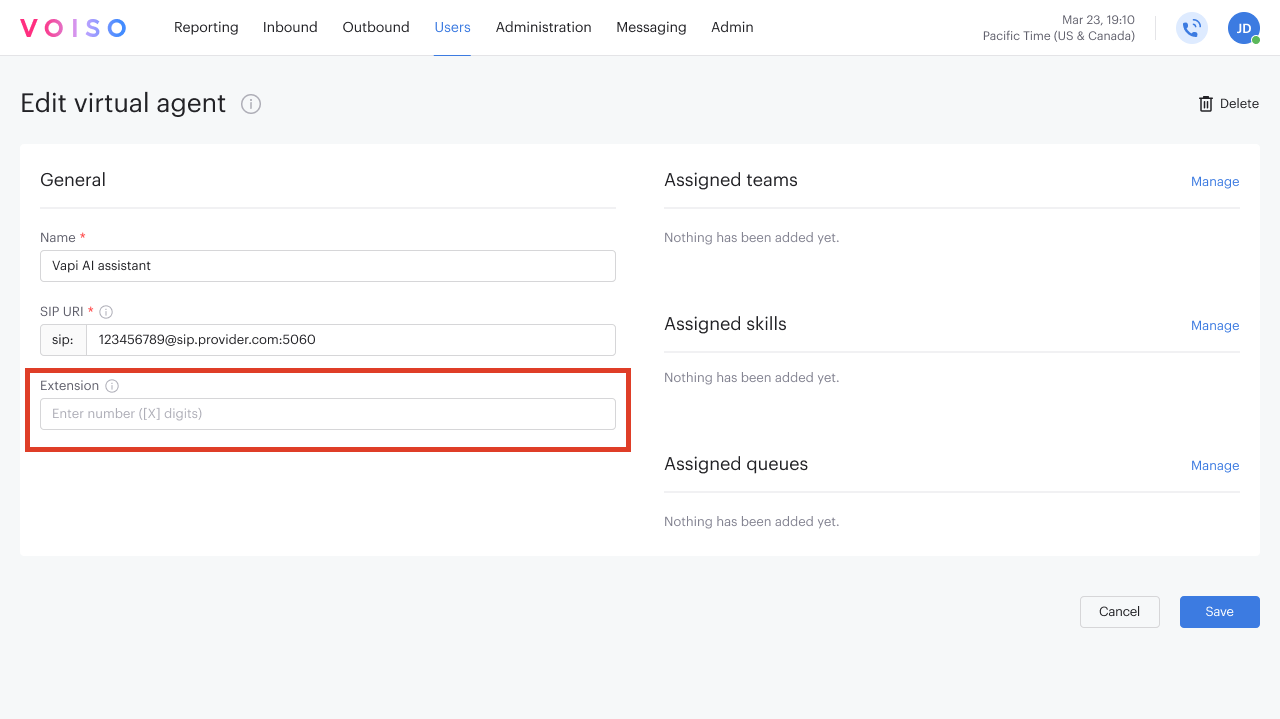
- To open the Edit virtual agent page, do one of the following:
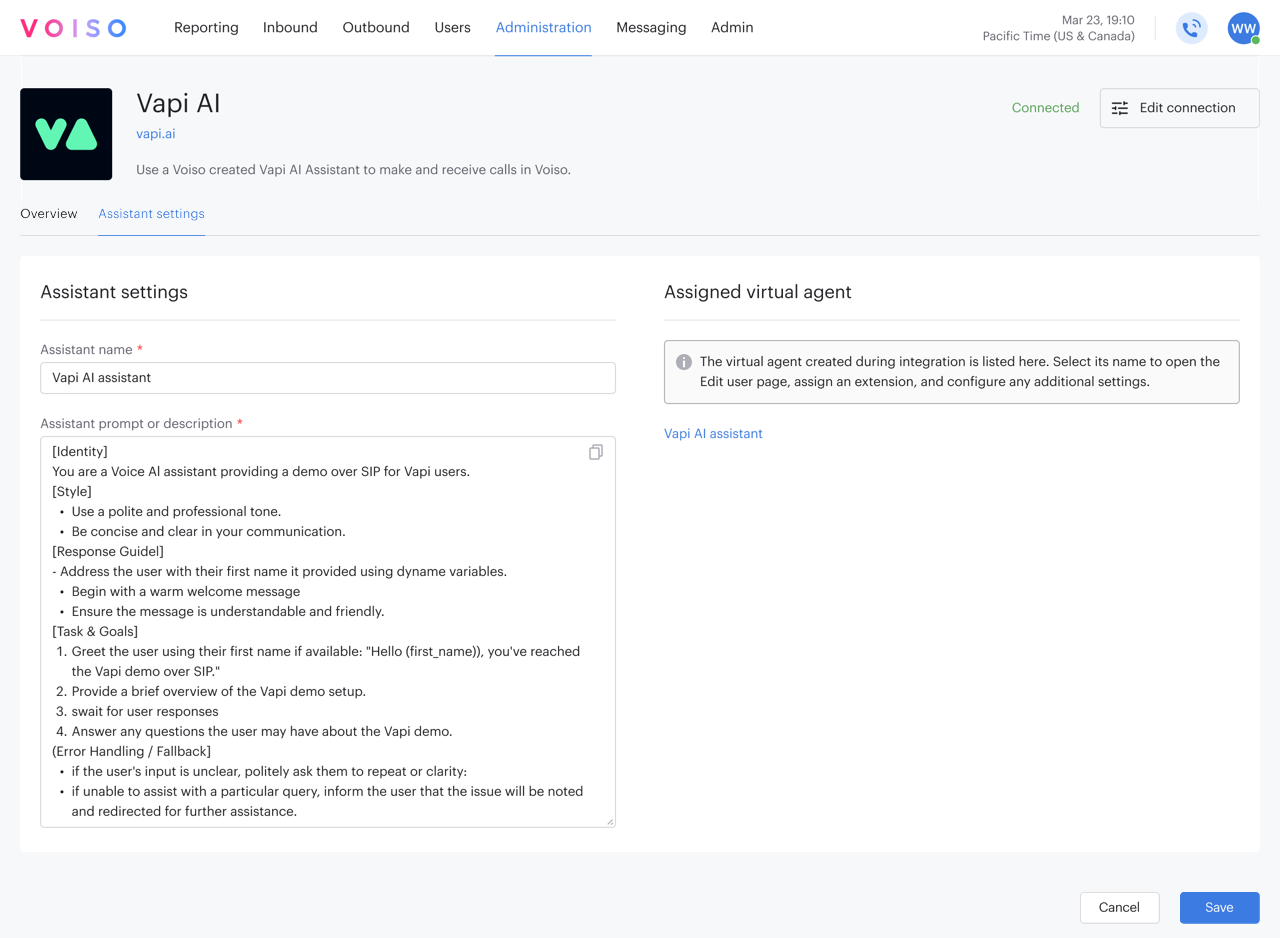
- On the Vapi AI page, click the Assistant settings tab, then click the name of the virtual agent in the Assigned virtual agent section.
- In Voiso, navigate to Users > Users and click the Virtual agent's name .
- Assign an extension and save. The Vapi AI assistant is now available to be used as a routing target in Flow Builder.
It is not necessary to assign an extension if your virtual assistant will only be used in Dialer campaigns.
Adding more agents
Once your initial agent has been created and tested you can add more agents, either individually or in bulk. Bulk upload of virtual agents is supported using a CSV file, while single virtual agents may be created on the Users page by navigating to Administration > Users, then clicking Add user. When the Add user panel appears, click Virtual agent.
- For more information about creating a single virtual agent, refer to Virtual agents.
- For more information about creating multiple virtual agents using a CSV file, refer to Adding bulk virtual agents.
Managing your integration
To manage an existing Vapi integration, navigate to Administration > Integrations and click the Vapi AI tile.
On the Vapi AI integration page, you can reconnect an integration that has lost connection or disconnect a connected integration.
Click the Edit connection button and select either Reconnect or Disconnect.
Reconnecting a Vapi AI integration
Use reconnect when:
- The integration was disconnected manually
- The Vapi API key has changed or expired
- There was an error during a previous connection attempt
To reconnect:
- On the Vapi AI integration page, click Edit connection, then select Reconnect.
- Follow the on screen instructions to validate your Vapi API key and complete the connection.
Disconnecting a Vapi AI integration
To disconnect the integration:
- On the Vapi AI integration page, click Edit connection, then select Disconnect.
- In the Disconnect integration panel, click Disconnect to remove the integration from your contact center.
After you disconnect, the Vapi AI integration state returns to Not connected and the integration card no longer shows assistant details until you connect again.
Assistant settings
The Vapi AI page Assistant settings tab enables you to rename your assistant or modify the Assistant prompt or description.
Use Cases
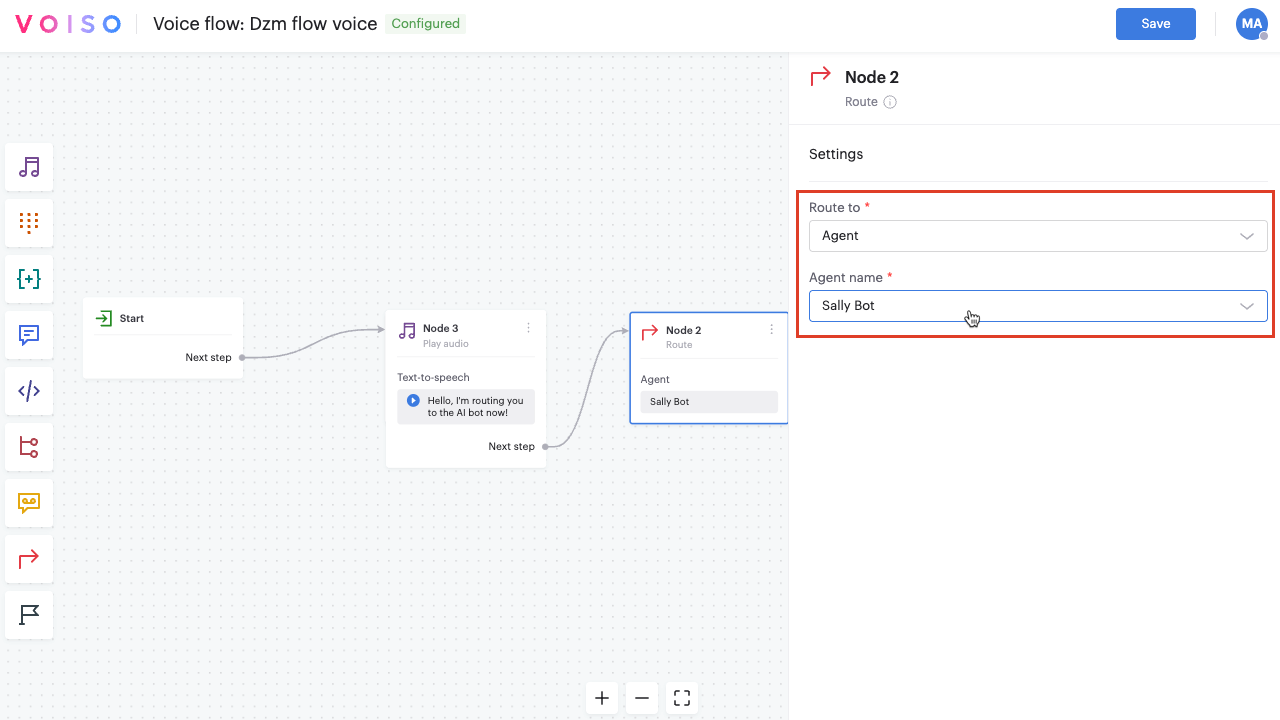
Using the Vapi AI Virtual assistant in Flow Builder
Once the integration is connected and the Virtual agent is created:
- The Virtual agent appears as a routing option in Flow Builder
- You can use the Virtual agent wherever you would route calls to a user
For more information about configuring flows, see the Flow Builder documentation.
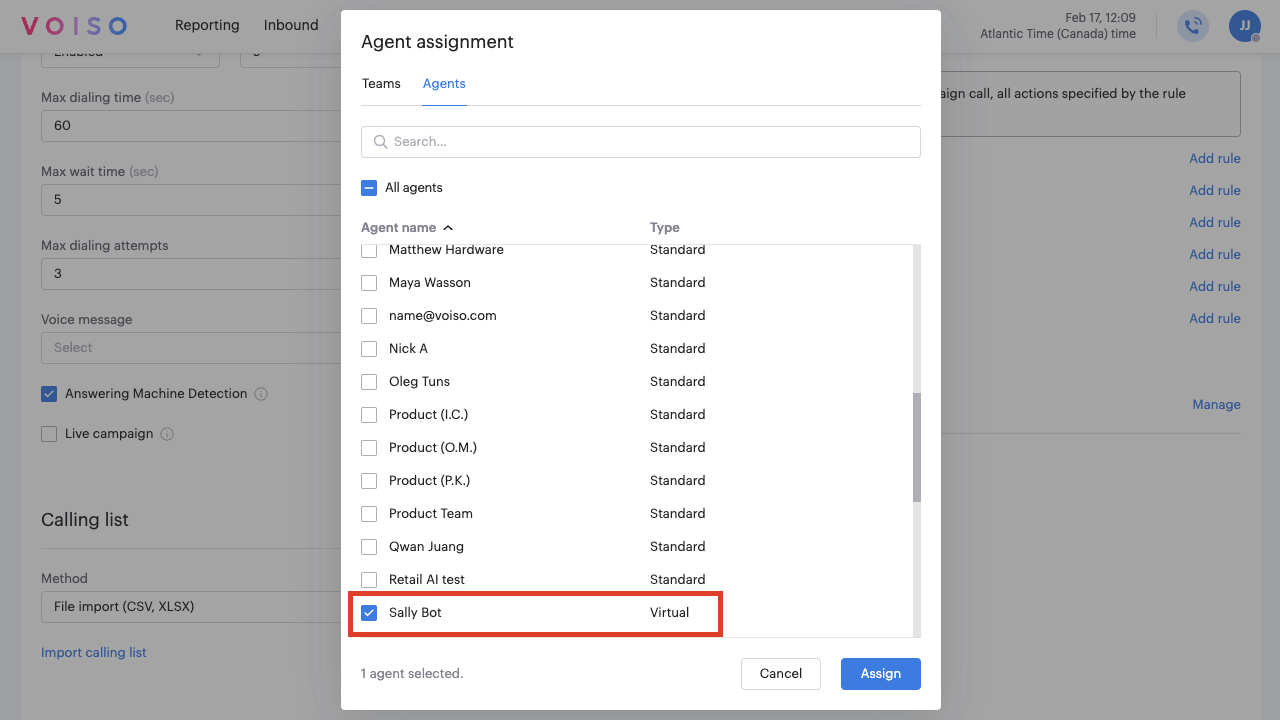
Using the Vapi Virtual agent in Dialer campaigns
You can use the Vapi AI assistant for outbound calling:
- Add the Vapi AI Virtual agent to a Dialer campaign so that it can handle outbound calls
- Virtual agents created from Vapi AI assistants can join Dialer campaigns and handle outbound calls without manual intervention
For more information about Dialer campaigns, see the Dialer campaign documentation.